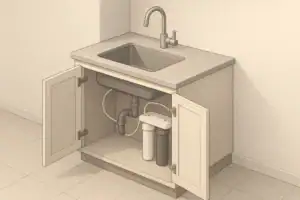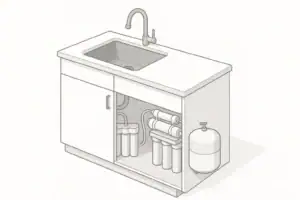
Under-sink water filters run under constant pressure whenever the faucet is open, and parts sit in a confined, often warm cabinet. Over time, small installation mistakes or aging components can lead to slow drips or visible puddles. Most leaks trace back to a few predictable points: fittings, tubing, housings, and cartridge seals.
Recognizing where the leak starts is the key to fixing it quickly and safely. Before you begin any troubleshooting, turn off the cold-water shutoff valve feeding the filter, depressurize the system by opening the filtered-water faucet, and place a towel or tray under the unit to catch any remaining water.
Why Under-Sink Filters Leak in the First Place
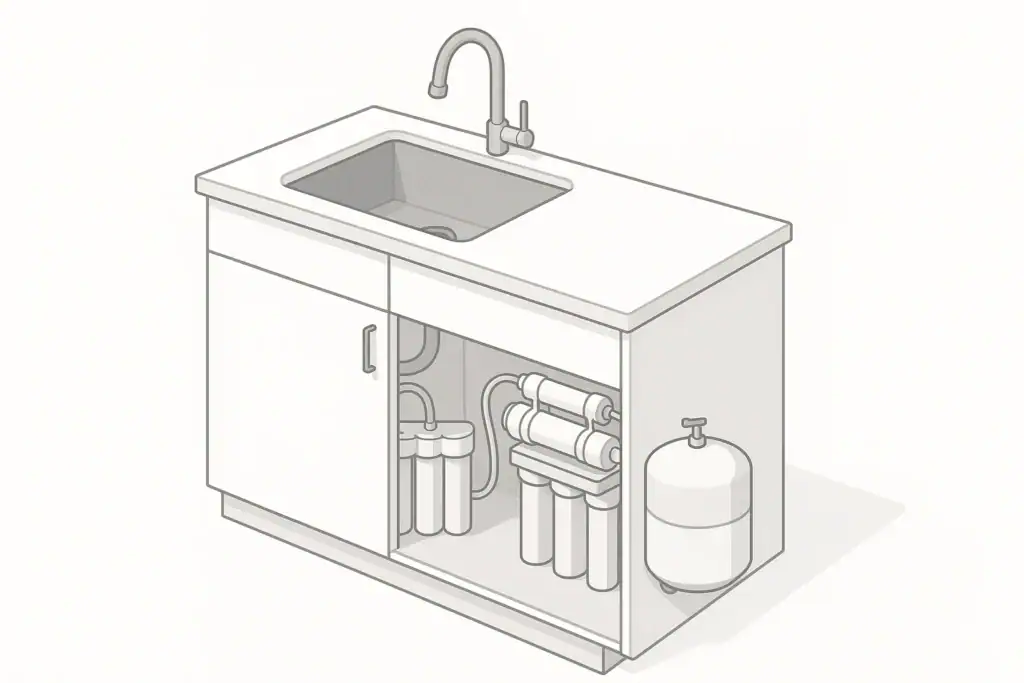
Under-sink water filters run under constant pressure whenever the faucet is open, and parts sit in a confined, often warm cabinet. Over time, small installation mistakes or aging components can lead to slow drips or visible puddles. Most leaks trace back to a few predictable points: fittings, tubing, housings, and cartridge seals.
Recognizing where the leak starts is the key to fixing it quickly and safely. Before you begin any troubleshooting, turn off the cold-water shutoff valve feeding the filter, depressurize the system by opening the filtered-water faucet, and place a towel or tray under the unit to catch any remaining water.
Quick Check #1: Confirm the Leak Source
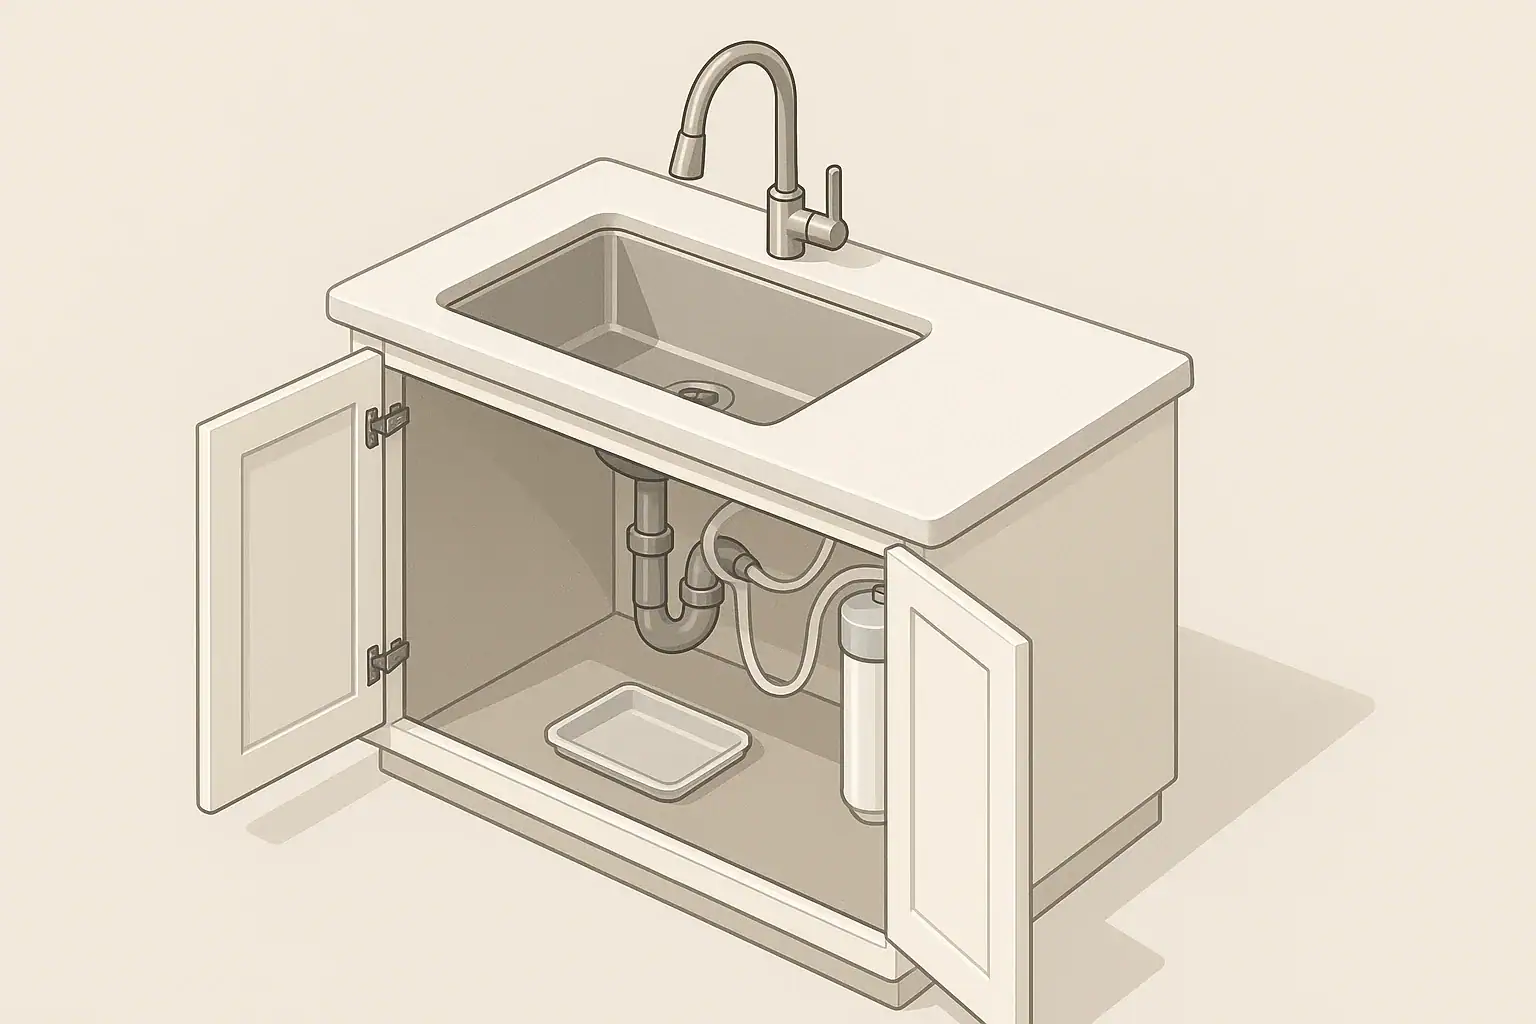
It is easy to mistake condensation or a spill for a genuine system leak. Start by drying the entire area and then pressurize the system briefly to see where new moisture appears.
Work methodically:
- Turn off the water to the filter and open the filtered faucet to relieve pressure.
- Gently dry all visible parts: tubing, fittings, housings, valves, and the cabinet floor.
- Place a dry tissue or paper towel around suspect areas (inlet fitting, outlet fitting, housing seams).
- Slowly reopen the shutoff valve and run the filtered faucet.
- Watch for darkened spots on the tissue or visible drips to pinpoint the source.
Common leak locations on under-sink filters include:
- Compression or push-to-connect fittings on tubing.
- The seam or threads of the filter housing.
- Cartridge top or bottom seals inside the housing.
- Tubing itself, where it may be kinked, abraded, or stressed.
- Feed shutoff valves or adapters added during installation.
Once you know exactly where water emerges, the remaining checks become faster and more targeted.
Example values for illustration.
| Where you see water | Most likely issue | Quick first action |
|---|---|---|
| At tubing-to-fitting connection | Tubing not fully seated or cut unevenly | Shut off water, remove and recut tubing square, reinsert fully |
| Around housing threads or seam | Loose housing or damaged/dirty O-ring | Depressurize, inspect and clean O-ring, re-seat and hand-tighten |
| From top of vertical cartridge | Cartridge not seated or wrong type | Reinstall cartridge, ensuring firm twist or click into place |
| From shutoff valve or adapter | Old valve packing or cross-threaded adapter | Gently snug nut or adapter; do not overtighten |
| Random wet spot on tubing run | Pinhole crack or abrasion | Replace affected tubing section with new piece |
| Persistent damp cabinet floor, no obvious drip | Very slow seep at fitting or valve | Wrap suspect joints with dry tissue and recheck after several minutes |
Quick Check #2: Inspect Fittings and Tubing
Most under-sink filter leaks originate where tubing connects to fittings. These may be compression-style, threaded adapters, or push-to-connect (also called quick-connect) couplings.
Check tubing cuts and seating
For reliable seals, tubing must be cut cleanly and inserted fully:
- Ensure the tubing end is cut square, not at an angle. Use a sharp tubing cutter if available.
- Inspect for nicks, oval shapes, or flattening from pliers or clamps.
- On push-to-connect fittings, push the tubing in until it bottoms out; you should feel a firm stop.
- Gently pull back to confirm the internal collet has gripped the tubing.
Check fitting tightness and thread sealing
Threaded fittings require proper tightening and, in some cases, thread sealant:
- Hand-tighten plastic fittings, then add only a small additional turn with a wrench if needed.
- Avoid overtightening plastic components, which can crack and lead to worse leaks.
- If a threaded metal-to-metal adapter was installed, verify that thread sealing tape or an appropriate sealant was used, if recommended by the manufacturer.
- Look for visible stress, hairline cracks, or deformation near fittings.
If a fitting continues to seep after reinstallation, replacing that specific fitting is often faster and more reliable than repeated adjustments.
Quick Check #3: Examine Filter Housings and O-Rings
For under-sink systems with canister-style housings, leaks commonly appear around the housing seam or at the bottom of the canister. The O-ring or gasket inside the housing is usually responsible.
Inspect the O-ring or gasket
Turn off water, relieve pressure, and then carefully unscrew the housing, following the system instructions. Once open:
- Locate the main O-ring or gasket in the housing groove.
- Check for twists, flat spots, cuts, or brittleness.
- Wipe away any grit or debris from the O-ring and the groove.
- Ensure the O-ring is fully seated in its channel all the way around.
Many systems perform best when the O-ring is lightly lubricated with a lubricant specified by the manufacturer (commonly a compatible, non-petroleum grease). Use only the type recommended for your system.
Reinstall the housing correctly
When reinstalling:
- Verify the cartridge is centered and not interfering with the housing threads.
- Screw the housing on by hand until the gasket makes uniform contact.
- Use the provided wrench only if specified, and avoid excessive force.
- Turn water back on slowly while watching the seam for weeping.
If the housing leaks even with a good O-ring, check for cracks in the canister body, thread damage, or warping. Any structural damage is a cue to replace the housing before continued use.
Quick Check #4: Verify Cartridge Position and Compatibility
A misaligned or incompatible filter cartridge can prevent proper sealing, especially in systems where the cartridge itself helps form the seal at the top or bottom of the housing.
Confirm the cartridge style and orientation
Different under-sink filters use different cartridge designs. To avoid leaks:
- Confirm that the cartridge type matches the system style (for example, not mixing standard and proprietary shapes).
- Check any alignment tabs, keys, or arrows that show how the cartridge should insert.
- Ensure the cartridge is fully rotated or pushed into its locking position if the design uses a twist-lock or click-in mechanism.
- Verify any internal sealing surfaces on the cartridge are intact and free of debris.
Look for double-gasket or missing-gasket issues
Occasionally, an old gasket can stick to the housing or head, and a new cartridge brings an extra gasket, leading to an uneven stack that leaks. Similarly, a missing gasket can prevent sealing entirely.
- Inspect both the old and new cartridges for O-rings or flat seals.
- Check the housing head for any gasket left behind from a previous cartridge.
- Use only the seals intended for the current cartridge configuration.
If leaks stop when you temporarily remove a suspect cartridge and plug the port with a proper cap or test fitting (following the manufacturer’s guidance), the issue may be isolated to that cartridge or its seals.
Quick Check #5: Check Water Pressure and Flow Conditions
Under-sink filter components are designed for typical household cold-water pressures, but pressures can vary significantly between homes and even within the same home at different times of day. Excess pressure or sudden surges can worsen small weaknesses and turn them into leaks.
Recognize signs of pressure-related stress
Common indicators of pressure issues include:
- Leaks that appear only when other fixtures are closed and pressure spikes.
- Loud banging or vibration in pipes when shutting off faucets quickly (water hammer).
- Visible bulging or deformation in plastic housings or tubing.
If your home pressure is unusually high, the safest long-term solution is to address the supply pressure at the home level with appropriate plumbing components installed by a qualified professional. Within the under-sink system, you can still take practical steps:
- Turn the shutoff valve on slowly after maintenance, allowing the system to fill gently.
- Avoid rapidly opening or closing the filtered faucet.
- Ensure tubing is supported and not left to whip or vibrate under pressure changes.
For households with variable or high pressure, inspecting under-sink filter joints more frequently can help catch minor seeping before it becomes cabinet damage.
Quick Check #6: Test After Cartridge Changes and Maintenance
Leaks often show up immediately after a cartridge change or system service, when components have been disturbed. Adding a simple post-maintenance routine reduces the chance of hidden drips soaking the cabinet over time.
Adopt a consistent leak-test routine
After any filter change or adjustment:
- Confirm all housings and fittings are snug by hand.
- Place a dry paper towel under the system and around key joints.
- Open the supply valve slowly and run the filtered faucet.
- Let the system operate for several minutes, then close the faucet and watch for delayed drips.
- Recheck the paper towel after 10–15 minutes to detect slower seepage.
Bleed air and flush according to instructions
During start-up:
- Expect some initial spurting or cloudy water as trapped air leaves the system.
- Follow the recommended flush time for new cartridges to remove loose carbon fines or preservatives.
- Observe all joints throughout the flush, as flow and pressure cycles can reveal marginal seals.
Documenting the date of each filter change and noting whether you observed any leaks can help you spot patterns over time, such as a particular fitting that needs closer inspection or eventual replacement.
Quick Check #7: When to Replace Components or Call a Professional
Some leaks can be solved with simple tightening or reseating. Others signal that parts have reached the end of their useful life or that the installation needs a more thorough review.
Signs that parts should be replaced
Consider replacing components instead of repeatedly troubleshooting when you see:
- Cracks, discoloration, or soft spots in housings or tubing.
- Fittings that leak even after careful recutting and reinserting tubing.
- O-rings that remain flattened or brittle after cleaning and lubrication.
- Valves or adapters that seep from the body, not just the connection point.
When replacing parts, use components compatible with your system’s size, pressure rating, and connection style. Mismatched threads or tubing sizes are common causes of new leaks after a repair.
When to consider professional help
It may be safer and more efficient to contact a licensed plumber or experienced installer when:
- The leak involves the main cold-water supply line or shutoff valve.
- You see repeated leaks in the same area despite correct basic steps.
- Cabinet surfaces or nearby electrical components have already been affected by water.
- You need to modify hard plumbing or install a pressure-regulating device.
In the meantime, you can shut off the filter’s feed valve and, if necessary, temporarily bypass the filter to keep regular cold water available while preventing further cabinet damage.
Using Leaks as a Signal to Review System Performance
A leak is inconvenient, but it can also be a useful reminder to review the overall condition and performance of your under-sink filtration system. While addressing drips, it is a good time to revisit basic system checks.
Review filter age, capacity, and water quality
During leak troubleshooting, consider:
- When the cartridges were last replaced and whether you are near or beyond their rated capacity or time interval.
- Any recent changes in taste, odor, or color of the filtered water that might suggest exhausted media or clogging.
- Measured indicators, such as a noticeable drop in filtered-water flow rate, which can signal a cartridge that is loading with sediment.
While basic indicators like taste and odor can hint at performance changes, formal testing and verification against recognized standards provide more reliable information about what a system is designed to reduce.
Connect leaks, maintenance, and certifications
Under-sink filters are commonly evaluated against NSF/ANSI standards for aesthetic effects, specific contaminants, and system design. A well-maintained system that continues to operate within its design parameters is more likely to perform as certified.
When you are already working under the sink to solve a leak, use that opportunity to look at your system documentation, note the filter model and replacement intervals, and confirm which standards it was tested against. This can guide your expectations about what the filter is designed to address and how often you should schedule replacement to help it continue operating as intended.
Example values for illustration.
| Standard | Focus area | What a homeowner can check |
|---|---|---|
| NSF/ANSI 42 | Aesthetic effects (taste, odor, chlorine, some particulates) | Confirm labeling or documentation states which aesthetic reductions were evaluated |
| NSF/ANSI 53 | Specific contaminants (for example, certain metals or organic compounds) | Review the performance data sheet for the list of contaminants and usage conditions |
| NSF/ANSI 58 | Reverse osmosis system performance and structural integrity | If your under-sink system is RO-based, verify it is identified as evaluated to this standard |
| NSF/ANSI 401 | Selected emerging compounds and incidental contaminants | Check whether the system lists any additional compounds evaluated under this standard |
| Material and structural claims | Safety of materials in contact with drinking water and pressure performance | Look for statements that housings and components were assessed for structural integrity |
| Installation and maintenance instructions | Proper use conditions to maintain performance | Verify recommended filter-change intervals, flushing steps, and pressure limits |
Simple Practices to Prevent Future Under-Sink Filter Leaks
Once an active leak is under control, a few regular habits can reduce the chance of a repeat incident and protect the cabinet area.
Monitor, document, and protect the cabinet
Helpful preventive steps include:
- Placing a shallow, rigid tray or mat under the filter assembly to contain small drips.
- Checking the cabinet for dampness during regular household cleaning or whenever you access stored items.
- Keeping a simple record of installation dates, filter changes, and any repairs made.
- Ensuring stored items under the sink do not press against tubing or housings, which can stress connections.
Under-sink filters can operate for long periods without attention, but quick periodic visual checks and careful maintenance after each cartridge change go a long way toward keeping both your filtration system and your cabinet in good condition.
Frequently asked questions
What is the most common cause of under-sink filter leaks?
The most common causes are improperly seated tubing at push-to-connect fittings, damaged or mis-seated O-rings in canister housings, and loose or cracked threaded fittings. These issues typically occur from installation errors, aged seals, or stress and can often be found by drying the area and pressurizing briefly to spot the source.
How can I tell if the moisture under my sink is an under-sink filter leak or just condensation or a spill?
Dry the area completely, then place dry paper towels around suspected joints and slowly pressurize the system; fresh darkening or wet spots on the towels will indicate an active leak. Condensation usually appears more evenly and will not reappear in the same concentrated spot after the area is dried and the system is briefly pressurized.
Can I fix an under-sink filter leak myself, and when should I call a professional?
Many leaks can be handled by homeowners: shut off the feed valve, depressurize, inspect and reseat tubing, clean or replace O-rings, and retighten fittings by hand. Call a licensed plumber if the leak involves the main supply, persistent leaks after basic repairs, structural damage to components, or when installing pressure-regulating equipment.
How often should I inspect or replace O-rings and tubing to prevent under-sink filter leaks?
Inspect O-rings and tubing each time you change cartridges and during routine visual checks; replace any O-rings that are flattened, nicked, or brittle and tubing with visible wear. While there is no universal time interval, treating these checks as part of regular cartridge changes (often every 6–12 months depending on usage) helps catch wear before leaks develop.
Can high water pressure cause under-sink filter leaks and how can I reduce the risk?
Yes — high or fluctuating supply pressure and pressure spikes can stress fittings, housings, and seals and reveal marginal connections as leaks. Mitigate risk by opening valves slowly, ensuring tubing is supported, and consult a professional to evaluate installing a pressure regulator if household pressure is consistently high.
Recommended next:
- Under-Sink vs Pitcher: Which Is Better for Families?
- Best Under-Sink Filters for Chlorine Taste & Odor
- Under-Sink Filter Installation: Tools, Parts, and Common Mistakes
- No-Drill Under-Sink Filters for Renters: What’s Possible?
- Under-Sink Filters for Lead Reduction: What Certifications to Look For
- Under-Sink Filter Flow Rate Explained: Why GPM Matters
- More in Under-Sink Filters →
- NSF/ANSI standards explained (42/53/401/58)
- Clear trade-offs: pitcher vs faucet vs under-sink vs RO
- Maintenance planning: cost per gallon and replacement cadence