
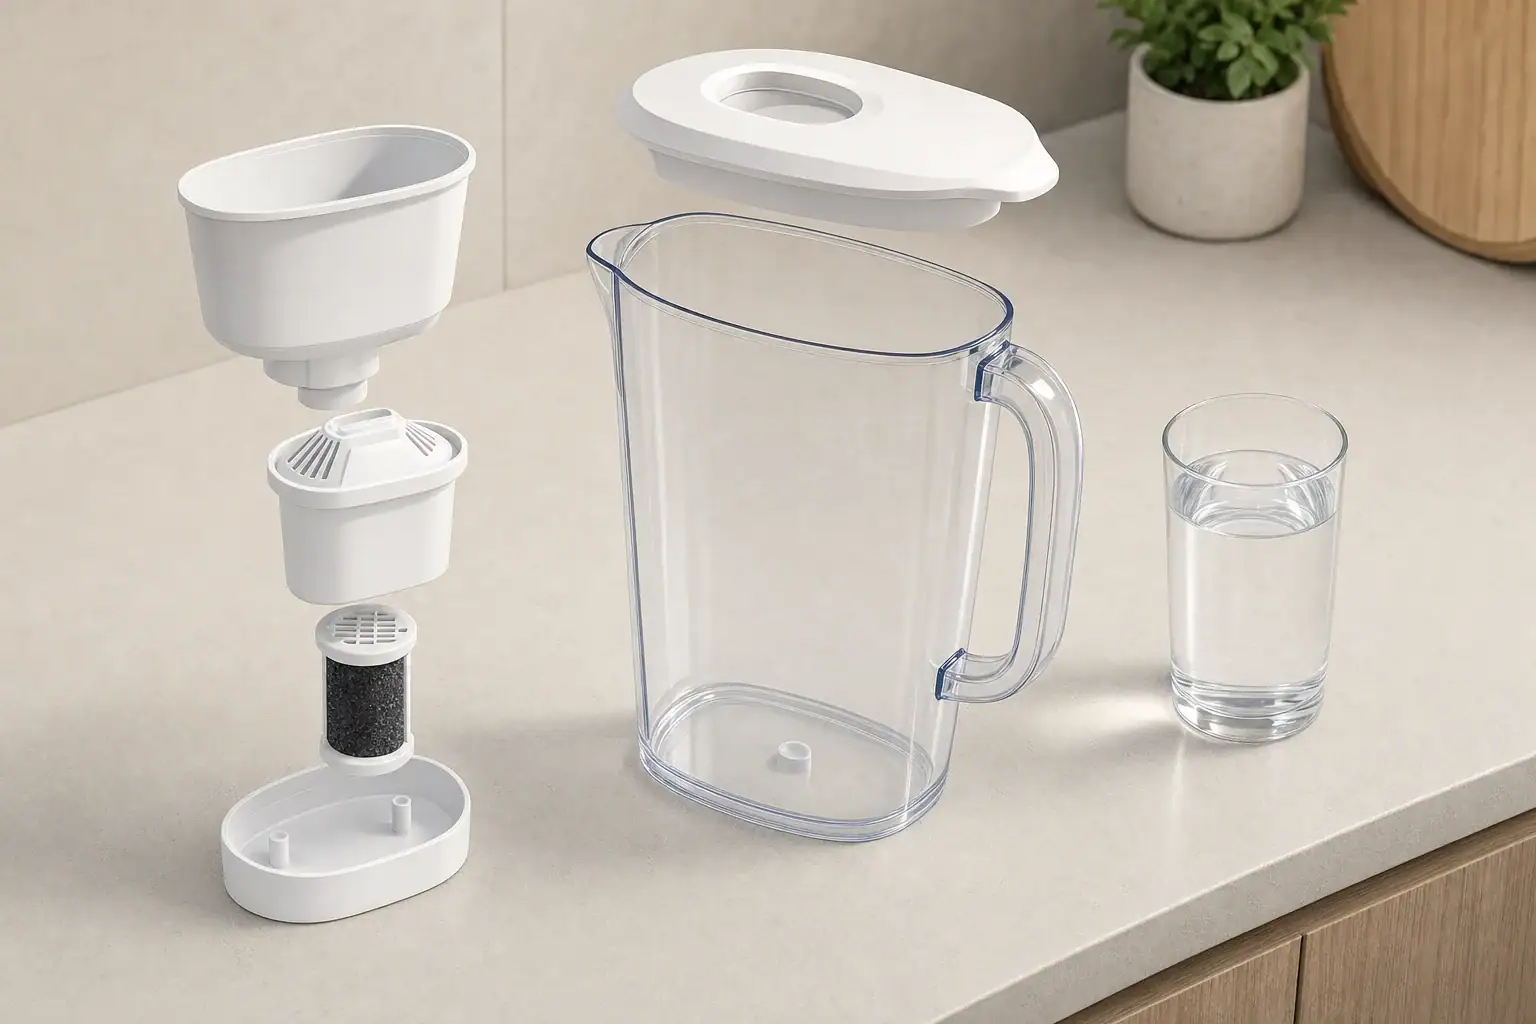
Putting a water filter pitcher in the dishwasher may seem like an easy way to remove residue and odors. However, many pitchers contain plastic parts, seals, filter media, and indicator electronics that can be damaged by dishwasher heat, detergent, or high-pressure spray.
The safest answer depends on the instructions for the specific pitcher and each removable component. Unless the manufacturer clearly identifies a part as dishwasher-safe, hand-washing it with mild dish soap and lukewarm water is the lower-risk approach.
Can a Water Filter Pitcher Go in the Dishwasher?
Some pitcher bodies and reservoirs are designed for the top rack of a dishwasher, but many are hand-wash only. A dishwasher-safe statement may also apply to the pitcher vessel without applying to the lid, filter cartridge, gasket, electronic indicator, or internal reservoir.
Do not assume that a durable-looking plastic is dishwasher-safe. Pitcher components may use different plastics, and their tolerance for heat and detergent can vary. Printed markings, bonded handles, seams, and seals may be more vulnerable than the main container.
Check instructions for each separate part
Look for cleaning guidance in the care manual, on the packaging, or molded into the bottom of the component. Follow any limits regarding rack position, heated drying, sanitizing cycles, or water temperature.
If the instructions are missing or unclear, hand-wash all reusable pitcher parts. The filter cartridge itself should not go in the dishwasher. Dishwasher detergent and unfiltered wash water can enter the filter media, while heat may damage its housing or internal structure.
How Dishwasher Heat and Detergent Can Damage a Pitcher
Dishwashers combine several stresses that do not occur during gentle hand-washing. These include elevated water temperature, concentrated alkaline detergent, forceful spray, and prolonged heat during a drying cycle.
Heat can warp plastic components
Plastic does not need to melt to become unusable. A small amount of warping can prevent the lid from closing correctly, change how the reservoir sits inside the pitcher, or create a poor seal around the cartridge.
Parts placed near a heating element face greater exposure. Even on an upper rack, a heated drying or sanitizing cycle may exceed what a hand-wash-only component was designed to tolerate.
Detergent may affect surfaces and seals
Automatic dishwasher detergents are generally stronger than mild hand dishwashing liquids. Repeated exposure can cloud some plastics, fade markings, dry out flexible seals, or leave an odor in enclosed components.
Food residue circulating in the dishwasher can also collect in narrow channels, lid mechanisms, or cartridge sockets. A wash cycle therefore does not guarantee that every pitcher surface will be clean or well rinsed.
Spray pressure can move lightweight parts
Small lids, reservoir pieces, caps, and gaskets may shift during a cycle. A part can fall onto a heating area, become distorted by rack pressure, or trap dirty water in a recess. Electronic filter-life indicators are particularly unsuitable for dishwasher exposure unless they are removable and explicitly rated for it.
Example values for illustration.
| Component | Default decision | Main concern | Practical action |
|---|---|---|---|
| Filter cartridge | Do not dishwash | Detergent, heat, and contamination of media | Remove before cleaning |
| Electronic indicator | Do not dishwash | Moisture and heat damage | Remove or wipe as directed |
| Lid | Hand-wash unless approved | Seams, mechanisms, and trapped water | Use mild soap and rinse well |
| Internal reservoir | Check instructions | Warping may affect cartridge fit | Hand-wash if uncertain |
| Outer pitcher body | Check instructions | Heat distortion or surface clouding | Use dishwasher only when permitted |
| Gasket or removable seal | Usually hand-wash | Drying, stretching, or loss of fit | Clean gently and inspect |
| Integrated handle | Follow pitcher guidance | Bonded joints or hidden gaps | Avoid high heat unless approved |
Which Pitcher Parts Need Special Care?
A water filter pitcher is an assembly rather than a single washable container. Separating its components before cleaning makes it easier to protect the filter and reach areas where moisture and residue collect.
Filter cartridge
Never clean a filter cartridge with soap, disinfectant, or dishwasher detergent. These substances can enter the filter media and may be difficult to rinse out. Scrubbing the cartridge can also damage screens or release loose media.
Follow the cartridge preparation and replacement directions provided for the pitcher. Depending on the filter design, those directions may call for rinsing or soaking a new pitcher filter cartridge, or discarding an expired cartridge rather than attempting to wash it.
Lid and filter-life indicator
Lids often contain narrow passages, hinged filling doors, or indicator assemblies. If the indicator can be removed, set it aside before washing the lid. Do not submerge an electronic component unless its care instructions specifically allow it.
Rinse moving parts carefully so that soap does not remain in crevices. Allow the lid to drain in several orientations before reassembly.
Reservoir and cartridge socket
The internal reservoir directs untreated water through the cartridge. Its cartridge socket needs to retain the correct shape so water does not bypass the intended flow path.
Use a soft cloth or nonabrasive sponge around this area. Avoid hard brushes, scouring pads, and tools that could scratch the surface or deform a sealing edge.
Pitcher body and seals
The outer body can develop mineral film at the waterline, particularly where water is moderately hard. Mild dish soap is usually enough for routine cleaning. A manufacturer-approved method may be needed for persistent mineral deposits.
Removable seals should be washed separately, rinsed thoroughly, and checked for stretching or cracking. A seal that no longer sits flat may allow leaks or affect how the lid fits.
How to Hand-Wash a Water Filter Pitcher Safely
Hand-washing provides better control over water temperature, detergent strength, and contact with delicate parts. Clean the pitcher regularly rather than waiting for visible buildup or a persistent odor.
Basic cleaning process
- Wash and dry your hands before handling the cartridge or clean pitcher parts.
- Empty the pitcher and remove the filter cartridge.
- Remove the lid, reservoir, gaskets, and indicator when the design permits.
- Wash reusable parts with lukewarm water, mild unscented dish soap, and a soft sponge.
- Pay attention to the waterline, lid channels, cartridge socket, handle joints, and bottom corners.
- Rinse each part thoroughly until no suds or soap odor remains.
- Air-dry components completely on a clean rack or towel before reassembly.
- Prepare or reinstall the cartridge according to its directions.
Avoid boiling water, abrasive powders, scouring pads, and concentrated cleaners unless the care instructions explicitly approve them. Mixing cleaning chemicals is unnecessary and can create avoidable hazards.
Cleaning frequency
There is no single cleaning interval for every household. Usage, water temperature, mineral content, storage conditions, and how often the pitcher is refilled all affect how quickly residue develops.
As a practical routine, wash the pitcher when replacing the cartridge and whenever you notice film, debris, or odor. More frequent cleaning may be useful if the pitcher stays at room temperature, is handled often, or is filled from a faucet that splashes onto the lid.
Cleaning the pitcher does not restore an exhausted cartridge. Pitcher filter replacement timing should follow the applicable time, volume, or performance guidance, even when the pitcher itself looks clean.
What to Do If the Pitcher Was Already Dishwashed
An accidental dishwasher cycle does not automatically mean every component is ruined. Let the parts cool, then inspect them before returning the pitcher to service.
Check for:
- Warping, buckling, or a pitcher that no longer sits level
- A lid or reservoir that rocks, binds, or does not fit normally
- Cracks, stress marks, cloudy areas, or roughened plastic
- Loose handles, stretched gaskets, or damaged cartridge sockets
- Detergent fragrance, residue, or unusual taste after thorough rinsing
- A filter indicator that is blank, fogged, or behaving unexpectedly
If the filter cartridge went through the dishwasher, replace it rather than trying to flush out detergent. If a structural part is visibly deformed or cracked, stop using it. Small changes in fit can affect leaks, lid stability, and the intended path of water through the filter.
For a pitcher body that remains correctly shaped and is confirmed dishwasher-safe, rinse it thoroughly and follow its normal setup procedure. When dishwasher compatibility cannot be verified, consult the original care information before reuse.
Example values for illustration.
| Observation | Possible cause | Response |
|---|---|---|
| Soap-like taste | Incomplete rinsing or exposed cartridge | Rinse reusable parts; replace a detergent-exposed filter |
| Detergent fragrance | Residue trapped in lid or seams | Hand-rinse parts separately and air-dry |
| Water bypasses cartridge | Warped reservoir or poor cartridge seating | Inspect fit and stop use if distorted |
| Lid no longer closes | Heat deformation | Do not force it; replace the damaged part |
| Pitcher leaks | Crack, loose joint, or displaced seal | Inspect dry components and discontinue use if cracked |
| Musty odor | Moisture trapped during storage | Wash, rinse, and dry fully before reassembly |
| Indicator does not work | Moisture or heat exposure | Follow indicator reset or replacement guidance |
Related guides:
Pitcher Filter Maintenance: Cleaning & Sanitizing Without Off-Flavors •
How Often Should You Replace Pitcher Filters? (By Household Size) •
How to Pre-Soak and Flush a New Pitcher Filter Cartridge •
Pitcher Filter Taste Issues: Why Water Tastes Worse After Filtering
Frequently Asked Questions
Is the top rack always safe for a filter pitcher?
No. The top rack generally reduces exposure to heating elements, but it does not eliminate hot water, detergent, spray pressure, or heated drying. Use the top rack only when the instructions identify the component as dishwasher-safe.
Can the filter cartridge be washed to make it last longer?
No. Washing does not reliably restore the adsorption or filtration capacity of used media. Soap and cleaning chemicals can contaminate the cartridge. Replace it according to its specified service guidance.
Can vinegar be used to clean a pitcher?
A diluted acidic solution may help with mineral film on some materials, but compatibility varies. Use it only when the pitcher care instructions permit it, keep it away from the filter cartridge, and rinse reusable parts thoroughly afterward.
Should a cleaned pitcher be air-dried?
Air-drying helps moisture escape from seams and corners. Place parts separately on a clean drying surface rather than assembling them while wet. This is especially useful before storing an empty pitcher for an extended period.
Does sanitizing a pitcher replace filter changes?
No. Cleaning addresses residue on reusable surfaces, while cartridge replacement addresses the finite service life of the filter media. The two maintenance tasks serve different purposes.
- NSF/ANSI standards explained (42/53/401/58)
- Clear trade-offs: pitcher vs faucet vs under-sink vs RO
- Maintenance planning: cost per gallon and replacement cadence