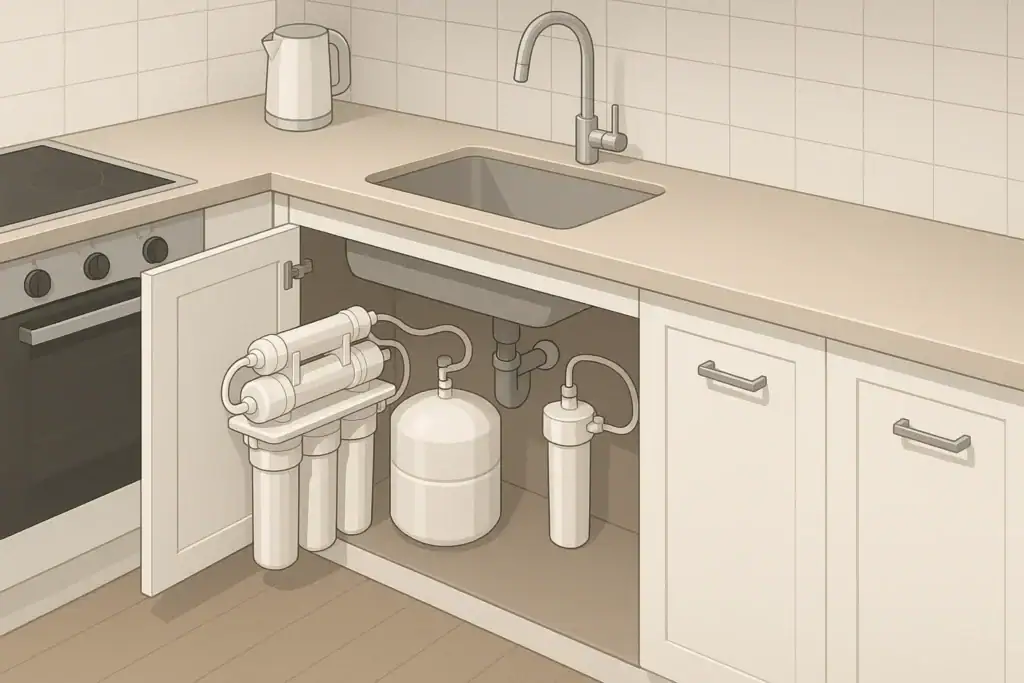
Reverse osmosis (RO) systems deliver high-quality drinking water, but they also add several components to an already crowded area under the sink. A thoughtful layout makes the system easier to install, maintain, and live with every day.
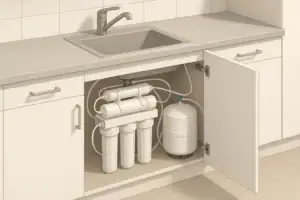
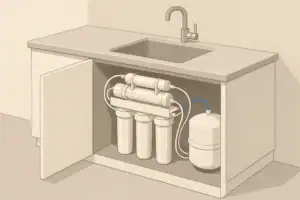
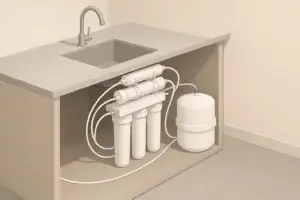
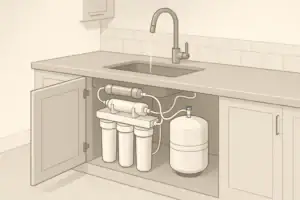
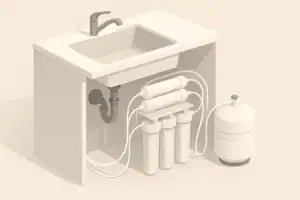
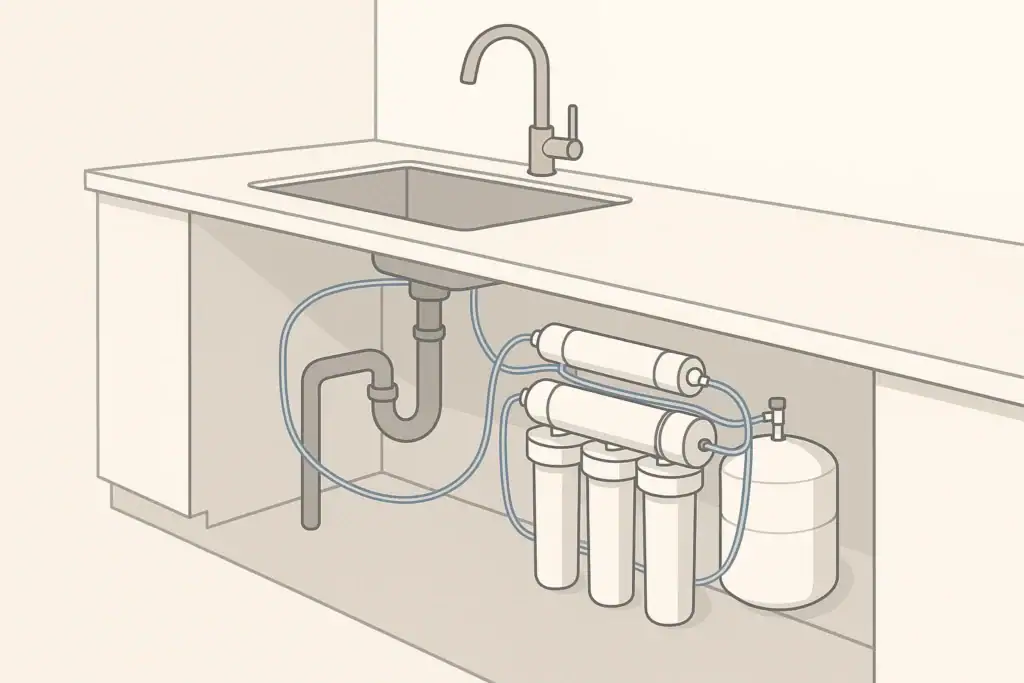
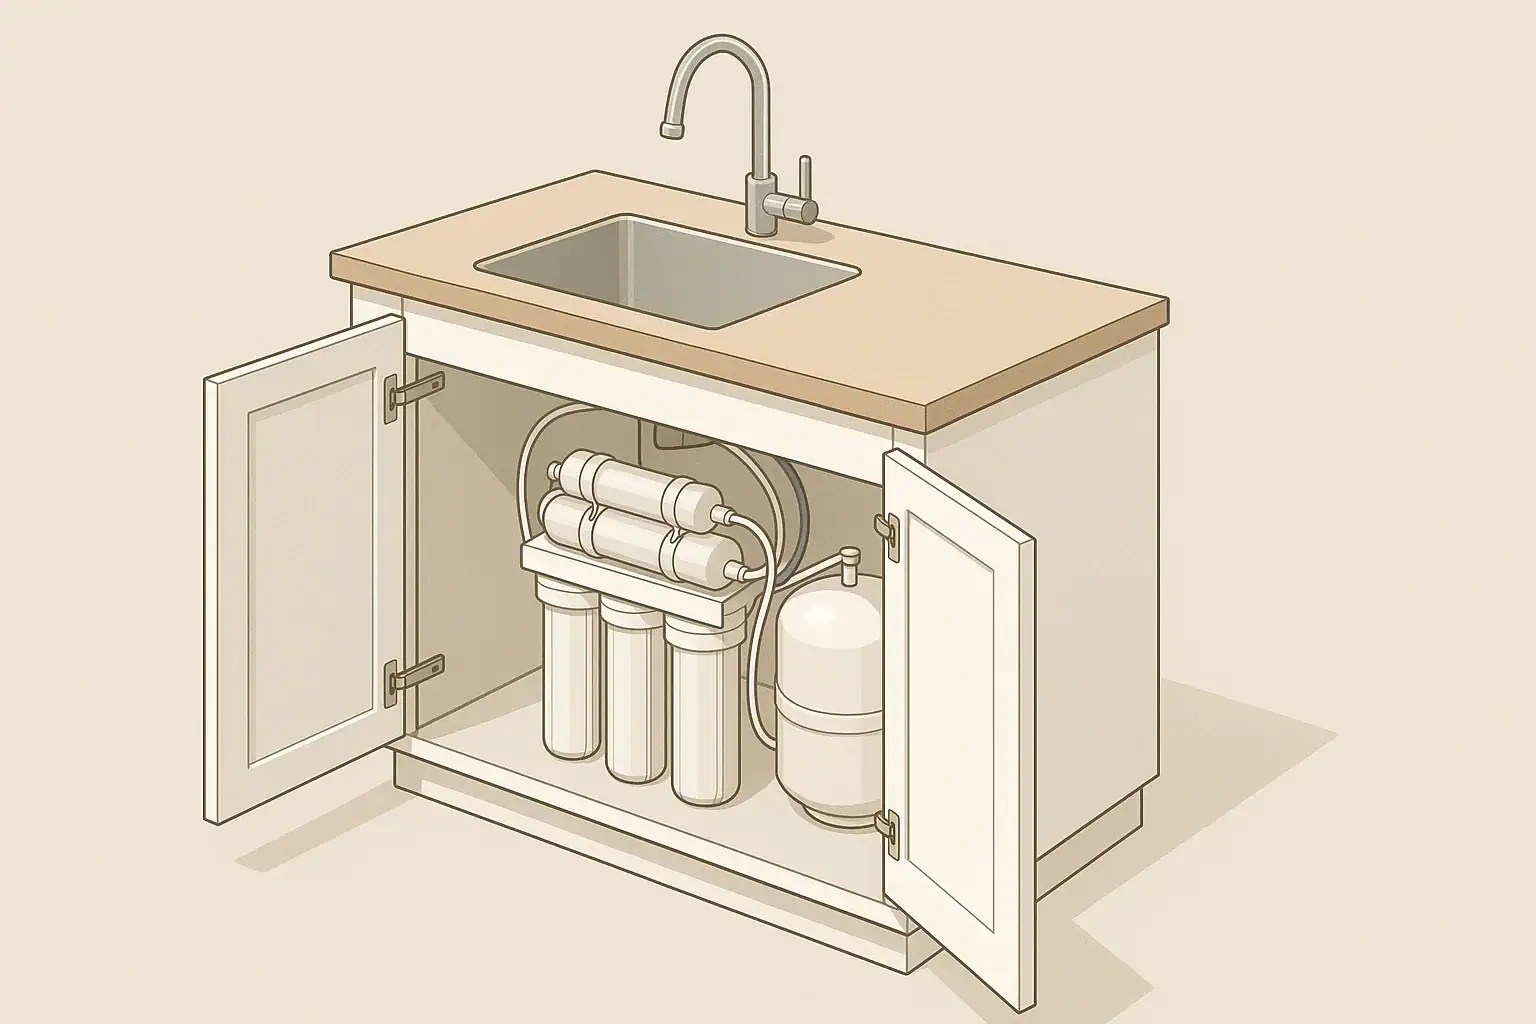
Most under-sink RO systems include multiple filter housings, a membrane housing, a small storage tank, and tubing connections to cold water, drain, and a dedicated faucet. Without planning, these parts can block access to shutoff valves, trap lines, or garbage disposals, and make filter changes difficult.
This guide walks through how to plan a space-saving installation layout, prepare the cabinet, and route lines so the system fits neatly while keeping plumbing accessible.
Before drilling or mounting anything, spend time on layout planning. Good planning prevents rework and helps you avoid conflicts with existing plumbing, waste lines, and storage needs.
Why Under-Sink RO Systems Need Careful Layout
Planning the Space-Saving Layout Under the Sink
Measure the Cabinet and Obstructions
Open the under-sink cabinet and remove everything stored inside. Then measure:
- Width: Inside width of the cabinet from left to right.
- Depth: From the back wall to the inside of the cabinet doors.
- Height: From the floor of the cabinet to the bottom of the sink or countertop.
Note the exact location of:
- Cold and hot water shutoff valves
- Existing faucet lines
- Drainpipe, P-trap, and dishwasher air gap or hose, if present
- Garbage disposal, if installed
- Electrical outlets or cords (for disposals or dishwashers)
RO storage tanks are often the largest single component. Check that there is enough clearance to slide the tank in and out for future service or replacement, even after you mount the filter manifold.
Define Your Priorities for the Space
Under-sink space often has competing uses. Before deciding on the exact layout, clarify how you want to balance:
- Access to plumbing: Shutoff valves and traps should remain reachable without disassembling the RO system.
- Filter change convenience: Cartridges should have enough vertical clearance to twist off and drop out.
- Storage needs: If you store cleaning products or tools, plan where they will go after installation.
- Future upgrades: Leave space for possible additions, such as a refrigerator or ice-maker line.
Sketch a simple top-down and front-view diagram of the cabinet to try different layouts on paper before you start mounting components.
Example values for illustration.
| Layout Choice | Best When | Space Impact | Maintenance Convenience |
|---|---|---|---|
| Filters on back wall, tank on side | Standard-width cabinets | Moderate floor space used | Good access to filters and valves |
| Filters on side wall, tank at back | Narrow but deep cabinets | Front floor area more open | Tank harder to remove |
| Filters on back wall, tank in adjacent cabinet | Very limited space under sink | Frees space beneath sink basin | Requires longer tubing runs |
| Tank on back wall shelf, filters below | Tall cabinets with vertical room | Better floor storage below | Filter access may be lower |
| Filters and tank in pull-out platform | High priority on easy service | Uses more hardware depth | Excellent access, more moving parts |
| Compact vertical mounting near corner | Small kitchens, tight spaces | Minimal footprint if well planned | Can be tight for filter changes |
Choosing Where Each RO Component Will Go
A typical under-sink RO system includes these main parts:
- Pre-filters (often sediment and carbon)
- RO membrane housing
- Post-filter (often carbon)
- Storage tank
- Dedicated RO faucet
- Tubing to cold water, drain, and optional appliances
Each piece has different space and access needs. Place them where they interfere least with existing plumbing and daily cabinet use.
Best Practices for Mounting the Filter Manifold
The filter manifold and housings are usually the central part of the system. For a space-saving layout:
- Use the back wall if possible. This keeps the floor open and reduces the risk of kicking or knocking components.
- Keep clear of the P-trap and disposer. Mount the manifold so it does not block access in case you ever need to service the drain.
- Check vertical clearance. Ensure cartridges can be removed downward without hitting the cabinet floor or items stored nearby.
- Allow slack in tubing. A bit of extra length reduces stress on fittings if you need to tilt or move the manifold for service.
If wall mounting is not possible due to thin paneling, you can mount the manifold to a small plywood backer board and then secure that board to cabinet framing.
Positioning the RO Storage Tank
The storage tank often takes up more space than the filters, so its placement has the largest effect on cabinet usability.
Consider:
- Side placement: Placing the tank against one side wall leaves the center area open for access and limited storage.
- Rear placement: Placing the tank at the back frees up front access but can make the tank harder to remove.
- Adjacent cabinet: If the under-sink area is cramped, you can often route tubing through a small hole into the next cabinet and put the tank there.
- Stability: Make sure the tank stands on a level surface and does not rock or tip when the cabinet is closed.
Leave enough clearance above the tank valve and below the sink to operate the valve and disconnect tubing without contortions.
Locating the Dedicated RO Faucet
The RO faucet usually mounts on the sink deck or countertop. When choosing a location:
- Look for existing knock-out plugs on the sink deck.
- Maintain comfortable reach from the front of the sink for filling pots and bottles.
- Confirm there is clear space underneath for the faucet hardware and tubing.
- Avoid conflicts with soap dispensers, sprayers, and existing faucets.
If you must drill a new hole, check from below before drilling to avoid hitting sink ribs, reinforcements, or tight areas crowded with lines or clips.
Space-Efficient Tubing and Connection Routing
RO systems rely on several low-diameter tubes, but they can still create clutter if routed poorly. A clean tubing layout keeps the cabinet usable and makes troubleshooting easier.
Color-Coding and Labeling Lines
Many RO kits use color-coded tubing (for example, feed water, permeate, and drain lines). If your tubing is all one color, consider adding simple labels near the manifold and along longer runs. Clear identification helps when you later add a refrigerator line, shut a valve, or track down a leak.
Routing Principles for a Neat Layout
Use these guidelines to keep tubing out of the way while protecting it from damage:
- Follow cabinet corners. Run tubes along walls and corners instead of diagonally across open space.
- Avoid sharp bends. Maintain gentle curves to reduce kinking and flow restriction.
- Keep away from hot lines. Avoid direct contact with hot water pipes or dishwasher discharge hoses.
- Secure with clips. Use small clips or clamps to hold tubing in place and prevent snagging.
- Leave service loops. Small loops with extra length give you room to remove filters or move the tank without disconnecting lines.
Connecting to Cold Water and Drain with Minimal Bulk
Under-sink RO systems usually connect to a cold water supply adapter and a drain saddle fitting.
For the cold water connection:
- Use a compact adapter that screws onto the existing shutoff valve, if compatible.
- Orient the adapter so the RO feed line exits in a direction that keeps it close to the wall.
- Confirm you can still fully operate the shutoff valve after installation.
For the drain connection:
- Mount the drain saddle on a straight section of the drainpipe, not on or near the curve of the P-trap.
- Position it so the RO drain line runs directly and neatly, avoiding tight loops.
- Drill the drainpipe carefully to the specified size and clean away any plastic or metal shavings.
Always follow local plumbing requirements; some areas have specific rules about connecting discharge lines to drains.
Step-by-Step Under-Sink RO Installation Overview
Exact steps vary by manufacturer, but most under-sink RO installations follow a similar sequence. Reviewing the sequence ahead of time helps you place components in an order that supports a tidy layout.
1. Prepare and Protect the Work Area
Before starting:
- Turn off the cold water shutoff valve at the sink.
- Open the main faucet to relieve pressure.
- Place towels or a shallow tray under connections to catch drips.
- Remove stored items and vacuum or wipe out debris from the cabinet floor.
2. Install or Drill the RO Faucet Hole
If using an existing sink knock-out, remove the plug according to the sink manufacturer’s instructions. If drilling:
- Confirm the faucet hole location from above and below.
- Use a bit suitable for the sink material (stainless, composite, or countertop).
- Drill slowly, supporting the underside if necessary.
Mount the RO faucet, orienting the spout toward the sink basin, and lightly tighten hardware while you verify the final position. Complete tightening once you are satisfied with the alignment.
3. Mount the Filter Manifold and Membrane Housing
Using your layout plan:
- Hold the manifold against the chosen mounting surface to confirm clearance for filters and tubing.
- Mark screw hole locations and pre-drill pilot holes if recommended.
- Attach the manifold securely but avoid overtightening into thin cabinet walls.
- Install the RO membrane and pre-/post-filters according to the manufacturer’s orientation.
Check that all O-rings or seals are correctly seated before closing housings.
4. Position and Connect the Storage Tank
Place the tank in its planned location and:
- Wrap the tank outlet threads with sealing tape if required.
- Install the tank valve, aligning it so the tubing will route along the cabinet wall.
- Connect the tubing from the post-filter outlet to the tank valve, leaving a small service loop.
If you are installing the tank in an adjacent cabinet, drill a smooth, appropriately sized hole between cabinets and use a grommet or bushing to protect the tubing from sharp edges.
5. Make Cold Water and Drain Connections
Connect the feed line:
- Loosen the cold water supply line from the shutoff valve.
- Install the adapter fitting between the valve and supply line as specified.
- Attach the RO feed tubing to the adapter, checking that the connection is fully seated.
Connect the drain line:
- Mark a straight section of drainpipe for the saddle location.
- Drill the drainpipe opening and remove shavings.
- Secure the saddle clamp, ensuring the drilled hole aligns with the saddle opening.
- Insert the RO drain tubing fully and secure it with the provided clip or nut.
6. Connect Tubing to the RO Faucet and Optional Appliances
From under the sink, connect the RO outlet tubing to the faucet stem, following the instructions for any included quick-connect fittings. If you plan to feed a refrigerator or ice maker:
- Install a tee fitting at the pressurized RO line after the tank.
- Route the line to the appliance along baseboards or inside cabinets, protecting it from abrasion.
- Label the line at both ends for clarity.
7. Pressurize, Flush, and Check for Leaks
Once all connections are complete:
- Open the cold water shutoff valve slowly and inspect every connection.
- Tighten any fittings that show signs of leakage.
- Open the RO faucet and allow water to flow as directed in the installation instructions, often several minutes or more.
- Allow the tank to fill and then empty it fully at least once, or as recommended, to flush new filters.
During the first days of operation, check under the sink periodically to confirm everything remains dry and secure.
Maximizing Storage and Serviceability After Installation
Once the system is operating, take a final pass through the cabinet layout to keep the space useful and make future maintenance easier.
Organizing Remaining Cabinet Space
RO components will permanently claim some under-sink volume, but you can still use the remaining space efficiently:
- Use low, shallow bins around the tank and filters to keep items from bumping tubing or valves.
- Avoid stacking heavy objects above tubing or near fittings.
- Label bins to discourage others from pushing or forcing items into tight spots.
It can help to leave a small open zone below the filter housings so dripping water would be visible if a future leak develops.
Planning for Filter Changes in Tight Spaces
Filter changes are much easier when you plan ahead for clearance and access:
- Keep a filter wrench, towels, and spare O-rings in a labeled container in the same cabinet.
- Leave enough vertical clearance to remove the longest cartridge without disassembling other components.
- Mark the cabinet wall or a small tag with the installation date and typical replacement intervals.
If you discover that filter changes are awkward in your current layout, consider small adjustments such as raising the manifold slightly, rotating the tank, or rerouting a single tube to free more space.
Example values for illustration.
| Item to Track | Typical Interval (Example Only) | What to Watch For | Planning Method |
|---|---|---|---|
| Sediment pre-filter | Every 6–12 months | Noticeable drop in flow or visibly dirty filter | Mark calendar and note last change date on cabinet |
| Carbon pre-filter | Every 6–12 months | Change in taste or odor at RO faucet | Replace with sediment filter on same schedule when possible |
| RO membrane | Every 2–5 years | Rising TDS readings or slower tank refill | Check annually and plan replacement when performance trends down |
| Post-filter (polishing carbon) | Every 12 months | Subtle taste changes or discoloration | Pair with annual deep inspection of cabinet and fittings |
| Tubing and fittings | Inspect every 6–12 months | Moisture, cracks, or stress on connections | Quick visual check during routine cleaning |
| Storage tank pressure (if accessible) | Every 1–2 years | Very low flow despite full filtration | Check pressure with system depressurized following instructions |
Safety, Standards, and Final Checks
Under-sink RO systems interact with both potable water and drain lines, so a few final checks help ensure ongoing safe operation.
Verifying Product Standards and Local Requirements
When selecting or reviewing an RO system, many homeowners look for certifications to specific NSF/ANSI standards. These standards typically relate to structural integrity, materials safety, and performance for certain contaminants and aesthetic factors such as taste and odor. Check for independent verification where available, and compare product claims carefully with your water quality goals.
Local plumbing codes may also have rules for air gaps, drain connections, and backflow prevention. If in doubt, consult local code resources or a licensed plumber.
Monitoring Performance Over Time
After installation, a few simple habits help confirm that the layout and system are working as intended:
- Occasionally feel around fittings and under the tank for moisture.
- Notice any changes in taste, odor, or flow at the RO faucet.
- Use basic water quality tools, such as a TDS meter or test strips, if you want to track performance trends.
- Keep a basic log of filter changes and observations in a small notebook or digital note.
A space-efficient, well-organized under-sink layout makes these checks faster, reduces the chance of unnoticed drips, and simplifies any future changes you choose to make to your home water filtration setup.
Frequently asked questions
How much vertical clearance should I leave to change RO filter cartridges under the sink?
Leave enough vertical space so the longest cartridge can be removed downward and twisted out without contacting the cabinet floor or stored items. Many common cartridges are roughly 9–12 inches long, so measure the actual cartridges supplied with your system and allow several inches of extra room for a filter wrench and hands. Planning this clearance ahead of mounting the manifold prevents awkward disassembly later.
Can I place the RO storage tank in an adjacent cabinet and route tubing between cabinets?
Yes — placing the tank in an adjacent cabinet is a common solution for cramped under-sink spaces. Drill a smooth, appropriately sized hole between cabinets and use a grommet or bushing to protect tubing from sharp edges, and keep the tank valve accessible for service. Be mindful that longer tubing runs can slightly increase fill time and should be secured and protected along their route.
Is it safe to mount the filter manifold to a thin cabinet panel?
Mounting to a thin panel is possible but not ideal; the manifold should be fastened to solid backing or cabinet framing when available. If the panel is too thin to hold screws securely, attach a small plywood backer board to distribute load and then mount the manifold to that board. Avoid overtightening fasteners to prevent cracking the panel.
Where should I install the drain saddle to minimize noise and clog risk?
Install the drain saddle on a straight, vertical or horizontal section of drainpipe above the P-trap curve and away from junctions or fittings. Positioning it on a straight section helps ensure proper flow and reduces the chance that solids will be drawn into the RO drain line. Follow the manufacturer’s drill size and local plumbing requirements, and ensure any required air gap or backflow protection is provided.
How can I prevent tubing kinks and leaks in a tight under-sink RO layout?
Route tubing along cabinet walls and corners, maintain gentle curves instead of sharp bends, and secure lines with clips or clamps to prevent movement. Leave small service loops near fittings so components can be moved for service without stressing connections, and label lines for easier troubleshooting. Inspect connections after pressurizing the system and periodically during routine maintenance to catch any developing issues early.
Recommended next:
- NSF/ANSI standards explained (42/53/401/58)
- Clear trade-offs: pitcher vs faucet vs under-sink vs RO
- Maintenance planning: cost per gallon and replacement cadence