Why RO Tank Pressure Matters
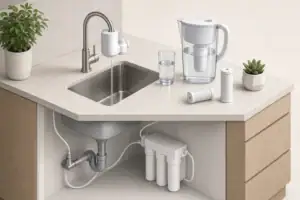
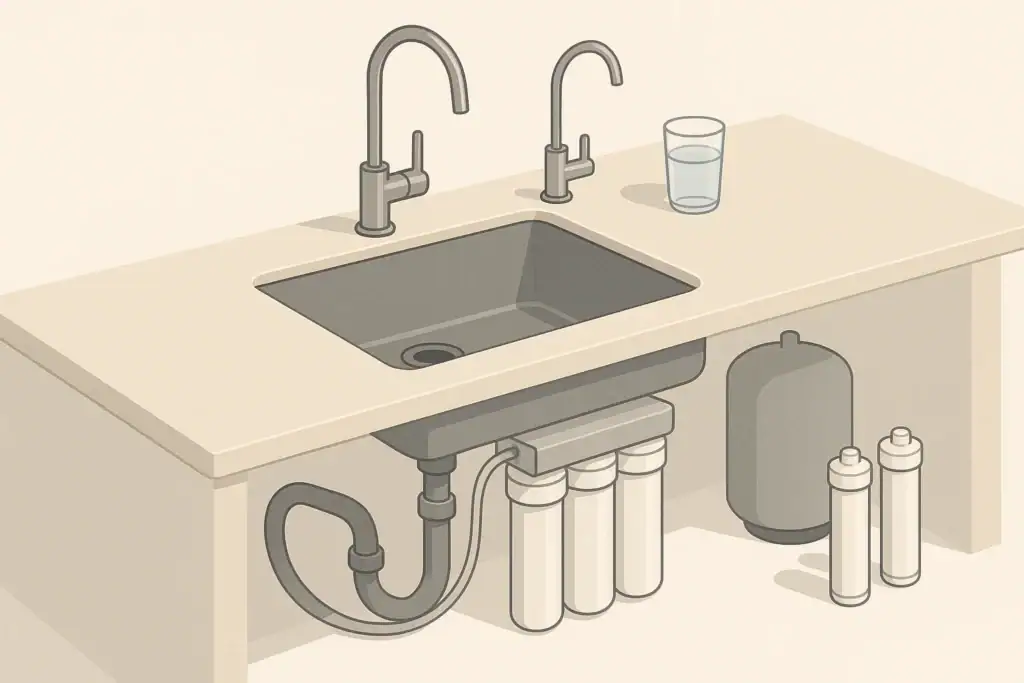
In a traditional under-sink reverse osmosis system, the storage tank does more than hold filtered water. It uses an air charge to push water from the tank to the RO faucet. If the air pressure is too low, the faucet may slow to a trickle even when the tank is full. If it is too high, the tank may hold less usable water because the air bladder pushes back too strongly.
RO tank pressure is usually checked when the tank is empty of water. This is important because a full or partly full tank can give a misleading gauge reading. The goal is not to force more pressure into the system, but to restore the tank to the general precharge range recommended for that tank design.
Common signs that tank pressure may need attention include:
- Slow flow from the dedicated RO faucet after the tank has had time to refill
- Only a small amount of water dispenses before flow drops sharply
- The system seems to run often, but faucet output remains weak
- The tank feels heavy, but water does not come out normally
- The tank feels empty even after the RO system has been on for several hours
These symptoms can also come from a clogged filter, closed valve, kinked tube, low home water pressure, exhausted membrane, or malfunctioning automatic shutoff valve. Checking tank pressure is one practical diagnostic step, not a complete diagnosis by itself. If low flow persists, troubleshooting low RO flow can help narrow down whether the issue is the tank, pressure, or filters.
Before You Check the Tank: Tools and Safety
Most RO storage tanks have a small air valve, similar to a tire valve, usually located on the side or bottom of the tank. This valve connects to the air side of the internal bladder or diaphragm. You will need to access it without disconnecting plumbing unnecessarily.
Helpful tools include:
- A low-pressure air gauge that reads accurately in small increments
- A bicycle pump or small hand pump
- A towel or shallow tray for minor drips
- A flashlight for under-sink visibility
- The system manual, if available
Avoid using a high-volume air compressor unless you can control it very precisely. RO tanks are small compared with vehicle tires, and pressure can rise quickly. Adding air in small increments is safer and more controlled.
Before working under the sink, note the positions of the feed water valve, tank valve, and RO faucet. Do not bypass shutoff valves, drill new holes, alter pressure relief parts, or modify plumbing to force additional output. If tubing, valves, or fittings appear damaged, brittle, swollen, or actively leaking, stop and consider professional service. For a broader overview of setup and placement, see this RO system installation guide.
Example values for illustration.
| Item | Why it matters | Practical note |
|---|---|---|
| Low-pressure gauge | Improves reading accuracy | Small tank pressures are easy to misread |
| System water supply off | Prevents the tank from refilling | Use the normal feed valve |
| RO faucet open | Relieves stored water pressure | Let the tank drain as much as possible |
| Tank empty | Gives a meaningful air reading | A full tank reading is not the precharge |
| Hand pump available | Allows small adjustments | Add air slowly |
| Dry work area | Helps spot leaks | Use a towel and good lighting |
| No water at air valve | Checks for bladder failure | Water from the valve suggests tank replacement |
How to Check RO Tank Pressure Step by Step
The safest general approach is to isolate the RO system, empty the tank through the normal faucet, and then measure the air side. Always follow the instructions for your specific system and tank if they are available. If you are comparing RO with other under-sink setups, the RO vs carbon under-sink comparison explains why maintenance and performance feel different.
1. Turn Off the RO Feed Water
Close the cold-water feed valve that supplies the RO system. This prevents new water from entering the membrane and tank while you are checking pressure. If your system has an inlet valve built into the RO assembly, use it only as intended by the manufacturer.
2. Open the RO Faucet
Open the dedicated RO faucet at the sink and let water run until it slows or stops. This can take several minutes depending on tank size and remaining volume. The purpose is to remove water pressure from the storage side so the air precharge can be measured accurately.
If water flow stops quickly but the tank still feels heavy, the air charge may be too low, the tank bladder may be damaged, or there may be a blockage in the line from the tank to the faucet. A clogged post-filter can also reduce output, so it helps to keep an eye on the wider RO filter replacement schedule.
3. Close the Tank Valve Only If Needed
Some people close the tank valve while checking other parts of the system, but for checking tank air pressure the tank generally needs to be drained through the faucet first. If you close the tank valve too early, water may stay trapped in the tank and affect the reading.
Use existing valves only as designed. Do not remove tank fittings or tubing just to drain faster unless you are trained and prepared to handle water, pressure, and reconnection safely.
4. Find the Air Valve
Look for the small capped air valve on the tank. Remove the cap and keep it nearby. Briefly inspect the area. If the valve stem is corroded, loose, damaged, or wet, proceed carefully.
Pressing the valve core is not usually necessary before using a gauge. If water comes out of the air valve at any point, the internal bladder has likely failed. In that case, adding air is not a reliable repair. The tank generally needs replacement.
5. Measure the Pressure
Attach the low-pressure gauge firmly to the air valve and read the pressure. Many residential RO tanks are commonly set in a low single-digit psi range when empty, often around 6 to 8 psi, but the correct value depends on the tank. Treat any number as a general reference unless it comes from your tank documentation.
If the tank is not fully empty, the gauge may show a higher reading because water is still compressing the air bladder. If the reading seems unusually high, confirm that the faucet is open and no water is still coming out. For standards and certification context, NSF/ANSI 58 is the key reference for many RO systems.
How to Adjust RO Tank Pressure Safely
If the empty-tank pressure is below the recommended range, add air slowly with a hand pump. Check the gauge after each short pump. Small tanks respond quickly, so patience matters.
If the pressure is above the recommended range, release a small amount of air by briefly pressing the valve core, then recheck. Do not remove the valve core. Do not intentionally over-pressurize the tank to increase faucet flow. Too much air pressure reduces storage capacity and may strain components.
After adjustment, replace the air valve cap, close the RO faucet, reopen the RO feed water, and make sure the tank valve is open. Let the system refill. A typical small residential tank may need a few hours to refill, depending on membrane capacity, water temperature, feed pressure, and filter condition.
Once the tank has had time to refill, open the RO faucet and observe flow. A healthy tank usually starts with stronger flow and then gradually slows as the tank empties. A sudden drop after only a cup or two may indicate that the tank still is not delivering water properly.
Troubleshooting Strange Pressure Readings
Tank pressure readings are useful, but they need context. The RO system is a group of parts working together: prefilters, membrane, flow restrictor, automatic shutoff valve, tank, post-filter, faucet, and tubing. A pressure issue in one area can look like a tank problem. If you are replacing parts, the RO filter replacement schedule is a useful companion reference.
Low Air Pressure
Low air pressure can cause weak faucet flow, especially near the end of the tank drawdown. If the tank accepts air and holds the setting after a day or two, adjustment may be enough. If it gradually loses air again, the valve or bladder may be leaking.
High Air Pressure
High air pressure can make the tank feel pressurized but reduce how much water it stores. The system may shut off sooner, and available water volume may be disappointing. Reduce pressure only in small steps with the tank empty.
No Water but Tank Feels Full
A heavy tank with little or no faucet flow often points to inadequate air charge, a failed bladder, a closed tank valve, or a blocked post-filter or tube. Check the simple items first: valve positions, kinked tubing, and whether the post-filter is overdue for replacement.
Water at the Air Valve
Water coming from the air valve is a strong indication that the internal separation between water and air has failed. This is not normally corrected by adding air. Continued use may lead to erratic flow or leakage, so replacing the tank is the practical path.
Tank Refills Slowly
A slow refill is not always a tank pressure problem. RO production depends on feed water pressure, water temperature, membrane condition, prefilter condition, and the system design. Cold water and lower feed pressure can reduce production rate. A clogged sediment or carbon filter can also reduce flow to the membrane. If delivery stays weak after those checks, troubleshooting low RO flow is a good next step.
When to Recheck or Call a Professional
RO tank pressure does not need constant adjustment. For many households, checking it during annual maintenance or when symptoms appear is enough. It is also reasonable to check after replacing a tank, moving the system, or troubleshooting low faucet flow.
Consider professional help if:
- You see active leaks or water damage under the sink
- The tank valve, feed valve, or tubing is stuck or damaged
- Water comes from the air valve
- The system will not shut off after the tank fills
- You are unsure which valve controls which part of the system
- The installation involves unusual plumbing, pumps, or shared appliance lines
RO systems are usually low-pressure devices on the filtered-water side, but they still connect to household plumbing. When in doubt, use the ordinary shutoff valves, avoid modifications, and get qualified help.
Example values for illustration.
| Situation | What to check | General interpretation |
|---|---|---|
| Empty tank precharge | Air valve with tank drained | Often a low single-digit psi range |
| Weak first flow | Tank air and tank valve | May indicate low air or restricted outlet |
| Good flow then quick stop | Usable tank volume | May indicate high precharge or low stored water |
| Slow refill | Feed pressure and filters | May be unrelated to tank precharge |
| Tank very heavy | Air charge and bladder condition | Water may not be pushed out effectively |
| Water at air valve | Bladder integrity | Tank replacement is commonly needed |
| System runs often | Leaks, shutoff valve, tank pressure | Several components can cause cycling |
Related guides: Reverse Osmosis 101: What RO Removes (and What It Doesn’t) • NSF/ANSI 58 Explained: What It Means for RO Systems • Troubleshooting Low RO Flow: Pressure, Tank, or Clogged Filters? • RO Filter Replacement Schedule: Prefilters vs Membrane • RO vs Carbon Under-Sink: Taste, TDS, and Maintenance Compared
Key Safety Notes for Everyday Maintenance
Checking RO tank pressure is a practical maintenance task when done carefully. The most important points are to measure only when the tank is empty, use a low-pressure gauge, adjust in small increments, and follow the tank manufacturer’s stated range when available.
Do not use tank pressure as a workaround for clogged filters, low feed pressure, or a failing membrane. If the system has poor flow, odd cycling, leaks, or unusual noises, look at the entire RO setup rather than only the tank.
After any pressure adjustment, monitor the under-sink area over the next day. Check for drips around the tank valve, tubing connections, filter housings, and faucet line. A dry cabinet and stable faucet flow are good signs that the system is operating normally.
With routine filter replacement, occasional sanitation as recommended by the system instructions, and careful pressure checks when symptoms appear, a standard RO storage tank can continue to provide steady faucet flow without unnecessary plumbing changes.
Frequently asked questions
How do I know if my RO tank pressure is too low?
Weak faucet flow, a tank that feels full but gives little water, or a tank that refills and still performs poorly can point to low pressure. The best check is to measure the tank when it is empty.
Should the tank be empty when I check the air pressure?
Yes. An empty tank gives the most accurate reading because water inside the tank can compress the air and make the pressure appear higher than it really is.
Can I use a regular tire gauge on an RO tank?
Sometimes, but a low-pressure gauge is better because RO tanks use small pressure ranges. A gauge made for low psi readings is usually more accurate for this job.
What should I do if water comes out of the air valve?
Water at the air valve usually means the bladder inside the tank has failed. In that case, adding air will not fix the problem, and the tank usually needs replacement.
How often should RO tank pressure be checked?
For many homes, checking it during annual maintenance or when flow changes is enough. It is also worth checking after a tank replacement or if faucet output becomes weak.
Recommended next:
- Reverse Osmosis 101: What RO Removes (and What It Doesn’t)
- NSF/ANSI 58 Explained: What It Means for RO Systems
- RO vs Carbon Under-Sink: Taste, TDS, and Maintenance Compared
- RO System Installation Guide: Space-Saving Layout Under the Sink
- RO Waste Water Ratio: What’s Normal and How to Reduce It
- RO Filter Replacement Schedule: Prefilters vs Membrane
- More in Reverse Osmosis (RO) →
- NSF/ANSI standards explained (42/53/401/58)
- Clear trade-offs: pitcher vs faucet vs under-sink vs RO
- Maintenance planning: cost per gallon and replacement cadence