Why Under-Sink Filters Work Well in Apartments
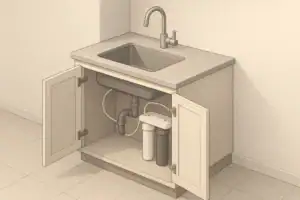
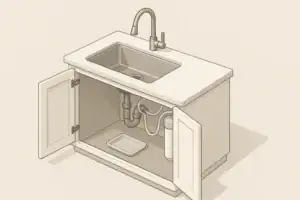
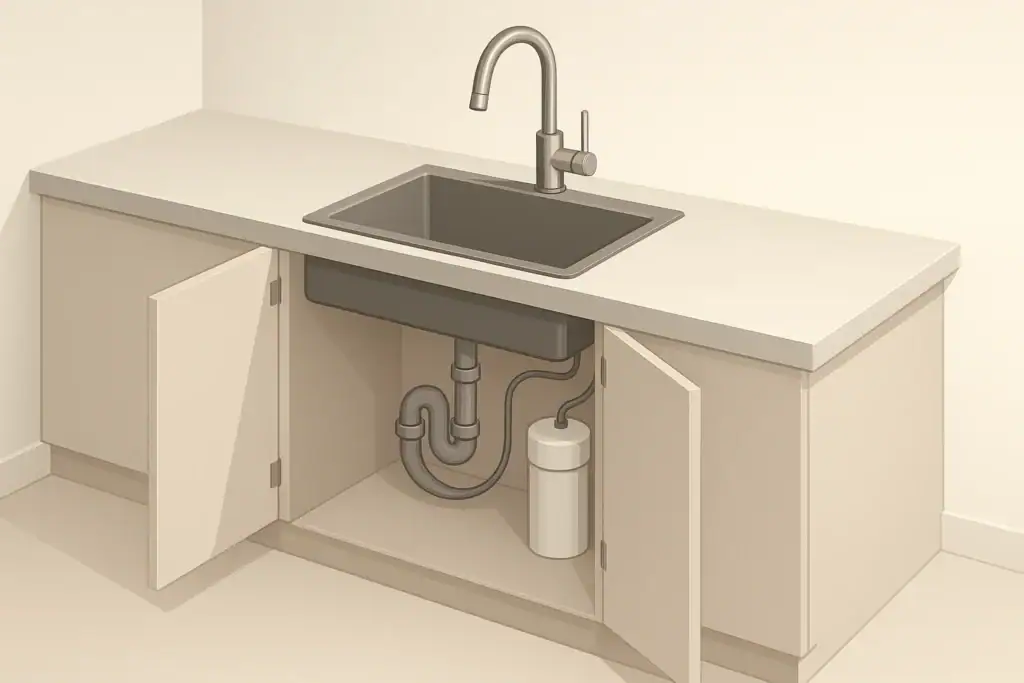
Under-sink filters are popular in apartments because they improve tap water taste and odor without taking up counter space. The filter housing and tubing stay hidden in the cabinet, while filtered water is delivered either through the main faucet (if compatible) or a small dedicated faucet.
For renters, under-sink systems can be appealing if they are compact, easy to disconnect, and do not require permanent plumbing changes. Many units connect with adapters at the shutoff valve and can be removed when moving out, leaving the plumbing essentially unchanged.
Common reasons apartment residents choose under-sink filters include:
- Freeing up counter and fridge space compared with pitchers
- Having on-demand filtered water instead of waiting for batches
- Reducing chlorine taste and odor from municipal water
- Targeting specific contaminants using cartridges certified to relevant NSF/ANSI standards
Because apartment kitchens often have shallow cabinets, trash bins, and cleaning supplies under the sink, thoughtful mounting is essential to avoid clutter and keep the filter serviceable.
Planning Your Under-Sink Layout in a Small Cabinet
Before drilling or mounting anything, spend time planning the layout. A tape measure and a quick sketch can prevent awkward installations that block storage or make cartridge changes difficult.
Measure and Map the Space
Start by measuring the inside of the cabinet:
- Width and depth: Note how much space pipes, the garbage disposal, and the sink basin already occupy.
- Height: Check the vertical clearance from the cabinet floor to the bottom of the sink and to any horizontal supports.
- Door swing: Make sure any planned mounting will not collide with door hinges or closing doors.
Sketch the cabinet interior from the front. Mark the positions of the drain, hot and cold shutoff valves, garbage disposal (if present), and any existing water lines for dishwashers or refrigerators. This helps identify the “free” wall surfaces and corners suitable for mounting.
Check What You Are Allowed to Modify
In a rental, it is important to understand what your lease and local rules allow. Many apartment residents are permitted to use compression fittings, adapters, and screw-mounted brackets that can be removed later, as long as they do not leave visible damage or alter shared building plumbing.
Before installing, consider:
- Whether you can drill into the cabinet side walls or base
- Whether you need to avoid drilling into the sink base or countertop
- How easily the system can be removed and the plumbing restored
When in doubt, choosing non-permanent mounting options, such as using existing screw holes or freestanding brackets, helps keep the system renter-friendly.
Example values for illustration.
| Situation | Key constraint | Suggested mounting idea |
|---|---|---|
| Very narrow cabinet (under about 20 inches wide) | Limited width beside plumbing | Use vertical side-wall mounting with a single or slim dual canister |
| Deep cabinet with tall clearance | Plenty of height, but crowded at the front | Mount canisters toward the rear wall, keep front area open for storage |
| Rental where drilling is discouraged | Need non-permanent hardware | Use freestanding bracket on cabinet floor or reuse existing screw holes |
| Cabinet already full of cleaning supplies | Need to preserve floor space | Mount filter housing high on side wall or back wall |
| Garbage disposal and dishwasher lines present | Many pipes and hoses competing for space | Choose a compact, single-housing system tucked beside shutoff valves |
| Shared kitchen used by multiple people | Frequent access under sink | Label shutoff valves and leave clear access in front of filter |
Space-Saving Mounting Ideas for Under-Sink Filters
Apartment cabinets often have to serve multiple purposes: storage, trash, cleaning supplies, and plumbing access. The goal is to mount the filter securely while preserving usable space and making cartridge changes manageable.
Use the Side Walls for Vertical Mounting
Side-wall mounting is one of the most effective ways to keep the cabinet floor clear. Many filter housings include brackets that can be attached to the interior cabinet wall with screws.
When planning side-wall mounting:
- Position the housing so the cartridge can drop straight down for replacement without hitting the cabinet floor.
- Leave at least a few inches below the housing to catch drips with a towel or shallow tray during maintenance.
- Avoid drilling into areas where hidden pipes or wires might run; most cabinets have safe zones near the front edges.
If drilling is not allowed, some residents use existing holes or supports inside the cabinet and pair them with compatible brackets, taking care that the filter remains stable and upright.
Mount High and Toward the Back
Mounting the filter high on the back wall or high on a side wall keeps everyday items accessible at the front of the cabinet. This location also reduces the chance of bumping the filter when placing or removing trash bins and cleaning bottles.
Consider these points when mounting high and toward the back:
- Ensure you can still reach the shutoff valve for the filter inlet.
- Plan a path for the tubing that avoids sharp bends and kinks.
- Confirm that you can still remove the housing for cartridge changes, even if you have to reach in from a slight angle.
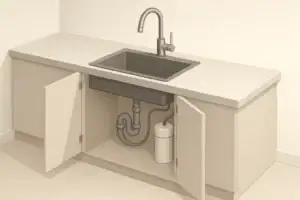
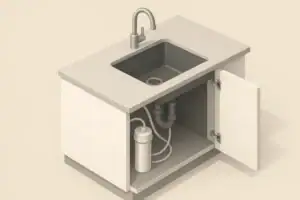
Freestanding Floor Brackets for Non-Drilling Installs
In some rentals, drilling into the cabinet may be strongly discouraged. In these cases, a freestanding bracket or frame placed on the cabinet floor can hold the filter housing upright. The bracket keeps the housing stable and prevents it from tipping.
When using freestanding placement:
- Secure tubing with clips or adhesive-backed holders to prevent strain on fittings.
- Keep the bracket far enough from the cabinet front to allow the door to close easily.
- Use a shallow waterproof mat or tray beneath the bracket as an extra layer of drip protection.
This approach is especially useful for small single-cartridge systems in tight cabinets.
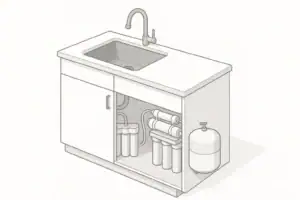
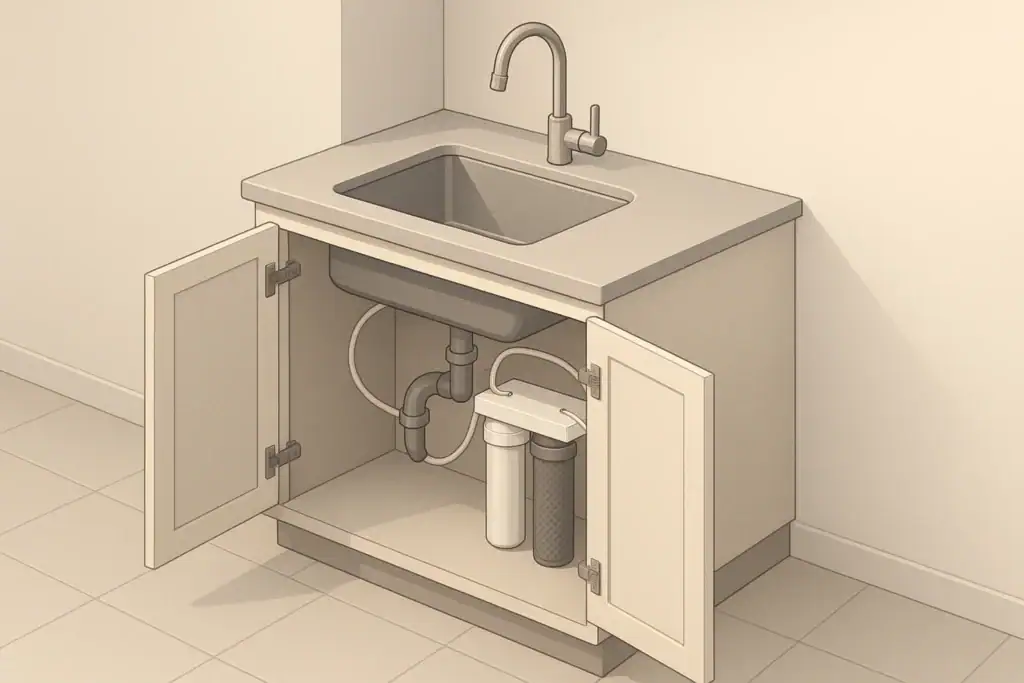
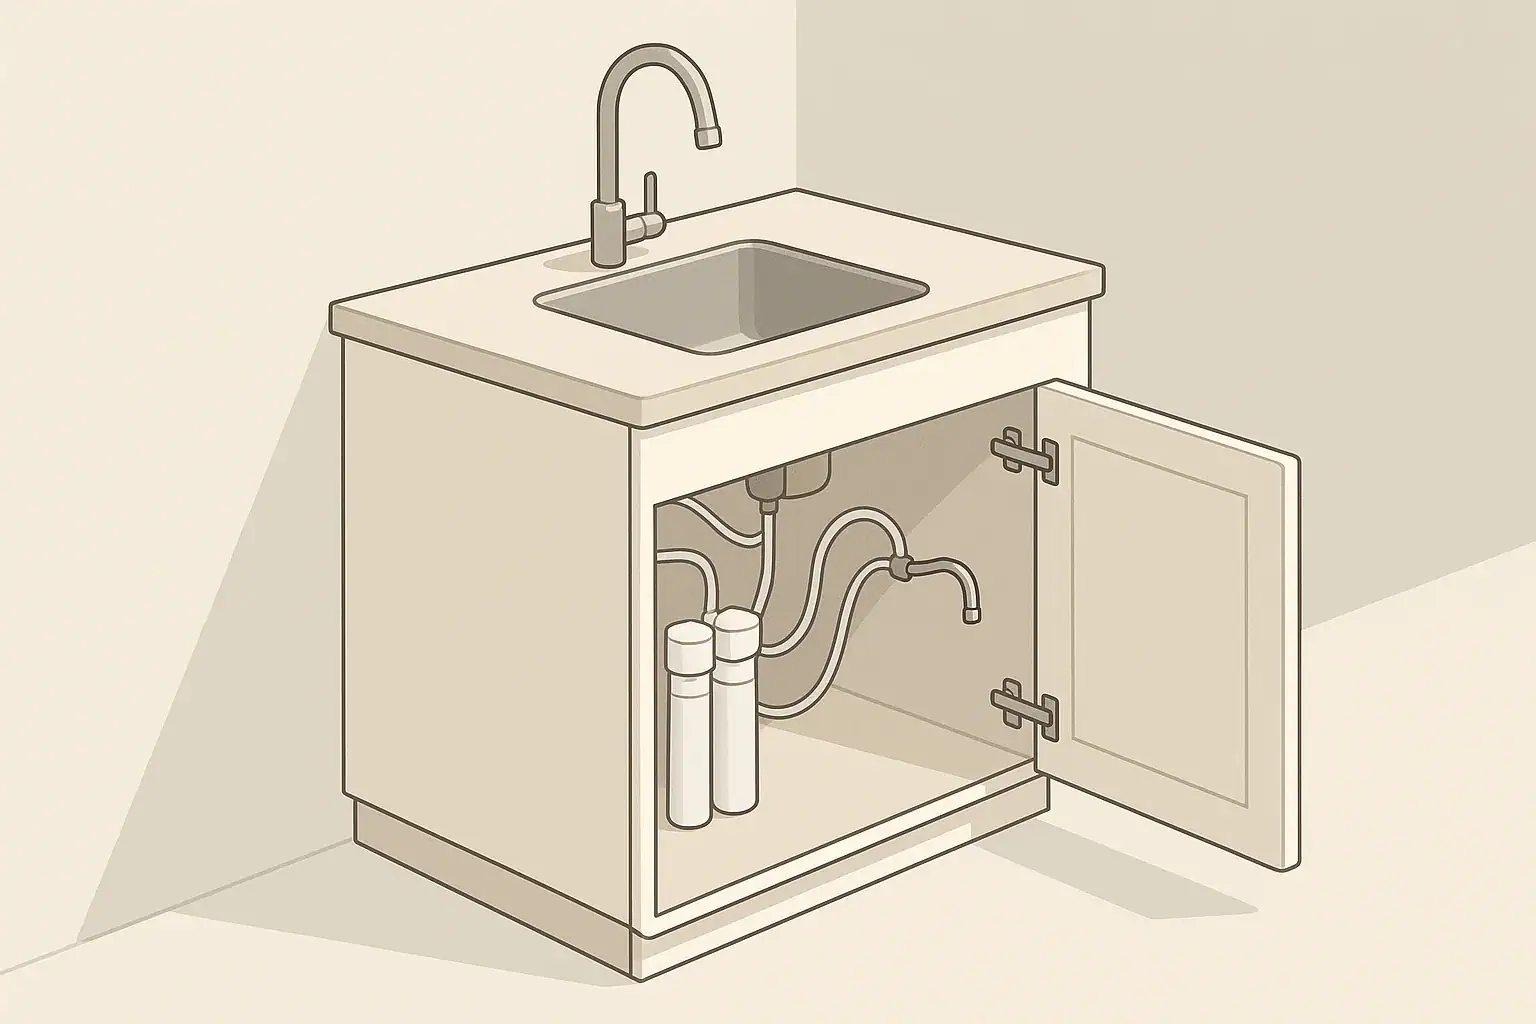
Stacked or Inline Multi-Stage Arrangements
Some under-sink systems use multiple stages (for example, a sediment cartridge followed by a carbon cartridge, or additional specialty media). In an apartment, you can often save space by arranging these canisters in a line along one wall instead of clustering them.
Space-conscious configurations include:
- Inline along the back wall: Mount two or three housings side by side, following the flow direction, so they form a narrow profile.
- Staggered heights: Where cabinet height allows, mount one housing slightly lower than the other to keep tubing routes short and access clear.
- Mixed mounting: Combine a wall-mounted first stage with a freestanding additional stage if one cartridge is replaced more often than the others.
Clever staging can preserve cabinet space while still allowing for sediment, chlorine taste and odor, and other concerns to be addressed through multiple filter types.
Tubing, Valves, and Faucet Placement in Tight Spaces
The way you route tubing and locate valves matters as much as where you mount the filter housing. Good routing keeps the installation neat, reduces kinks, and makes it easier to shut off or disconnect the filter later.
Use Compact, Clear Tubing Routes
Measure and cut tubing lengths only as long as needed, leaving gentle curves instead of tight bends. Excess loops can tangle around trash bins and may put stress on fittings, especially when the cabinet is full.
To keep tubing organized:
- Follow cabinet corners and edges rather than crossing the open floor.
- Use adhesive-backed clips or small clamps where permitted to anchor the tubing.
- Keep hot and cold lines clearly separated to avoid confusion later.
Neat routing is not only tidier but also makes it easier to inspect for drips and perform maintenance.
Apartment-Friendly Shutoff Valve Placement
An accessible shutoff valve for the filter line is helpful in apartments where residents may need to disconnect the system quickly for maintenance, inspections, or moving out. Often, the shutoff can be placed:
- Just downstream of the cold-water supply adapter feeding the filter
- In a reachable spot near the cabinet door opening
- In line with the tubing leading to the filter inlet
Labeling the filter shutoff valve and keeping it free of obstructions can save time later and avoid confusion with the main sink shutoff valves.
Choosing a Faucet Location That Fits Apartment Rules
Some under-sink filters use a dedicated drinking-water faucet, while others connect directly to a compatible main faucet. In apartments, the choice depends on lease language and countertop configuration.
Common approaches include:
- Using an existing accessory hole: Many sinks have a hole used for a sprayer or soap dispenser; replacing this with a filtered-water faucet avoids drilling new holes.
- Cold-side only connection: Some systems route filtered water through the cold side of the main faucet, which keeps the countertop unchanged.
- Temporary countertop faucet mounts: Where drilling through counters is not allowed, residents sometimes use non-invasive mounting solutions that clamp to the sink deck, checking first that they are permitted.
Always confirm what modifications, if any, are allowed to the sink or countertop before committing to a new faucet hole.
Keeping Under-Sink Storage Usable with a Filter Installed
One of the biggest concerns in apartments is losing valuable storage under the sink. With careful planning, most residents can keep trash bins and essential supplies in the cabinet alongside the filter system.
Plan for Trash Bins and Cleaning Supplies
Before installing, decide where the trash can and large bottles will go. Then mount the filter in the remaining open area instead of the other way around. Many people find success with:
- Placing the trash bin on the side opposite the filter housing
- Using stackable bins or caddies to keep supplies off the cabinet floor
- Hanging smaller items on the inside of cabinet doors to free floor space
Maintaining some clear floor space at the front of the cabinet also makes it easier to access shutoff valves and inspect the filter.
Protect the Cabinet Base from Moisture
Even with properly tightened fittings, it is a good idea to protect the cabinet bottom from occasional drips during cartridge changes or minor condensation.
Protective measures include:
- Placing a waterproof liner or tray beneath the filter housing
- Using a shallow, removable mat that can be taken out and dried
- Keeping paper products or cardboard boxes away from the immediate filter area
Simple moisture barriers can extend the life of a rental cabinet and make cleanup easier if water is spilled during maintenance.
Organize Around Accessibility
While it is tempting to use every available inch for storage, the filter housing, shutoff valve, and any pressure-relief buttons should remain reachable. When organizing around the filter:
- Keep a small open zone directly in front of the housing.
- Avoid stacking items on top of tubing, which can create kinks or stress.
- Store replacement cartridges in a labeled container under or near the sink.
This approach allows for quick visual checks and easier routine maintenance without having to fully empty the cabinet each time.
NSF/ANSI Certifications and Apartment Water Considerations
Apartment buildings in the United States often receive centrally treated municipal water. While treatment aims to meet regulatory requirements, residents may still notice chlorine odor, sediment from aging pipes, or concerns about specific contaminants. Under-sink filters can help with taste and odor and, depending on the cartridge design and certification, may also reduce certain substances.
Matching Filter Performance to Building Water Conditions
Before choosing a filter, it is useful to understand the general characteristics of your building’s water:
- Chlorine or chloramine: Commonly used for disinfection and can affect taste and smell.
- Visible sediment or rust: May appear in older buildings with aging pipe infrastructure.
- General hardness: Mineral content that may affect scaling but is often handled by other solutions beyond basic under-sink filters.
Some apartment residents review local water quality reports or basic home test results to decide which filter media characteristics to prioritize, such as activated carbon for chlorine taste and odor, or sediment pre-filtration if fine particles are present.
Why Certifications Matter in a Small-Space System
In a compact apartment installation, it is helpful to rely on filters that have been independently evaluated for specific performance claims. Common NSF/ANSI standards for drinking water treatment units include:
- NSF/ANSI 42: Related to aesthetic effects such as chlorine taste and odor, and particulate reduction.
- NSF/ANSI 53: Related to reduction of certain contaminants with health-related significance, such as some heavy metals and organic compounds.
- NSF/ANSI 401: Related to reduction claims for certain emerging compounds, such as some pharmaceuticals or personal care products.
- NSF/ANSI 58: Related to point-of-use reverse osmosis systems, which may also be installed under sinks when space permits.
When reviewing product literature, residents often look for which standards a system is certified to, along with the specific contaminants and conditions addressed by that certification. This helps align the chosen system with building water characteristics and personal priorities.
Example values for illustration.
| Standard | General focus | What residents often verify |
|---|---|---|
| NSF/ANSI 42 | Aesthetic effects (taste, odor, chlorine, particulates) | Whether the filter is certified to reduce chlorine taste and odor for more pleasant tap water |
| NSF/ANSI 53 | Selected contaminants with health-related significance | Which specific substances (such as certain metals or organic compounds) have verified reduction claims |
| NSF/ANSI 401 | Selected emerging compounds | Whether any listed pharmaceuticals or personal care products match local water concerns |
| NSF/ANSI 58 | Reverse osmosis systems | Overall system certification, including recovery and typical operating conditions for under-sink RO units |
| Material and structural safety clauses | Construction suitability | That wetted materials are appropriate for contact with drinking water under typical use |
| Performance data sheets | Verified claims and conditions | Service life, capacity, and required pressure ranges used for testing, compared with apartment plumbing |
Maintenance, Filter Changes, and Apartment-Friendly Practices
After a compact under-sink filter is installed, ongoing maintenance keeps it performing as expected and helps prevent clutter or leaks under the sink.
Plan for Cartridge Changes from the Start
Mount the filter so that you can remove and replace cartridges without disconnecting the whole system. This usually means leaving vertical space under the housing and enough room to twist off sumps or pull out cartridges.
Useful planning habits include:
- Noting the recommended replacement interval or capacity on a label inside the cabinet
- Keeping a small towel or tray available under the sink for changeouts
- Tracking approximate usage if the system’s guidance is based on gallons filtered
Watch for Early Cues of Needed Maintenance
Even in an apartment setting, several cues can suggest that attention is needed before the scheduled replacement interval, such as:
- Noticeable reduction in flow rate through the filtered water outlet
- Return of chlorine taste or odor that had previously improved
- Visible discoloration of clear housings, if applicable, from trapped sediment
These changes can reflect increased sediment load, higher usage than expected, or reaching the functional end of the cartridge’s life.
Keep the Installation Easy to Remove
Apartment residents often aim for installations that can be removed with minimal tools and effort when moving. To keep things simple:
- Retain original faucet parts, adapters, and aerators labeled in a small bag.
- Use fittings that can be reversed without cutting or soldering.
- Keep a basic note of how the system is connected to make removal and reinstallation straightforward.
A well-planned, space-saving under-sink filter can serve multiple apartments over its lifetime, moving with its owner while continuing to fit into compact kitchen cabinets.
Frequently asked questions
Can I install an under-sink filter in a rental apartment without drilling?
Yes. Many renters use compression fittings, supply-line adapters, adhesive-backed clips, or freestanding brackets that avoid drilling and permanent changes. Always check your lease or confirm with the landlord first so you follow any restrictions and leave the installation removable.
What are the best mounting locations for under-sink filters in shallow apartment cabinets?
Side walls mounted vertically and high on the back wall are common choices because they keep the cabinet floor clear and preserve storage. If drilling is not permitted, a freestanding floor bracket toward the rear also works while keeping front space available for bins.
How much clearance do I need to change cartridges in an apartment under-sink filter?
Leave enough vertical space for the cartridge or sump to drop straight down and room to grip or turn it; commonly this means reserving roughly 4–8 inches beneath the housing depending on the model. Also plan a small drip tray or towel area to manage any spills during changes.
Which NSF/ANSI certifications should renters look for when choosing an under-sink filter for apartment water?
Look for NSF/ANSI 42 for aesthetic improvements like chlorine taste and odor reduction, NSF/ANSI 53 for verified health-related contaminant reductions, and NSF/ANSI 401 for certain emerging compounds; NSF/ANSI 58 applies to reverse-osmosis systems. Review the product’s performance data sheet to confirm which specific contaminants and capacities were tested.
How can I protect the cabinet from leaks and condensation with an under-sink filter installed?
Place a waterproof liner or shallow tray beneath the filter and consider a removable mat to catch drips during maintenance. Secure tubing to prevent strain on fittings and keep replacement parts and a towel handy so minor leaks can be cleaned up quickly without damaging the cabinet.
Recommended next:
- Under-Sink vs Pitcher: Which Is Better for Families?
- Best Under-Sink Filters for Chlorine Taste & Odor
- Under-Sink Filter Installation: Tools, Parts, and Common Mistakes
- No-Drill Under-Sink Filters for Renters: What’s Possible?
- Under-Sink Filters for Lead Reduction: What Certifications to Look For
- Under-Sink Filter Flow Rate Explained: Why GPM Matters
- More in Under-Sink Filters →
- NSF/ANSI standards explained (42/53/401/58)
- Clear trade-offs: pitcher vs faucet vs under-sink vs RO
- Maintenance planning: cost per gallon and replacement cadence