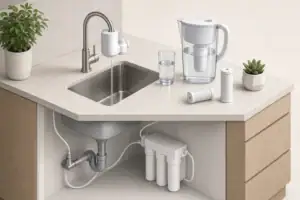
Reverse osmosis (RO) systems often start out delivering a steady stream of water, then gradually slow to a trickle. In most home systems, low flow at the RO faucet comes down to three broad areas:
- Incoming water pressure and drain performance
- Storage tank capacity and air charge
- Clogged prefilters, carbon stages, or RO membrane
Because RO relies on pressure to push water through a semi-permeable membrane, anything that restricts pressure or blocks the flow path can create very slow output. Understanding where the restriction is happening helps you fix the problem without replacing parts unnecessarily.
This guide walks through each major cause, how to test it safely at home, and what maintenance practices help keep flow rates in a usable range.
Why Reverse Osmosis Flow Slows Down
Reverse osmosis (RO) systems often start out delivering a steady stream of water, then gradually slow to a trickle. In most home systems, low flow at the RO faucet comes down to three broad areas:
- Incoming water pressure and drain performance
- Storage tank capacity and air charge
- Clogged prefilters, carbon stages, or RO membrane
Because RO relies on pressure to push water through a semi-permeable membrane, anything that restricts pressure or blocks the flow path can create very slow output. Understanding where the restriction is happening helps you fix the problem without replacing parts unnecessarily.
This guide walks through each major cause, how to test it safely at home, and what maintenance practices help keep flow rates in a usable range.
First Checks: How Low Is “Low” and When Did It Start?
Before diving into specific components, it helps to define the problem as clearly as possible. Some RO systems are designed for relatively low output compared with standard faucets, so a modest flow may be normal.
Establishing a Baseline Flow
If you can, recall how the system performed when it was new or recently serviced. Helpful questions include:
- Did the RO faucet once fill a glass in under a minute but now takes several minutes?
- Does the flow start strong and then quickly drop to a trickle?
- Has the system always seemed slow since installation?
As a rough example, many typical under-sink RO systems are designed to provide on the order of a few ounces per minute at the dedicated faucet, not a full-force stream. However, if the flow has dropped dramatically compared with what you’re used to, troubleshooting is warranted.
Simple Flow Test
You can do a basic flow test with a measuring cup and a timer:
- Fully open the RO faucet.
- Collect water for 30–60 seconds in a container with volume markings.
- Note how long it takes to fill a given amount of water.
This gives you a point of comparison before and after any adjustments, helping you confirm whether changes are actually improving performance.
Example values for illustration.
| If you notice… | Most likely area | What to check first |
|---|---|---|
| Strong flow for a few seconds, then a rapid drop | Storage tank | Tank air charge and tank shutoff valve |
| Weak flow immediately, even with full tank | Clogged filters or faucet restriction | Prefilters, postfilters, faucet aerator |
| Very slow tank refill time after heavy use | Low feed pressure or membrane issue | House pressure, feed valve, membrane age |
| System was never fast, even when new | System sizing or pressure | Design capacity vs. household demand |
| Fast normal faucets but slow RO faucet only | RO system components | RO tubing, flow restrictor, internal valves |
| Slow RO flow and slow other cold faucets | House plumbing or supply | Main shutoff, pressure regulator, sediment buildup |
Checking Water Pressure and Supply to the RO System
Reverse osmosis relies heavily on adequate incoming water pressure. When pressure at the RO feed line is too low, the membrane produces purified water more slowly, and the storage tank refills at a reduced rate.
Confirm the Feed Valve and Lines Are Open
Begin with the simplest checks:
- Locate the cold-water feed valve under the sink that supplies the RO system.
- Make sure it is fully open (handle aligned with the pipe for most valves).
- Inspect the small-diameter tubing from the feed valve to the first RO prefilter for kinks or crushing.
A partially closed valve or pinched tube can significantly restrict flow into the system, even if household water pressure is otherwise normal.
Household Water Pressure
Typical municipal water pressure is often in a moderate range that works well for RO. However, some homes have unusually low pressure, or pressure that drops at certain times of day when demand is high in the neighborhood.
You can get a general sense of pressure with a simple gauge connected to an outdoor spigot or a laundry faucet. If pressure appears consistently low, options include:
- Checking for partially closed main shutoff valves
- Inspecting or adjusting a household pressure regulator, if present
- Consulting a plumber if there are widespread pressure issues in the home
Some RO systems use booster pumps when natural pressure is not sufficient; if your system has one, verify that it has power and is operating quietly and consistently.
Drain Line and Flow Restrictor
The RO membrane produces both purified water and a reject stream that flows to the drain through a small tube and flow restrictor. If the drain line is blocked or the restrictor is malfunctioning, pressure behavior across the membrane can be affected, sometimes reducing performance.
- Check that the drain saddle clamp is tight but not crushing the drain pipe.
- Inspect the drain tube for kinks or sagging loops that trap water.
- Listen for water intermittently moving to the drain while the system is producing water; a complete absence of any drain sound over time may indicate a blockage.
Flow restrictors are internal parts sized for the membrane; if they clog with scale or debris, production can slow. They are usually replaced when the membrane is changed.
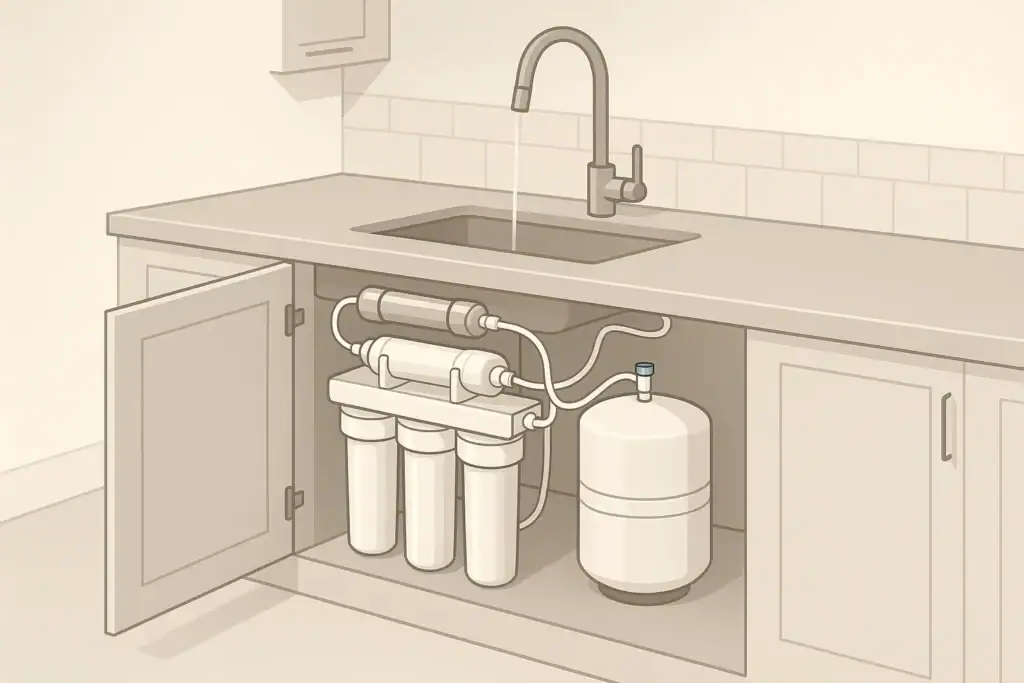
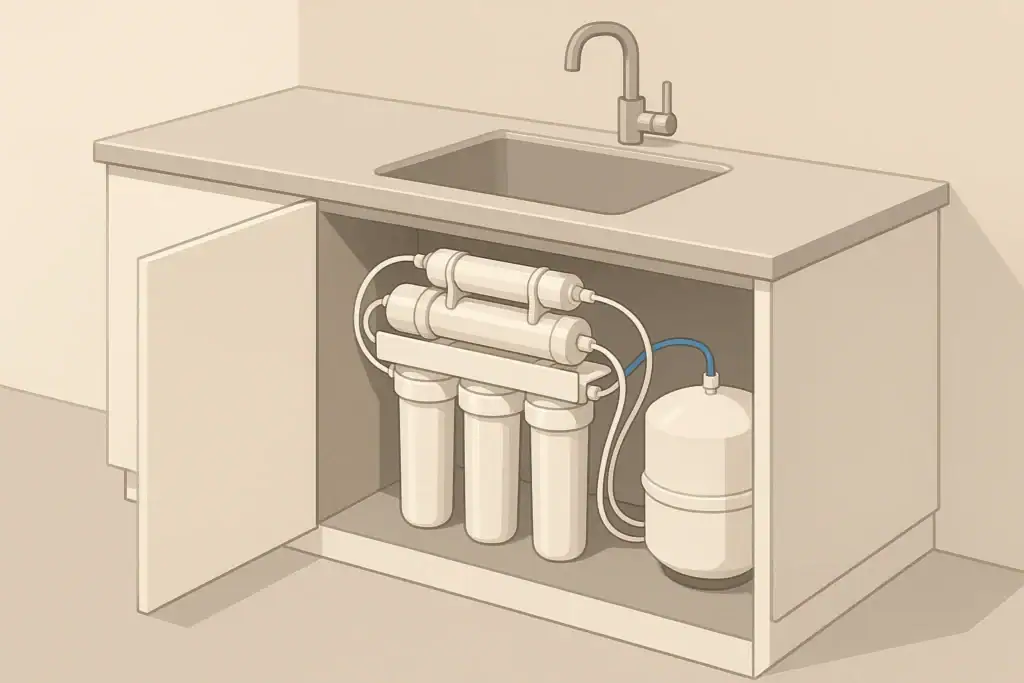
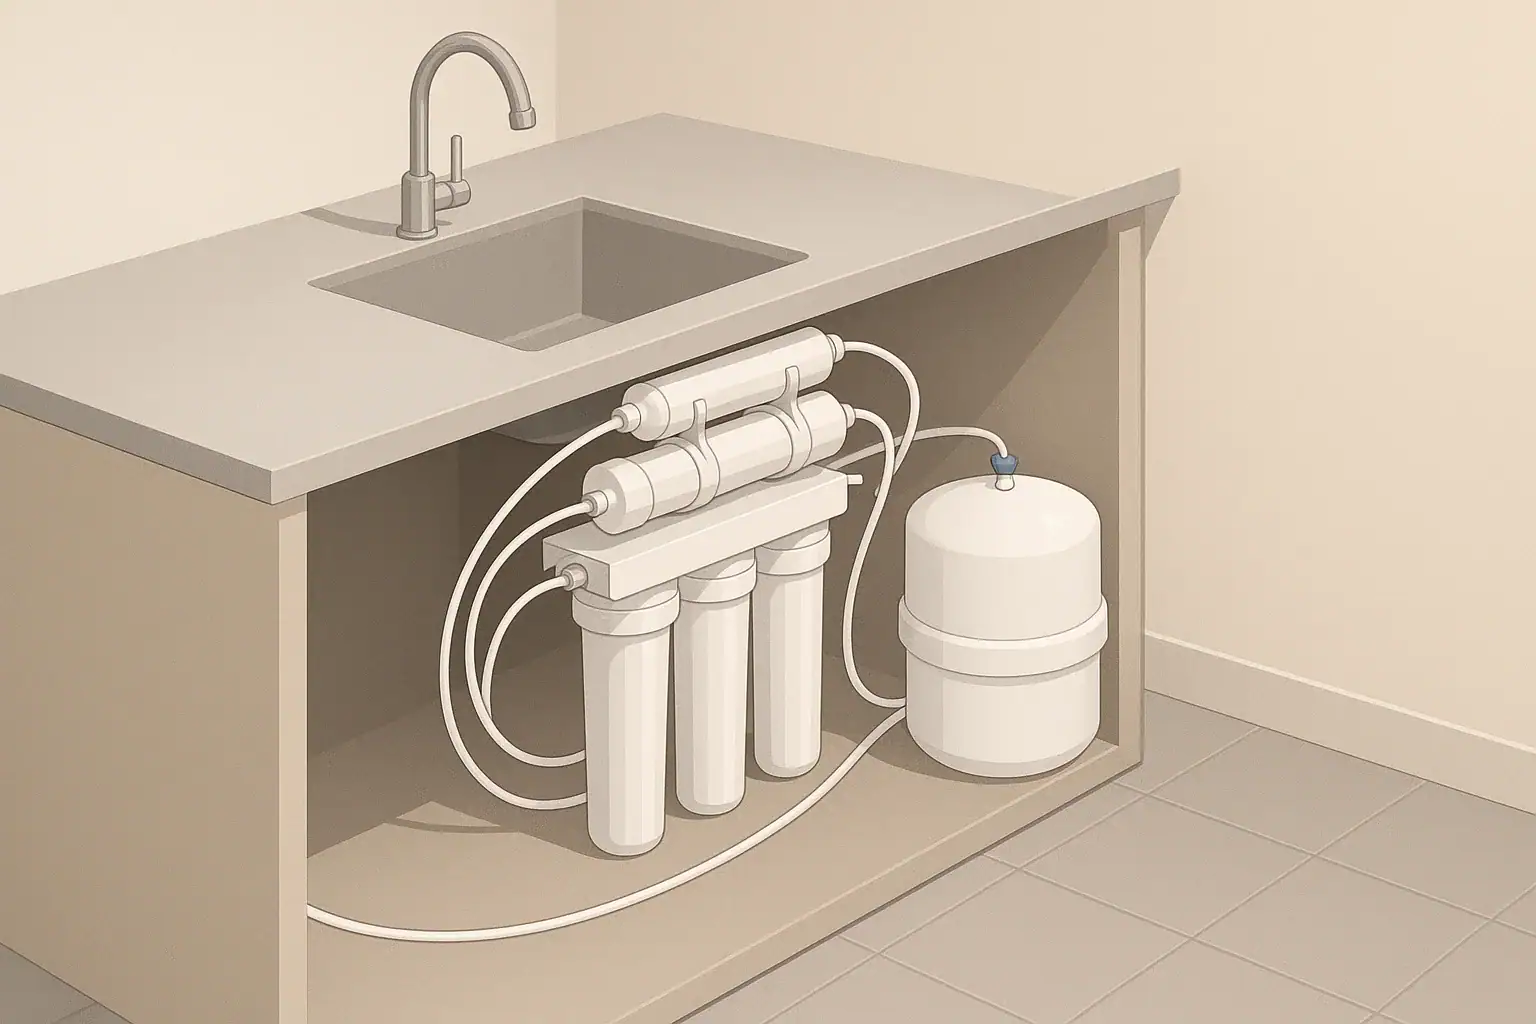
Diagnosing RO Storage Tank Problems
Most pressurized storage tanks used in under-sink RO systems make purified water available quickly. The tank contains water on one side of a flexible bladder and air on the other. Flow problems frequently involve this tank.
Is the Tank Actually Full?
A nearly empty tank naturally produces a weak flow. Open the RO faucet and let it run:
- If flow is initially strong and then decreases after a short time, the tank may be small or partially filled.
- If the tank takes an unusually long time to refill after heavy use, production from the membrane may be slow due to pressure or filter issues.
Gently lift or rock the tank to estimate its fullness. A full tank will feel noticeably heavy compared with an empty or partially filled tank.
Tank Air Pressure (Precharge)
The air side of the RO tank is precharged to a specific pressure when empty. If this air pressure drifts too low or too high over time, it can cause low flow or loss of usable capacity.
General steps to check and adjust (follow your manufacturer’s instructions):
- Turn off the feed water to the RO system.
- Open the RO faucet and allow the tank to empty completely.
- Locate the air valve (similar to a tire valve) on the tank.
- Use a low-pressure gauge to read the air charge with the tank empty.
- Adjust with a hand pump if needed, staying within the typical range recommended for home RO tanks.
Do not add or release air from a tank that still contains significant water; this gives inaccurate readings and can stress the bladder.
Bladder or Internal Tank Failure
Over many years of service, the internal bladder can wear out or develop leaks. Symptoms can include:
- Very little water available before flow drops to a trickle
- Water emerging in spurts with irregular pressure
- Tank feeling full and heavy but delivering only a small volume of water
In these cases, replacing the tank is usually more practical than repair. Before assuming the tank has failed, rule out low feed pressure and clogged filters, since those are more common and easier to fix.
Clogged Prefilters, Carbon Filters, and RO Membranes
RO systems typically use several stages of filtration: one or more sediment prefilters, carbon blocks or cartridges, the RO membrane, and often a postfilter. Any of these can clog and reduce flow, especially if replacement intervals are extended.
Sediment Prefilter Issues
The sediment prefilter is the first line of defense and protects downstream carbon and the membrane from particles such as sand, rust, and silt. When it clogs, pressure drops across the filter and the entire system slows.
Signs of a clogged sediment filter include:
- Noticeable drop in RO flow compared with previous weeks or months
- Filter housing showing visible discoloration or heavy debris buildup
- System has exceeded the typical time or volume guideline for this stage
Replacing the sediment filter regularly, even if water still tastes fine, helps maintain both flow and membrane life.
Carbon Filter Restrictions
Carbon stages are used to reduce chlorine or chloramine (which can damage the membrane), as well as to improve taste and odor. They can also clog over time with fine particles, organic compounds, and scale.
If the carbon stage is heavily loaded:
- RO flow may decline gradually.
- There may be changes in taste or odor at the faucet.
- The membrane may be at risk if chlorine breakthrough occurs.
Replacing carbon filters on schedule is important both for performance and for protecting the membrane from chemical damage.
RO Membrane Fouling or Scaling
The RO membrane is the heart of the system. Over time, it can accumulate scale, organic fouling, or trapped fine particles.
Common indicators of a worn or fouled membrane include:
- Very slow tank refill time, even with new prefilters
- Noticeable change in taste compared with earlier performance
- Total dissolved solids (TDS) readings, if you measure them, trending upward over months
When replacing the membrane, it’s good practice to also replace the flow restrictor that controls the reject water rate, since these are typically matched pairs.
Separating Tank Problems from Filter Problems
It can be difficult to tell whether slow flow is due to the tank or the filters and membrane. A few simple tests can help you narrow it down.
Bypass-Test the Tank (If Safe to Do So)
On many systems, you can temporarily isolate the tank to observe membrane production directly. Only do this if your system’s tubing and instructions allow for it, and always watch for leaks.
- Close the valve on top of the storage tank.
- Open the RO faucet and observe the flow after any residual tank water has been used.
- If the flow from the membrane alone is extremely weak but steady, the tank is not the primary restriction.
- If the membrane flow seems reasonable but overall performance is poor with the tank open, the tank or its air charge may be suspect.
This test only provides a general indication; the membrane’s natural production rate is much lower than tank-assisted faucet flow.
Time to Refill the Tank
Another indicator is how long the tank takes to refill after being mostly drained:
- If refill time is much longer than in the past, the membrane output may be reduced by low pressure or clogging.
- If refill time seems normal but available drawdown volume is small, the tank capacity or air charge may be the issue.
Make sure that prefilters have been replaced on schedule before assuming the membrane or tank have failed.
RO Faucet, Tubing, and Other Flow Restrictions
Not all low-flow problems are inside the filters or tank. The faucet, tubing, and fittings themselves can also create bottlenecks.
Inspect the Faucet Aerator and Spout
Some RO faucets have a small aerator or flow outlet at the tip. Over time, this can collect debris or scale, especially in areas with higher hardness or sediment.
- Gently unscrew any removable tip from the RO faucet.
- Rinse or soak in a mild vinegar solution if mineral deposits are visible.
- Reassemble and test flow again.
Do not enlarge or drill out any orifices, as this may cause splashing or alter pressure behavior in the system.
Check for Kinked or Crimped Tubing
Under-sink storage can sometimes compress or bend RO tubing sharply behind cleaning supplies, bins, or other items.
- Trace each tube from the feed valve through each filter to the tank and faucet.
- Straighten any sharp bends and re-route tubing if necessary.
- Ensure that tubing is not pressing tightly against cabinet walls or hardware.
Even a small pinch in the narrow RO lines can noticeably reduce flow at the faucet.
Internal Valves and Automatic Shutoffs
Many RO systems use an automatic shutoff valve (ASO) that stops production when the tank is full. If this valve fails or becomes partially obstructed, it may restrict flow.
Signs of ASO valve or internal component issues can include:
- System not shutting off when the tank is full (continuous drain flow)
- Intermittent spurts of flow with strange cycling sounds
- Normal prefilter condition but poor performance overall
These issues can be more complex to diagnose. If you suspect an internal valve problem and basic filter and tank checks do not resolve it, consulting the installation manual or a water treatment professional may be helpful.
Maintenance Habits to Prevent Low RO Flow
Most low-flow problems develop gradually and can be minimized with consistent maintenance. Instead of waiting until the faucet slows dramatically, try to set up a simple service schedule based on time, water quality, and use.
Typical Replacement Intervals (General Examples)
Actual intervals depend on specific equipment, water quality, and household usage, but many homeowners use patterns like:
- Sediment filters: replaced every several months, or sooner with very turbid water
- Carbon filters: replaced every several months to a year, depending on capacity and chlorine levels
- RO membrane: replaced every few years when performance declines
- Postfilters (polishing stages): replaced on a similar schedule to carbon filters
Always follow your manufacturer’s guidance first, using these as broad examples.
Tracking Performance Over Time
Simple tracking can alert you to issues before flow becomes unworkable:
- Record installation and replacement dates on a label or in a log.
- Note any major changes in taste, odor, or refill time.
- If you use a TDS meter, jot down occasional readings at the RO faucet and compare over months.
Slight changes over long periods are normal, but sudden drops in performance are a cue to inspect filters, pressure, and the tank more closely.
NSF/ANSI Certifications: What They Do and Do Not Promise
Many RO systems and filter cartridges carry NSF/ANSI certifications. These certifications focus on performance and safety under defined test conditions, but they are not direct guarantees of a specific flow rate in every home.
Relevant Standards for RO Systems
In the context of reverse osmosis and under-sink filtration, you’ll commonly see references to:
- NSF/ANSI 42 for aesthetic effects such as taste and odor reduction
- NSF/ANSI 53 for specific contaminant reduction claims
- NSF/ANSI 58 for complete RO drinking water treatment systems
- NSF/ANSI 401 for certain emerging compounds
For homeowners concerned with low flow, it’s important to understand that these standards address things like material safety and contaminant reduction under standardized conditions. Actual flow at your faucet can still be affected by pressure, maintenance, and installation details.
Example values for illustration.
| Standard | Applies to | What to verify on documentation |
|---|---|---|
| NSF/ANSI 42 | Aesthetic effects (taste, odor, chlorine) | That the specific cartridge or system is listed, and which aesthetic claims were tested |
| NSF/ANSI 53 | Health-related contaminant reduction claims | Which contaminants were evaluated and any conditions (such as filter life) that apply |
| NSF/ANSI 58 | Complete RO systems | That the full system, not just individual components, is certified for RO performance |
| NSF/ANSI 401 | Certain emerging compounds | Which compounds were included in testing and any special usage notes |
| Material safety | System and component construction | That wet-contact materials were evaluated under the applicable standard |
| Structural integrity | Housings and pressure-bearing parts | That pressure performance was assessed within the intended operating range |
When to Call a Professional for Low RO Flow
Many low-flow issues can be solved with simple steps: checking valves, replacing prefilters, adjusting tank air charge, or clearing minor restrictions. However, it may be time to seek professional help when:
- Household water pressure appears abnormal beyond the RO system alone.
- There are signs of leaks, corrosion, or damaged tubing near the RO unit.
- You suspect internal valve failure, complex plumbing interactions, or drain line code issues.
- Performance remains poor even after following manufacturer-recommended maintenance.
A qualified installer or plumber familiar with RO systems can test pressure, inspect components, and confirm whether parts such as the membrane, tank, or valves should be replaced. With a clear understanding of how pressure, the storage tank, and filters interact, you can describe symptoms more precisely and get more targeted assistance.
Frequently asked questions
How can I tell whether the storage tank or the filters/membrane are causing low RO flow?
Perform a tank bypass test by closing the tank valve and opening the RO faucet to observe the membrane’s direct output; if membrane flow is extremely weak, the filters or membrane are likely the issue, but if membrane flow is reasonable while faucet flow is poor with the tank open, the tank or its air charge may be the cause. Also check tank refill time and prefilter condition—slow refill with clean prefilters points toward the membrane or feed pressure.
What air precharge should I set on an RO storage tank and how do I check it?
With the tank emptied, measure the air precharge using a low-pressure gauge; typical recommendations for many small home RO tanks are in the neighborhood of 5–7 psi when empty, though some manufacturers specify slightly different values. Always follow the system manual, and never measure or adjust the air charge while the tank still contains significant water.
Can low household water pressure cause slow RO flow, and what fixes are effective?
Yes—low feed pressure reduces membrane production and lengthens tank refill time. Start by confirming the feed valve is fully open, measure household pressure with a gauge, and if pressure is consistently low consider correcting a partially closed main valve, adjusting a pressure regulator, or installing a booster pump if appropriate.
How often should prefilters and the RO membrane be replaced to avoid reduced flow?
Sediment and carbon prefilters are commonly replaced every 3–12 months depending on water quality and usage, while RO membranes typically last 2–5 years before performance drops. Track flow, refill time, and optionally TDS readings to decide if components need earlier replacement for your conditions.
Could the faucet, tubing, or fittings cause low flow even if filters and tank look fine?
Yes—small aerator screens, mineral buildup at the faucet tip, kinked or crushed tubing, and partially closed or faulty internal valves can all restrict flow. Inspect and clean the faucet tip, straighten or replace tubing, and check fittings and ASO components before assuming an internal filter failure.
Recommended next:
- Reverse Osmosis 101: What RO Removes (and What It Doesn’t)
- NSF/ANSI 58 Explained: What It Means for RO Systems
- RO vs Carbon Under-Sink: Taste, TDS, and Maintenance Compared
- RO System Installation Guide: Space-Saving Layout Under the Sink
- RO Waste Water Ratio: What’s Normal and How to Reduce It
- RO Filter Replacement Schedule: Prefilters vs Membrane
- More in Reverse Osmosis (RO) →
- NSF/ANSI standards explained (42/53/401/58)
- Clear trade-offs: pitcher vs faucet vs under-sink vs RO
- Maintenance planning: cost per gallon and replacement cadence