A noticeable drop in water pressure immediately after installing a whole house water filter is common, but it is not inevitable. A new filtration system changes how water flows through your plumbing, and even small restrictions can affect showers, faucets, and appliances.
Understanding what “normal” looks like is the first step:
- Most homes are designed to work well in a general range of household water pressure (for example, many plumbers consider a mid-range value comfortable).
- Filters add resistance to flow. The finer the filtration, the more potential there is for pressure loss.
- If the system was not sized or installed correctly, that resistance can become noticeable throughout the house.
Not all low pressure is caused by the filter itself. Existing plumbing issues can show up more clearly once a filter is added, so it helps to work through the problem methodically.
Why Whole House Pressure Drops After a New Filter Install
A noticeable drop in water pressure immediately after installing a whole house water filter is common, but it is not inevitable. A new filtration system changes how water flows through your plumbing, and even small restrictions can affect showers, faucets, and appliances.
Understanding what “normal” looks like is the first step:
- Most homes are designed to work well in a general range of household water pressure (for example, many plumbers consider a mid-range value comfortable).
- Filters add resistance to flow. The finer the filtration, the more potential there is for pressure loss.
- If the system was not sized or installed correctly, that resistance can become noticeable throughout the house.
Not all low pressure is caused by the filter itself. Existing plumbing issues can show up more clearly once a filter is added, so it helps to work through the problem methodically.
Distinguishing Normal Flow Loss From a Problem
A whole house filter will almost always reduce water flow a bit. The key is deciding whether the change is within a reasonable range or indicates a problem that needs attention.
Signs the Pressure Drop Is Probably Normal
- Only a slight difference at high-demand fixtures such as multiple showers running at once.
- Single fixtures (one shower, one sink) still feel usable, even if not as strong as before.
- No sudden changes over time; performance is consistent from the day of installation.
- The system’s rated flow (for example, a general mid-range whole house flow) matches your typical usage pattern.
Signs You May Have a Real Problem
- Pressure drops are severe at all fixtures, all the time.
- Some fixtures barely flow or stop when another fixture is turned on.
- Pressure was fine right after the install but declined rapidly within days or weeks.
- The filter housings, valves, or plumbing feel unusually noisy, or you hear whistling or hammering sounds.
When in doubt, start with simple visual checks and safe, non-invasive tests before adjusting valves or disassembling anything.
Example values for illustration.
| What you notice | When it happens | Most likely category | First safe check |
|---|---|---|---|
| All fixtures are weak | Immediately after install | Installation or sizing issue | Confirm inlet/outlet orientation and valve positions |
| One bathroom is weak | After filter install | Local plumbing restriction | Check that fixture’s shutoff valves and aerators |
| Pressure was fine, then dropped | Days to weeks later | Clogged cartridge or sediment | Inspect pre-filter and consider cartridge change |
| Pressure surges then falls | During heavy use | Supply or pressure regulator issue | Compare pressure before and after filter with gauges |
| Loud hissing at filter | Whenever water runs | Excessive restriction | Verify plumbing size and any partially closed valves |
| Outdoor spigots unaffected | After filter install | Bypass/branch configuration | Confirm which lines are on the filtered loop |
Step-by-Step Checks: Is the Filter Really to Blame?
Before focusing on the filter, confirm that the main water supply and plumbing are working as expected. Many checks are visual and do not require tools.
1. Confirm the Problem Is House-Wide
- Test several fixtures: a shower, a bathroom sink, the kitchen sink, and an outdoor spigot.
- Note where pressure is low and where it is normal or strong.
If only one area is affected, the issue may be local (a clogged aerator, a partially closed shutoff valve, or a fixture-specific restriction) rather than filter-related.
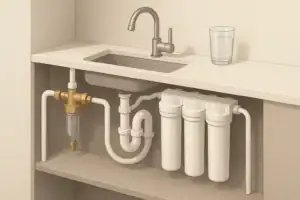
2. Check for a Bypass Option
Many whole house systems include a bypass line:
- A three-valve setup (inlet, outlet, and bypass) or a dedicated bypass valve.
- In bypass mode, water skips the filters and flows directly to the house.
With the system in bypass (if provided):
- Compare water pressure before and after switching to bypass.
- If pressure returns to normal in bypass, the restriction is likely within the filter system.
- If pressure remains low, the cause may be elsewhere (supply, regulator, or upstream plumbing).
Always return the system to the normal filtration position after testing, if that is how you intend to use it.
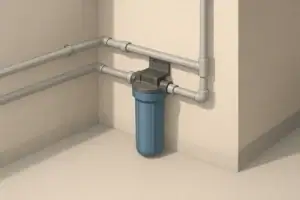
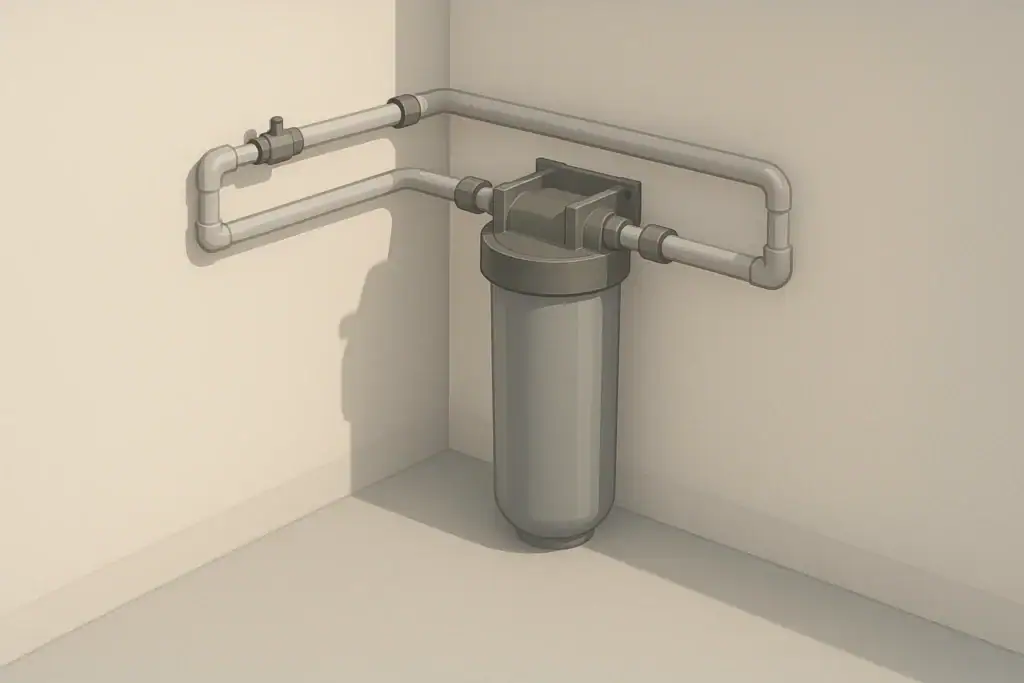
3. Inspect Shutoff Valves and Orientation
Near the filter you should see valves on the inlet and outlet, and sometimes additional isolation valves. Confirm that:
- All valves that should be open are fully open (turned completely in the open direction).
- No temporary construction valves or plugs were left partially closed.
- The system is plumbed according to the marked flow direction (inlet to outlet).
A partially closed ball valve or a reversed flow direction can significantly reduce pressure through the media and internal passages.
4. Compare Pressure Before and After the Filter (If Possible)
If you have pressure gauges or hose bibs before and after the filter, you can compare:
- Static pressure (when no water is running) at both points.
- Dynamic pressure (with one or more fixtures running) at both points.
A modest drop under flow is expected, but a large difference indicates a restriction at the filter, cartridges, or valves nearby. Simple screw-on gauges for hose spigots or laundry taps can be used for approximate readings.
Common Installation-Related Causes of Low Pressure
If the issue appears right after installation and the bypass test points to the filter, the cause is often related to design or installation details.
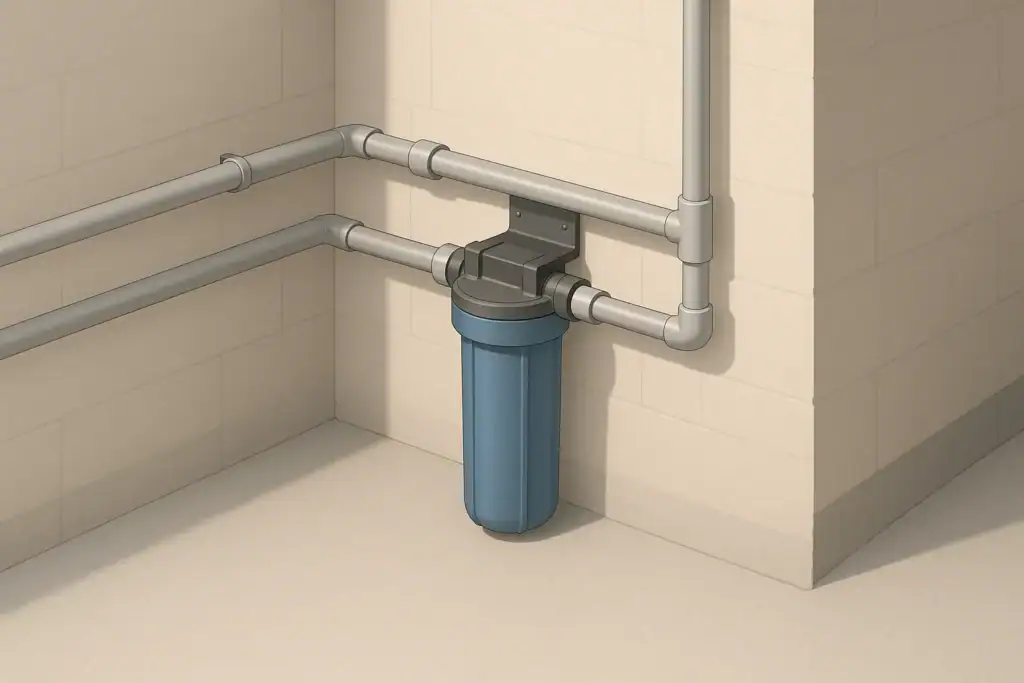
Incorrect Pipe Sizing
Whole house filters should generally match the diameter of the main supply line, or be sized in a way that maintains adequate flow. If the system uses significantly smaller pipe or fittings than the rest of the plumbing, it can become a bottleneck.
Examples of restrictive arrangements include:
- Reducing a larger main line down to a much smaller size through the filter and not upsizing again.
- Long runs of small-diameter tubing to and from the filter, especially with sharp bends.
- Multiple filters or devices placed in series without accounting for total flow resistance.
In some cases, reconfiguring the plumbing to use larger fittings or shorter runs can noticeably improve flow.
Undersized Filter for Household Demand
Whole house filters are designed for a certain range of flow rates. If your household often uses several fixtures at once (for example, two showers, a dishwasher, and a washing machine), a small filter housing or fine media may not keep up comfortably.
Signs the filter may be undersized include:
- Pressure is acceptable when one fixture is running but collapses during multi-fixture use.
- Pressure loss is more pronounced at the farthest fixtures from the main line.
- The filter housing is noticeably small compared with the main line and overall plumbing.
In high-demand homes, larger housings, multiple parallel filters, or systems designed for higher flow can reduce pressure loss.
Cartridge or Media Type Too Restrictive
Some filter cartridges, especially very fine sediment or specialty chemical media, offer greater resistance to flow than basic sediment or general-purpose carbon cartridges. If the installed cartridge was chosen for maximum removal of certain contaminants but not for flow, the result can be a strong pressure drop.
Consider:
- Whether multiple stages are needed for every faucet, or if some treatment can be located at the point of use (e.g., under-sink) instead of whole house.
- Using staged filtration: a coarser pre-filter to catch sediment first, followed by finer media, so that the finer media does not plug as quickly.
Trapped Air and Incomplete System Flushing
After a new install, air often remains in the housings and plumbing. Until it is fully purged, you may hear sputtering or experience uneven pressure.
To address trapped air safely:
- Open a cold water faucet closest to the filter, then slowly open the filter’s inlet valve to let water enter gradually.
- Once water is flowing steadily without spurts at that faucet, open additional faucets to help purge air from the system.
- Follow any specific flushing instructions for new cartridges or media, including recommended time or volume of water.
If low pressure remains after thorough flushing, the cause is likely not just trapped air.
Sediment, Clogging, and Early Cartridge Plugging
Low pressure that develops days or weeks after installation often points to sediment or clogging rather than an installation mistake. A new filter can act as the first line of defense against sediment that previously flowed freely through the plumbing.
How Sediment Affects Flow
Sediment can be fine (like silt) or coarse (like sand and rust flakes). When it collects in cartridges and housings, it blocks water pathways and increases resistance. This can be especially noticeable in areas with:
- Private wells with variable water clarity.
- Older distribution pipes feeding the property.
- Seasonal changes that stir up sediment in supply systems.
In many cases, the sudden presence of a filter makes sediment problems visible because the filter is now capturing material that previously went into your plumbing and fixtures.
Checking and Replacing Cartridges
If your system uses replaceable cartridges, inspect them:
- Turn off the water and relieve pressure according to manufacturer instructions.
- Open the housing carefully and remove the cartridge.
- Look for heavy discoloration, slime, or visible clogging in the folds or pores.
If a new cartridge restores normal pressure but becomes clogged again quickly, you may need:
- A coarser or higher-capacity pre-filter to handle sediment.
- More frequent cartridge changes, at least initially.
- Consultation with a water professional about sediment management options.
Using Sediment Pre-Filters Strategically
Pre-filters are often used upstream of carbon or specialty media to intercept larger particles. This can help:
- Extend the service life of more expensive cartridges.
- Maintain more consistent flow and pressure between maintenance intervals.
- Reduce turbidity and visible particles throughout the home.
Pre-filters come in different micron ratings and styles (pleated, spun, and others). A slightly coarser pre-filter that still captures the bulk of visible sediment may be a good balance between protection and flow.
Pressure Regulators, Supply Issues, and Plumbing Layout
Not all low pressure after a filter install is caused by the filter. Sometimes the new system simply exposes existing limitations in the supply or plumbing layout.
Pressure-Reducing Valve (PRV) Behavior
Many homes, especially those on municipal supply, use a pressure-reducing valve to keep downstream pressure in a comfortable range. A PRV that is set very low, or one that is partially obstructed or aging, can contribute to pressure problems, especially when extra resistance from a filter is added.
Consider:
- Whether your home has a PRV, typically located near where the main line enters.
- Whether the PRV was adjusted or disturbed during the filter installation.
- Having a licensed plumber evaluate or adjust the PRV if pressures are consistently low.
Municipal vs. Well Supply Constraints
On municipal water:
- Supply pressure can vary by time of day and neighborhood demand.
- Adding a filter can make low-supply periods feel more noticeable.
On private wells:
- Well pump capacity, pressure tank size, and pressure switch settings all affect available flow.
- Filters add resistance on top of the pump’s capabilities. A marginal pump may struggle during high demand.
Comparing pressure before and after the filter, and reviewing pump or pressure tank behavior, can help distinguish filter-related issues from supply limitations.
Plumbing Branches and Long Runs
The physical layout of your plumbing also shapes how pressure feels after a filter install. Long runs of smaller pipe, numerous elbows, and multiple branch lines can all compound the pressure drop caused by a filter.
Common scenarios include:
- Second-floor bathrooms at the end of long pipe runs feeling weaker than fixtures near the main line.
- Outdoor spigots or garage sinks that are on separate or partially bypassed lines having different pressure behavior.
Mapping which fixtures are on the filtered line and which are not can give clues to where restrictions are most significant.
Maintenance Habits That Help Preserve Pressure
Consistent maintenance is one of the most effective ways to avoid pressure problems with whole house systems. Instead of waiting for noticeable flow loss, plan ahead using time and water use estimates.
Track Cartridge Life by Time and Usage
Cartridge life is often specified in terms of either time (for example, a certain number of months) or an approximate water volume. In reality, local water quality and household demand strongly influence how long a cartridge performs well.
Helpful habits include:
- Recording install dates on a label near the filter or in a household log.
- Noting any visible changes in taste, odor, or flow over time.
- Replacing cartridges on a schedule that fits your own water quality, even if it is earlier than general estimates.
Monitor for Gradual vs. Sudden Changes
Gradual declines in pressure typically suggest normal loading of the filter media. Sudden drops, however, may point to:
- A slug of sediment or rust from upstream plumbing.
- Construction or repair work on the supply line introducing debris.
- A mechanical issue such as a stuck valve or partially collapsed line.
Keeping simple notes about when pressure changes occur (such as after storms, street work, or maintenance) can help identify patterns.
NSF/ANSI Certifications and What They Mean for Flow
Whole house systems and cartridges may carry NSF/ANSI certifications that focus on performance claims such as chlorine taste and odor reduction, particulate reduction, or specific contaminant reduction. While these standards mainly address contaminant performance and structural integrity, they can indirectly relate to how a filter is designed and how it impacts flow.
Common standards in residential filtration include NSF/ANSI 42, 53, 401, and 58 (for systems such as reverse osmosis). For whole house filters used on the main line, 42 and 53 are often discussed. When reviewing certified products, look for documentation that describes both performance claims and typical flow behavior within a general pressure range.
Example values for illustration.
| Standard | General focus | What to check on documentation |
|---|---|---|
| NSF/ANSI 42 | Aesthetic effects (taste, odor, chlorine, particulate) | Claims about chlorine taste and odor reduction and any notes on flow range |
| NSF/ANSI 53 | Health-related contaminant reduction | Specific contaminants listed and conditions for which those claims apply |
| NSF/ANSI 401 | Emerging compounds and incidental contaminants | Which compounds were tested and under what operating parameters |
| NSF/ANSI 58 | Reverse osmosis systems | System components included, efficiency metrics, and operating pressure range |
| NSF/ANSI component listings | Materials and structural integrity | That housings and cartridges are suitable for their intended application |
| Performance data sheets | System-specific details | Recommended flow, pressure range, and replacement intervals |
When to Involve a Professional
While many checks are safe for homeowners, there are times when it is wise to contact a licensed plumber or qualified water treatment specialist:
- Persistent low pressure that does not respond to cartridge changes, flushing, or valve checks.
- Evidence of leaks, corrosion, or damaged plumbing near the filter.
- Uncertainty about pipe sizing, flow requirements, or the suitability of the current filter configuration.
- Signs of issues with a well pump, pressure tank, or pressure-reducing valve.
A professional can measure pressures accurately, evaluate your home’s plumbing layout, and recommend solutions such as resizing lines, reconfiguring filters, or adjusting pressure controls. A careful approach helps maintain both water quality and comfortable water pressure throughout the home.
Frequently asked questions
Why did my water pressure drop immediately after installing a whole house filter?
A new whole house filter adds resistance to flow, so a modest pressure drop right after installation is common. Larger or widespread drops usually indicate installation issues such as partially closed valves, reversed flow orientation, undersized piping, or a very fine cartridge that is overly restrictive.
How can I test whether the filter or the supply is causing the low pressure?
If your system has a bypass, switch to bypass and compare pressure; if pressure returns to normal, the filter is likely the restriction. Alternatively, use simple hose bib gauges before and after the filter or test multiple fixtures—house-wide low pressure points to the filter or supply, while a single weak area points to local plumbing.
Can trapped air after installation cause low pressure, and how do I purge it safely?
Yes, trapped air can cause sputtering and uneven flow after a new install. Purge air by opening the cold faucet closest to the filter, slowly opening the filter inlet to fill housings, then open additional faucets until flow is steady, following any manufacturer flushing instructions.
What filter sizing or cartridge choices help prevent whole house low pressure?
Choose a system and cartridges rated for your household peak flow; larger housings, parallel units, or staged filtration with a coarser pre-filter upstream reduce resistance. Match the filter plumbing to the main line diameter and avoid using overly fine media on the main supply unless flow capacity is verified.
When should I call a plumber or water treatment professional for low pressure?
Contact a professional if low pressure persists after flushing, cartridge replacement, and valve checks, or if you detect leaks, damaged plumbing, or suspect PRV or well pump problems. A pro can take accurate pressure readings, evaluate pipe sizing and layout, and recommend hardware or reconfiguration to restore proper flow.
Recommended next:
- Whole House Filters vs Water Softeners: Different Jobs Explained
- Best Whole House Sediment Filters: Clear Up Cloudy Water
- Whole House Carbon Filters for Chlorine & Taste: What to Expect
- Whole House Filter Flow Rate: Sizing by GPM and Household Count
- Backwashing Filters Explained: Pros, Cons, and Maintenance
- Installing a Whole House Filter: Placement, Bypass, and Leak Prevention
- More in Whole House Filters →
- NSF/ANSI standards explained (42/53/401/58)
- Clear trade-offs: pitcher vs faucet vs under-sink vs RO
- Maintenance planning: cost per gallon and replacement cadence