When a reverse osmosis (RO) system sits unused for weeks, the water inside its lines, housings, and storage tank becomes stagnant. Stagnant water can develop unpleasant tastes and odors and may allow microbial growth on surfaces inside the system. Even if your tap water is treated by a municipal utility, lack of flow through the RO unit changes how the filters and tank behave.
Sanitizing after a long vacation is a preventive maintenance step. It helps:
- Flush out stale water from the tubing and storage tank
- Rinse away fine trapped particles in prefilters
- Disinfect wet surfaces inside housings and the tank
- Restore normal taste and odor of your drinking water
Most manufacturers recommend periodic sanitizing even in regular use. A long absence, such as several weeks or more, is a convenient trigger to perform a thorough cleaning along with any scheduled filter changes.
Why Your RO System Needs Sanitizing After a Long Break
When a reverse osmosis (RO) system sits unused for weeks, the water inside its lines, housings, and storage tank becomes stagnant. Stagnant water can develop unpleasant tastes and odors and may allow microbial growth on surfaces inside the system. Even if your tap water is treated by a municipal utility, lack of flow through the RO unit changes how the filters and tank behave.
Sanitizing after a long vacation is a preventive maintenance step. It helps:
- Flush out stale water from the tubing and storage tank
- Rinse away fine trapped particles in prefilters
- Disinfect wet surfaces inside housings and the tank
- Restore normal taste and odor of your drinking water
Most manufacturers recommend periodic sanitizing even in regular use. A long absence, such as several weeks or more, is a convenient trigger to perform a thorough cleaning along with any scheduled filter changes.
Safety Basics and What to Check Before You Start
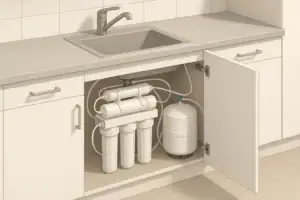
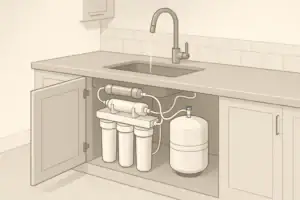
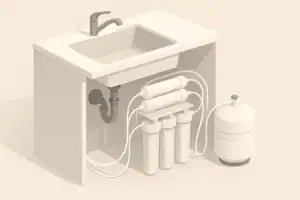
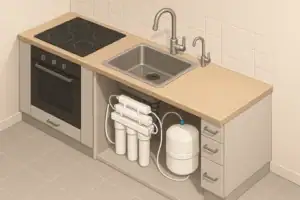
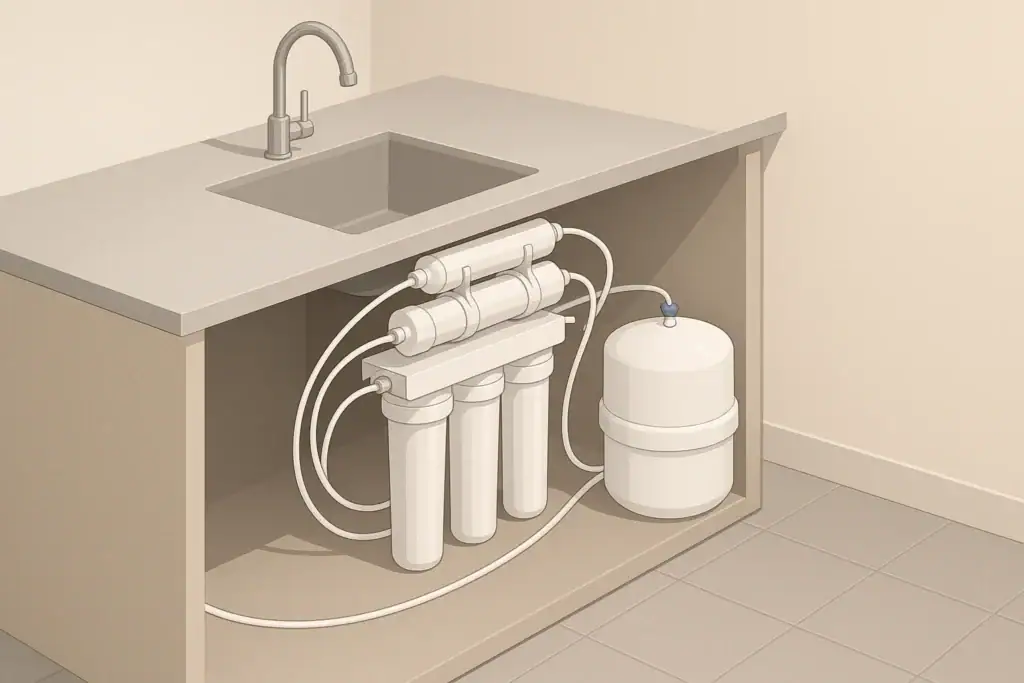
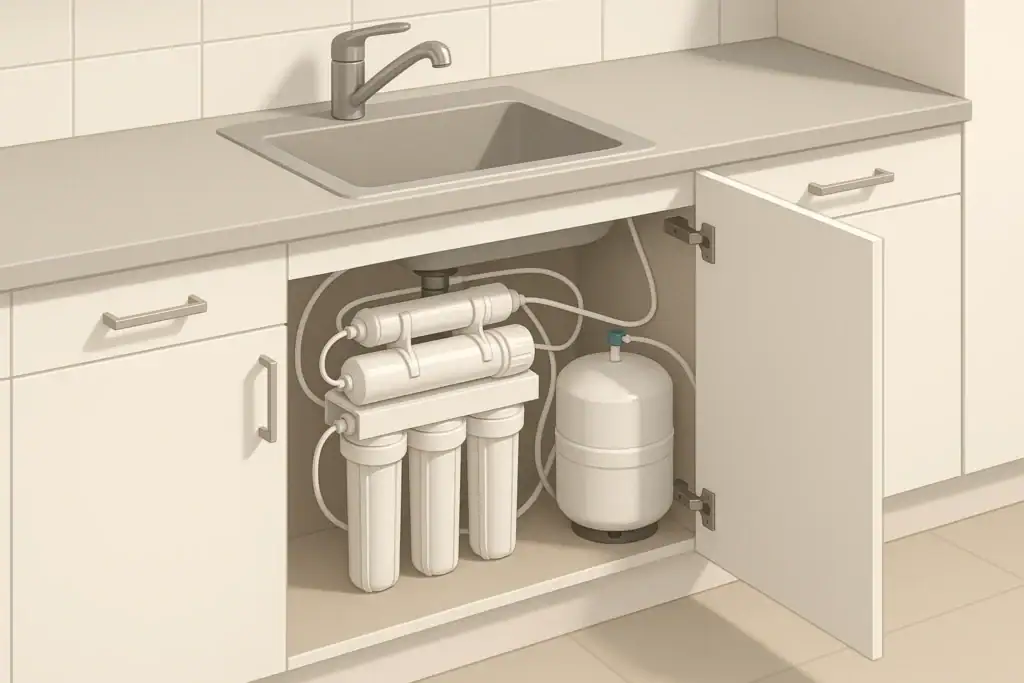
Before sanitizing your RO system, it helps to understand its basic components and how they interact. Typical under-sink RO units include:
- A cold-water feed connection and shutoff valve
- One or more prefilters (often sediment and carbon cartridges)
- The RO membrane module
- An optional postfilter or polishing filter
- A pressurized storage tank
- An RO faucet on the sink
- A drain line for reject water
After a long vacation, take a few basic safety and condition checks before you start disinfection.
1. Inspect for leaks and physical damage
Open the cabinet and visually inspect all components. Look for:
- Any pooling water or dampness under the system
- Cracked housings or fittings
- Loose, kinked, or discolored tubing
- Corrosion on metal valves or connections
If you see active leaks or obvious damage, address these issues or consult a qualified plumber or water treatment professional before running water or starting sanitation. Sanitizing will not fix mechanical failures.
2. Confirm water supply and drain arrangements
Make sure:
- The cold-water shutoff feeding the RO is accessible and functional
- You can close and open the tank valve (usually on top of the storage tank)
- The RO drain line is still properly connected to the sink drain assembly
Knowing how to control both the feed water and tank isolation valve is essential to safely move through the sanitizing steps.
3. Gather tools and sanitizing materials
For most home RO systems, you will need:
- Clean container or measuring cup
- Basic hand tools to open housings (often a plastic filter wrench)
- Disposable gloves and eye protection
- Approved sanitizing agent (commonly unscented household bleach or a manufacturer-recommended sanitizer)
Always follow your RO unit’s manual for sanitizing agent type and amount. Do not use scented or thickened bleach, and avoid mixing different chemicals.
Example values for illustration.
| Situation | Time Away | Observed Condition | Recommended Action |
|---|---|---|---|
| Short trip | Up to 1 week | Water looks and smells normal | Flush RO faucet for several minutes; no full sanitizing needed |
| Moderate break | 1–3 weeks | Slightly flat taste but no strong odor | Drain and refill tank; consider mild sanitizing if maintenance is due |
| Long vacation | 3–8 weeks | Noticeable stale taste or odor | Perform full system sanitizing plus scheduled filter changes |
| Extended shutdown | Over 2 months | RO unused, uncertain filter age | Perform full sanitizing, replace prefilters and postfilter, evaluate membrane |
| Visible contamination | Any duration | Cloudy tank water, slimy tubing, or debris | Do not drink; fully sanitize, replace filters, consider professional inspection |
| Known plumbing work while away | Any duration | Lines were shut off or disturbed | Flush whole house lines, then sanitize RO system before use |
Step 1: Shut Down and Depressurize the RO System
Begin by making the system safe to work on. This prevents splashes and accidental leaks while you handle housings and tubing.
Close valves and relieve pressure
- Turn off the cold-water supply feeding the RO system.
- Close the shutoff valve on top of the RO storage tank.
- Open the RO faucet at the sink and leave it open. Any trapped pressure will drop, and the faucet will eventually stop dripping.
Once the flow has stopped, most of the internal pressure has been relieved and it is safer to remove housings and filters.
Disconnect or protect filters as needed
For sanitizing, many manufacturers recommend removing carbon filters and sometimes the RO membrane before you introduce a chlorine-based sanitizer. Chlorine can shorten the life of these components.
Refer to your manual for specific guidance, but common practice includes:
- Removing prefilter cartridges from their housings
- Removing the postfilter or polishing filter cartridge
- Leaving the empty housings reinstalled for sanitizing the plumbing path
Store any reusable filters you remove in a clean container or plastic bag while you sanitize. If those filters are already at or beyond their recommended service life, plan to replace them instead of reusing them.
Step 2: Prepare and Introduce the Sanitizing Solution
A mild chlorine solution is commonly used for RO system sanitizing. Always confirm the concentration and volume recommended by your manufacturer. The aim is to coat the internal wet surfaces without leaving strong residual chlorine in the drinking water once rinsed.
Mixing a mild sanitizing solution
Many home instructions suggest a small volume of unscented household bleach diluted in clean water. For example, a manual might recommend adding a few milliliters or a small spoonful of bleach to each housing or to the empty storage tank before refilling with water. Because instructions vary, treat any numeric examples you see as illustrative and follow the guidance supplied with your particular system.
General safety tips when handling bleach-based sanitizer:
- Work in a well-ventilated area.
- Wear gloves to protect your skin.
- Avoid contact with eyes and clothing.
- Never mix bleach with other chemicals.
Adding sanitizer to housings and tank
With cartridges removed and housings drained:
- Add the recommended small amount of sanitizer into the prefilter housings.
- If your procedure calls for sanitizing the storage tank interior, introduce sanitizer through the tank port as directed (some methods add sanitizer to the line feeding the tank).
- Reinstall the empty housings securely using the filter wrench. Ensure O-rings are clean, lubricated if specified, and properly seated.
Double-check that all fittings and caps are snug but do not overtighten plastic parts. Overtightening can crack housings over time.
Step 3: Circulate and Soak the RO System
Once the sanitizer has been introduced, you need to bring it into contact with the internal surfaces of the tubing, manifold, and tank, then allow time for contact.
Refill the system with sanitized water
- Close the RO faucet at the sink.
- Open the cold-water feed valve slowly to the RO system.
- Keep the tank valve closed at first to allow sanitizer to move through the prefilter housings and into the internal plumbing while minimizing dilution.
After a short period, follow your unit’s instructions to open the tank valve so the tank also fills with sanitized water. You may hear water flowing to the storage tank; this is normal.
Allow sufficient contact time
Let the system sit with the sanitizing solution for the time recommended in the manual, often in the range of tens of minutes. Longer is not always better: extended exposure to strong chlorine can be harsh on some plastics and rubber parts. Staying within the suggested time helps balance disinfection and component longevity.
Step 4: Flush and Reinstall Filters
Flushing after sanitizing is crucial. You want to remove chlorine and any loosened deposits before drinking the water. This step also prepares the system for new or reinstalled filters.
Initial flushing of sanitizer
- After the contact time, open the RO faucet and leave it open.
- Allow the tank to empty completely through the faucet. This may take several minutes.
- Once flow slows to a trickle, you have largely drained the tank and main lines.
Close the faucet, allow the tank to refill fully, and then open the faucet again to drain. Many manufacturers recommend multiple fill-and-drain cycles, so follow that guidance to ensure chlorinated water is thoroughly removed.
Reinstalling or replacing cartridges
With the sanitizer flushed:
- Turn off the feed water and close the tank valve again.
- Open housings and discard any remaining sanitizing water.
- Install new prefilter and postfilter cartridges if you are on schedule for replacement.
- If reusing relatively new cartridges, reinstall them carefully, observing flow direction arrows where present.
Most RO membranes are not exposed directly to strong chlorine solutions during sanitizing if manufacturer instructions are followed. If your system design exposed the membrane, verify in the manual whether any special rinsing or testing is required.
Final rinsing with filters installed
Once all cartridges are in place:
- Reopen the feed water valve and tank valve.
- Allow the tank to fill completely (this can take an hour or more depending on system capacity and water pressure).
- Open the RO faucet and discard the first full tank of water after filter replacement.
Some manufacturers recommend discarding the first two tanks of water after a thorough sanitizing and filter change. This helps clear fine carbon particles and ensures taste and odor are acceptable.
Step 5: Verify Performance and Taste
After sanitizing and flushing, a few simple checks can confirm that the system is working as expected and that the water quality is consistent with normal operation.
Check for leaks under the sink
With the system pressurized and the tank full, dry all visible fittings and housings with a towel. Then:
- Look and feel around each housing and fitting for moisture.
- Check the base of the storage tank and its connection point.
- Inspect the drain saddle and tubing for slow drips.
If any leaks are detected, turn off the feed water and tank valve before tightening fittings or re-seating O-rings.
Evaluate taste, odor, and appearance
Draw a glass of water after the final flushing cycle. Observe:
- Clarity: Water should appear clear, without cloudiness or visible particles.
- Odor: There should be little to no chlorine or musty smell.
- Taste: The water should taste neutral relative to your baseline experience with the RO system.
If strong chlorine odor or an off-taste persists, perform additional flushes and confirm that the correct amount of sanitizer was used. Do not continue drinking water that tastes or smells objectionable until the issue is resolved.
Optionally, check basic water metrics
Home users sometimes monitor simple parameters before and after sanitizing for practical reference, such as:
- Total dissolved solids (TDS), using a basic TDS meter
- Flow rate at the RO faucet, using a measuring cup and timer
These checks can help you notice significant performance changes that might indicate clogged prefilters, a depleted RO membrane, or pressure issues in your plumbing. For detailed interpretation of water metrics, consult your user manual or local water quality resources.
Sanitizing Frequency and Vacation Planning Tips
Sanitizing after a long vacation fits into a broader maintenance plan for your RO system. Aligning these tasks can reduce effort and keep your drinking water consistent in taste and odor.
Align sanitizing with filter and membrane schedules
Typical guidance for many home RO systems includes:
- Replacing sediment and carbon prefilters every several months to a year, depending on water quality and usage
- Replacing postfilters on a similar or slightly longer schedule
- Replacing RO membranes on a multi-year schedule, depending on feed water conditions and system design
When planning a long trip, it can be efficient to:
- Note upcoming filter replacement dates before you leave.
- Sanitize and replace filters when you return if the timing aligns.
- Keep a simple log in the cabinet documenting dates of sanitizing, filter changes, and any observed issues.
Simple steps before leaving for an extended trip
If you know you will be away for more than a few weeks, consider these preparations:
- Turn off the RO feed water valve and, if recommended by the manufacturer, close the tank valve.
- Draw down the RO tank so it is mostly empty before you leave.
- Confirm there are no slow leaks or drips under the sink.
Reducing the amount of stagnant water sitting in the system can simplify sanitizing when you get back, because less old water remains in contact with the internal surfaces.
Example values for illustration.
| Item to Track | Typical Cue to Act | Planning Method |
|---|---|---|
| Sediment prefilter | Several months of use or noticeable drop in flow | Write replacement month on housing with removable marker |
| Carbon prefilter | Manufacturer’s time guideline or change in taste/odor | Set calendar reminders based on household usage |
| RO membrane | Multiple years of service or rising TDS readings | Log installation date and recheck annually |
| Postfilter (polishing) | Manufacturer’s interval or flat taste | Replace when prefilters are changed if intervals match |
| System sanitizing | After long trips, filter changes, or annually | Combine with major filter replacements and vacations |
| Leak checks | After any maintenance or plumbing work | Quick visual inspection and paper towel test under fittings |
| Water taste and odor | Any noticeable change from normal | Note observations and compare to maintenance log |
How RO Sanitizing Relates to Standards and Certifications
RO systems are often tested against recognized performance standards for home water treatment. Sanitizing does not change a unit’s certification status, but proper maintenance helps the system continue operating in a way that reflects how it was tested.
- Some standards address reduction of specific contaminants such as chlorine, taste and odor, or certain metals and organics.
- RO-focused standards may consider performance of the membrane and overall system in reducing dissolved solids.
- Manufacturer instructions for sanitizing and maintenance are typically written to support the system’s tested performance over its expected service life.
By following your manual’s sanitizing procedure after a long vacation, you help your RO system continue to provide consistent water quality, predictable taste and odor, and reliable operation within its design parameters.
Frequently asked questions
How long should I wait after sanitizing before drinking water from the RO?
After completing the recommended fill-and-drain cycles and discarding the first tank (or two, if suggested), most residual sanitizer should be removed and the water will be safe to drink. Confirm there is no noticeable chlorine odor or off-taste before regular use. If an odor persists, continue flushing until it disappears.
Can I use unscented household bleach to sanitize my RO system after a vacation?
Yes, unscented household bleach diluted according to your system manual is a common sanitizer for home RO systems, provided you follow the recommended amounts. Do not use scented or thickened bleach and avoid mixing chemicals. Take care to minimize membrane exposure to strong chlorine and follow the manufacturer’s instructions.
Should I remove the membrane and carbon filters when sanitizing after a long break?
Many manufacturers advise removing carbon filters and sometimes the membrane to prevent chlorine damage to those components; follow your unit’s manual for specific guidance. If you remove cartridges, store them cleanly or replace them if they are near end of life. Some systems are designed so the membrane is not exposed during the standard sanitizing process.
How often should I sanitize an RO system if I travel frequently?
Sanitizing after trips longer than about three weeks is a practical rule of thumb, and annual sanitizing is commonly recommended even with regular use. Align sanitizing with scheduled prefilter and postfilter replacements to reduce effort. If you notice any off tastes or odors after shorter trips, perform a sanitizing or thorough flush.
What should I do if the water still tastes or smells off after following the sanitizing steps?
Perform additional fill-and-drain cycles until the chlorine smell is gone and discard the first one or two tanks after sanitizing and filter changes. If the problem continues, check for old or clogged prefilters, leaks, or a failing membrane and replace components as needed or consult a water treatment professional. Measuring TDS can help determine whether membrane performance has changed.
Recommended next:
- Reverse Osmosis 101: What RO Removes (and What It Doesn’t)
- NSF/ANSI 58 Explained: What It Means for RO Systems
- RO vs Carbon Under-Sink: Taste, TDS, and Maintenance Compared
- RO System Installation Guide: Space-Saving Layout Under the Sink
- RO Waste Water Ratio: What’s Normal and How to Reduce It
- RO Filter Replacement Schedule: Prefilters vs Membrane
- More in Reverse Osmosis (RO) →
- NSF/ANSI standards explained (42/53/401/58)
- Clear trade-offs: pitcher vs faucet vs under-sink vs RO
- Maintenance planning: cost per gallon and replacement cadence