Why Whole House Filter Installation Details Matter
Whole house water filters treat all the water entering your home, so placement, plumbing layout, and leak prevention directly affect everyday use. A well-planned installation helps maintain adequate water pressure, keep cold and hot lines supplied, and reduce the risk of damage from unnoticed leaks.
Unlike point-of-use filters installed at a single faucet or appliance, a whole house system sits on the main supply line. That means every shower, faucet, and appliance is influenced by how and where you install the filter, the size of the piping, and how you allow water to bypass the filter for service or emergencies.
This guide focuses on practical decisions homeowners and installers face when installing a whole house filter: where to place it, when to include a bypass, and how to minimize leaks through good materials, layout, and ongoing checks.
Planning Filter Placement on the Main Water Line
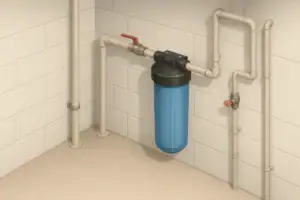
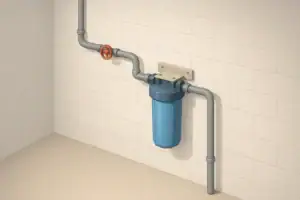
Before cutting into any pipe, map the path from the water source to your fixtures. Your goal is to place the filter where it protects the whole home while staying easy to access for cartridge changes and inspections.
Typical Locations: Municipal vs. Well Water
The best location depends on whether your water comes from a municipal supply or a private well and what other treatment equipment you already have.
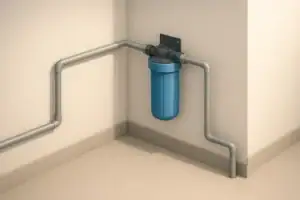
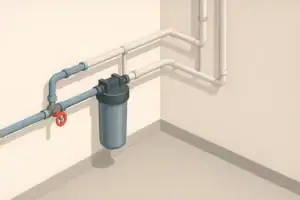
- Municipal water: The whole house filter is usually installed just after the main shutoff valve where water enters the home, and before the water line branches to the water heater and interior fixtures.
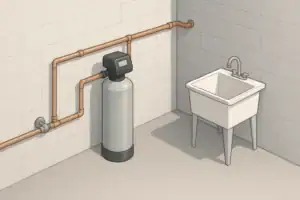
- Well water: The filter is commonly installed after the pressure tank and any essential pre-treatment (such as sediment settling equipment), but ahead of softeners or other devices if recommended by the system designer.
For both cases, you generally want the filter to protect both hot and cold lines, but sometimes you may deliberately exclude outdoor irrigation lines if full-house filtration would consume cartridges too quickly.
Key Placement Priorities
When comparing possible locations, consider these practical factors:
- Accessibility: Allow enough space below and around the housing to unscrew the sump, pull out a wet cartridge, and catch spills with a bucket or pan.
- Lighting and visibility: A well-lit area helps with inspection and makes it easier to spot slow drips early.
- Temperature: Install in a non-freezing, sheltered location such as a basement, utility room, or insulated garage if local climate requires it.
- Structural support: Mount the bracket on a solid surface (studs, masonry, or a backing board) that can hold the filter when it is full of water.
- Drain or spill management: If possible, place the filter where accidental drips can be managed with a floor drain, drain pan, or easy cleanup.
Balance these needs with the routing of your main line. Sometimes a short extra run of pipe is worthwhile if it brings the filter into a safer, more accessible area.
Example values for illustration.
| Potential Location | When It Fits Well | Tradeoffs to Consider |
|---|---|---|
| Basement near main shutoff | Home has unfinished or utility basement with exposed piping | May require extra pipe runs if main line enters elsewhere |
| Utility or mechanical room | Central spot for water heater and other equipment | Space constraints around other appliances |
| Garage (insulated) | Mild climate and easy access for maintenance | Requires freeze protection in colder regions |
| Crawlspace | Limited indoor options and accessible crawl area | Poor access, dampness, and lighting challenges |
| Exterior wall cabinet | Warm climate and purpose-built enclosure | Added exposure to temperature swings and weather |
| Near pressure tank (well) | Well system with centralized pressure and controls | Need to coordinate with existing treatment order |
Designing and Using a Bypass for Service and Emergencies
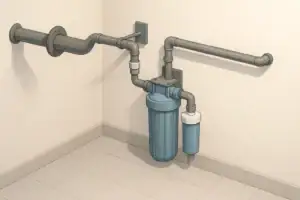
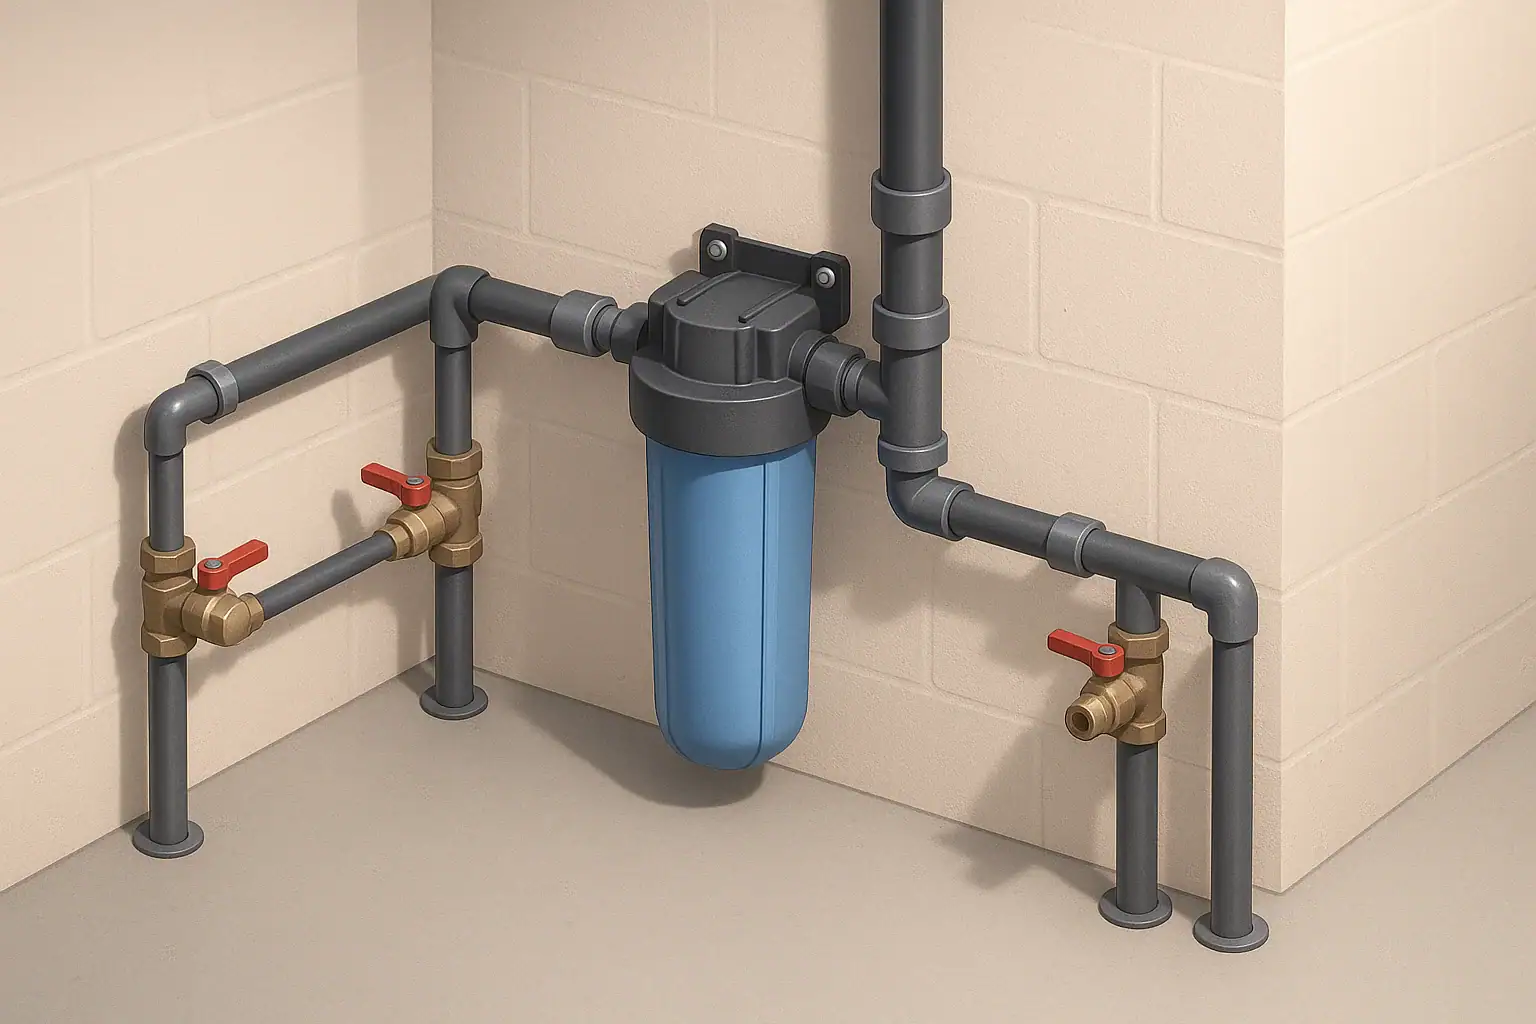
A bypass allows water to flow around the filter housing when you need to change cartridges, inspect the system, or isolate problems. A bypass can be built with three valves or integrated into a dedicated bypass block, depending on your plumbing layout.
Three-Valve Bypass Layout
The most common field-built bypass uses three shutoff valves:
- Inlet valve: Controls water entering the filter.
- Outlet valve: Controls water leaving the filter back to the main line.
- Bypass valve: Connects the upstream and downstream lines to let water skip the filter entirely.
In normal operation, the inlet and outlet valves are open, and the bypass valve is closed. To bypass the filter, you close the inlet and outlet valves and open the bypass valve. This setup lets you maintain water service during cartridge changes or troubleshooting, while still being able to fully isolate the housing.
When a Bypass is Especially Important
Adding a bypass is helpful in most installations, but some situations benefit from it more than others:
- Homes with only one bathroom or limited water access: A bypass allows household water use while the filter is offline.
- Areas with seasonal water quality changes: You can bypass temporarily if you need to adjust filtration strategy.
- Homes with multiple treatment stages: A bypass around a single filter lets you work on that stage without shutting down the whole system.
- Rental or shared properties: A bypass reduces disruption if maintenance must occur at inconvenient times.
Labeling valves or documenting their positions in a simple reference note near the system can help prevent accidental operation in the wrong mode.
Bypass Safety and Water Quality Considerations
Because a bypass can route untreated water into the home, it should be used thoughtfully:
- Limit bypass duration: Use bypass only for maintenance or testing and return to filtered mode when work is complete.
- Flush after maintenance: When you return to filtered operation, run water through several fixtures to clear trapped air and any loose particles.
- Track usage: If you bypass frequently, note the time and reason so you understand how often water is entering the home without passing through the filter.
Protecting Water Pressure and Flow Rate
Whole house filters sit in the main line, so they influence flow and pressure throughout the home. Poorly sized or installed systems can cause noticeable drops at showers and faucets, especially when several fixtures run at once.
Pipe Size and Filter Body Selection
As a general guide, the filter housing and fittings should match the diameter of the main supply line whenever practical. Reducing from a larger main line to a small filter connection and then back up can create a bottleneck.
Other details that affect flow include:
- Cartridge size: Larger cartridges usually provide more surface area for flow, which can reduce pressure drop at a given flow rate.
- Number of stages: Multiple housings in series can increase restriction; consider overall system design if combining sediment, carbon, and other media.
- Expected household demand: Peak use (for example, several showers plus laundry) suggests the need for a filter sized for higher flow.
Manufacturers often provide example pressure drop versus flow curves. While these numbers are generalized, they can help you choose a housing style suitable for your expected usage.
Using Pressure Gauges and Shutoff Valves
Adding simple pressure gauges before and after the filter can help track performance over time. A growing difference between inlet and outlet readings is a sign that cartridges are loading with sediment and approaching the time for replacement.
Ball valves on the inlet and outlet not only allow isolation for maintenance but also support basic checks: for example, you can see how pressure behaves with the filter online versus bypassed when investigating reduced flow.
Leak Prevention During and After Installation
Every joint, valve, and threaded port in a whole house filter installation is a potential leak point. Good techniques reduce risk at the start and make it easier to detect small issues before they cause damage.
Choosing Materials and Fittings
Common materials for whole house filter plumbing include copper, PEX, and other code-approved piping. The key is to use fittings that are compatible with both the pipe and the filter ports.
- Threaded connections: Use appropriate thread sealant or tape approved for potable water, applied evenly and not excessively.
- Compression or push-fit fittings: Follow depth and cutting guidelines, ensuring pipe ends are square and free of burrs.
- Support and strain relief: Use pipe clamps or hangers close to the filter to avoid stress on the housing from the weight of pipes.
In regions with seismic activity or where pipes may experience movement, flexible sections or expansion loops can help reduce mechanical strain on rigid joints.
Properly Seating O-Rings and Gaskets
The seal between the filter housing sump and head typically relies on a large O-ring:
- Clean the groove and O-ring surface before installation to remove grit.
- Lightly lubricate the O-ring with a lubricant approved by the housing manufacturer (commonly a compatible silicone-based option).
- Ensure the O-ring is not twisted and is fully seated in its channel.
- Tighten the housing according to instructions—usually hand-tight plus a small additional turn with the provided wrench, not excessive force.
A poorly seated or dry O-ring can lead to slow drips that may not appear until several hours after the system is pressurized.
Initial Pressure Testing and Inspection
After installation, expand your pressure test beyond just opening a single faucet:
- Pressurize slowly: Partially open the main shutoff or inlet valve to fill the housing gradually, while checking for immediate leaks.
- Bleed trapped air: Use any built-in vent or open several faucets to purge air from the line.
- Test at normal pressure: Once air is purged, bring the system up to standard household pressure and inspect all joints and valves.
- Check under load: Run multiple fixtures at once to simulate peak demand, then inspect again.
It is often helpful to place a dry paper towel or absorbent pad under connections during the first hours of operation; small leaks may show up as localized damp spots before they are visible elsewhere.
Routine Checks, Maintenance, and Leak Monitoring
Even a carefully installed whole house filter requires regular observation. Cartridges gradually accumulate sediment and other captured material, and seals age over time. A simple routine helps you maintain performance and reduce unexpected issues.
Setting a Maintenance Schedule
Cartridge life depends on water quality, household usage, and the type of media. Rather than relying on a single time estimate, combine several cues:
- Usage-based: Track approximate gallons used or time in service.
- Performance-based: Note changes in taste, odor, or visible sediment at fixtures.
- Flow-based: Watch for noticeable drops in flow or increasing pressure drop across the filter, if gauges are installed.
Writing the installation date and last cartridge change date on a nearby label or in a logbook can help you match observed performance with actual time in service.
Inspecting for Slow Leaks
Slow leaks can be easy to miss. A quick monthly check can catch them early:
- Look and feel around joints and valves for moisture.
- Check the floor or any drain pan for dampness or staining.
- Confirm that the sump is not weeping at the O-ring seam.
- Listen for faint hissing or dripping sounds when the room is quiet.
Some homeowners also install simple water leak alarms in basements or utility rooms. These devices can provide an audible alert if they detect water on the floor around the filter area.
Example values for illustration.
| Item to Track | Typical Cues | Planning Method |
|---|---|---|
| Cartridge replacement | Reduced flow, change in taste/odor, visual discoloration | Record change dates and set calendar reminders |
| O-ring inspection | Moisture at sump seam, need for re-lubrication | Check during every cartridge change |
| Valve operation check | Stiff or leaking valve stems, difficulty turning handles | Exercise valves briefly a few times per year |
| Pressure readings (if installed) | Increasing difference between inlet and outlet gauges | Log readings monthly to spot gradual changes |
| Leak scan around joints | Damp fittings, water on floor, corrosion beginning | Visual and tactile check each month |
| System labeling and notes | Unclear valve positions, misplaced manuals | Keep a simple diagram and notes near the system |
Considering Standards, Testing, and Documentation
While the physical installation focuses on placement and plumbing, it is also useful to understand how your chosen system has been tested. Many whole house filters refer to NSF/ANSI standards related to aesthetic effects (such as taste and odor), structural integrity, or specific contaminants.
For household planning, consider:
- Which standards are referenced on the system literature or packaging.
- Whether those standards relate to the contaminants you are concerned about.
- How often replacement cartridges should be changed to maintain the level of performance described in the documentation.
Keeping this information near the installation site, along with your own maintenance notes, makes it easier to adjust your schedule as your water use or local water conditions change.
Frequently asked questions
Where is the recommended location for installing a whole house filter in my home?
Install the filter on the main supply line where it will protect both hot and cold branches—typically just after the main shutoff for municipal systems or after the pressure tank for well systems. Choose a non-freezing, accessible spot with room to change cartridges, good lighting, and support for the filter bracket.
Do I need a bypass when installing a whole house filter and how does a three-valve bypass operate?
A bypass is recommended for most homes so you can maintain water service during cartridge changes or troubleshooting. A three-valve bypass uses inlet and outlet shutoffs plus a bypass valve; in normal use inlet and outlet are open and bypass is closed, while for bypass mode you close inlet and outlet and open the bypass valve.
How can I reduce the chance of leaks when installing and maintaining a whole house filter?
Use compatible, code-approved fittings, properly seat and lightly lubricate the O-ring, and support piping close to the housing to avoid stress on joints. After installation, pressurize slowly, bleed air, inspect all joints under normal and loaded demand, and place an absorbent pad during the first hours to spot small leaks.
Will installing a whole house filter cause noticeable pressure loss, and how should I size it?
Some pressure drop is normal, but matching the filter housing and fittings to your main pipe diameter and choosing appropriately sized cartridges minimizes restrictions. Check manufacturers’ pressure-drop versus flow information and size the system for your peak household demand to avoid noticeable reductions during simultaneous high-use events.
How often should cartridges be replaced and what signs indicate service is needed?
Replacement frequency depends on water quality and usage; monitor for indicators such as reduced flow, increasing inlet-to-outlet pressure differential, changes in taste or odor, or visible sediment. Keep a log with installation and change dates and combine time-based tracking with performance cues to determine the right schedule.
Recommended next:
- Whole House Filters vs Water Softeners: Different Jobs Explained
- Best Whole House Sediment Filters: Clear Up Cloudy Water
- Whole House Carbon Filters for Chlorine & Taste: What to Expect
- Whole House Filter Flow Rate: Sizing by GPM and Household Count
- Backwashing Filters Explained: Pros, Cons, and Maintenance
- More in Whole House Filters →
- NSF/ANSI standards explained (42/53/401/58)
- Clear trade-offs: pitcher vs faucet vs under-sink vs RO
- Maintenance planning: cost per gallon and replacement cadence