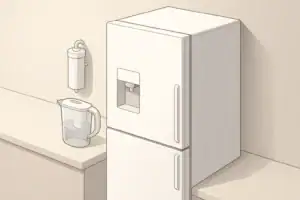
Low flow from a refrigerator dispenser is a common nuisance in US homes. You press the lever and instead of a steady stream, you get a slow trickle that takes a long time to fill a glass. In most cases, this points to a restriction somewhere along the water path, from the household supply line to the dispenser outlet.
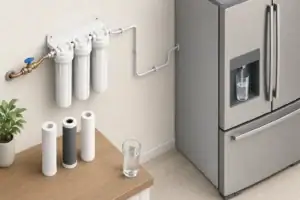
Refrigerator water and ice systems are relatively simple. Cold water typically passes through:
- The household cold-water supply line and shutoff valve
- A small-diameter supply tube feeding the refrigerator
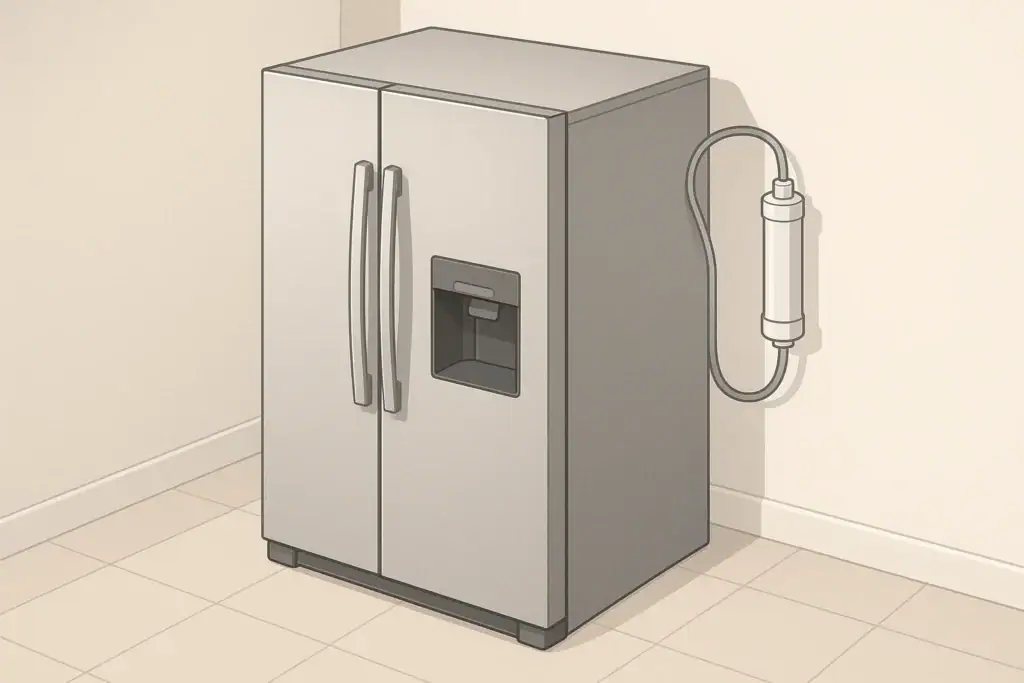
- An internal or inline filter cartridge
- One or more internal valves
- Optional water storage tank or coil inside the fridge
- The dispenser outlet and ice maker feed
Any partial blockage or pressure drop along this route can reduce flow. Common causes include a clogged filter, partially closed valve, kinked or frozen line, or low incoming water pressure. Understanding where and how these restrictions occur helps you fix low flow safely without damaging equipment.
Why Refrigerator Dispensers Develop Low Flow
First Checks: Simple Causes of Low Flow
Before assuming a major problem, it is worth checking a few quick items that often explain a weak dispenser stream. These steps do not require tools and help narrow down whether the issue is with the refrigerator or the household plumbing.
Confirm the Household Water Supply
Start by verifying that your overall household water supply is normal:
- Open a nearby cold-water faucet and check that the stream is steady.
- Compare flow from different fixtures (kitchen sink, bathroom sink, tub).
- Note any recent plumbing work, water main repairs, or pressure regulator changes.
If every fixture in the home has noticeably reduced flow, the problem is likely with the municipal supply, a private well system, or a main pressure regulator. If other fixtures look normal but the refrigerator is slow, the issue is more localized.
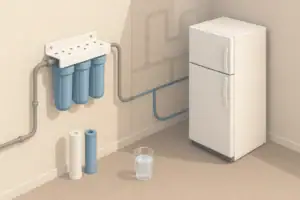
Check the Fridge Shutoff Valve and Supply Line
The refrigerator is usually fed by a small dedicated shutoff valve under the sink, in the basement, or behind the appliance. A partially closed valve can mimic low pressure.
- Locate the shutoff valve that controls water to the fridge.
- Make sure it is fully open (turn counterclockwise for common valves).
- Check the small-diameter tubing from the valve to the fridge for sharp bends or kinks.
Small plastic or copper lines are easy to pinch when the refrigerator is pushed back toward the wall. A kinked line reduces flow even if pressure is otherwise strong. Carefully pull the fridge forward and visually inspect the entire length of tubing you can see.
Test the Dispenser with and without the Filter
If your refrigerator allows water to bypass the filter (some designs do, some do not), comparing flow with and without the cartridge can quickly confirm whether the filter is the main restriction.
- Review the owner information for instructions on removing the filter safely.
- Some models will not dispense water when the filter is removed; others use a built-in bypass.
- If your model dispenses without a filter, briefly test flow with the filter removed.
If flow improves significantly without the filter, the cartridge is likely clogged or near the end of its life. If there is no change, the problem may lie elsewhere in the system.
Example values for illustration.
| Observation | Most likely area to check | Typical next step |
|---|---|---|
| Low flow at all fixtures | Household supply / pressure | Check main valve and pressure regulator |
| Sink is normal, fridge is slow | Fridge line and internal components | Inspect shutoff valve and tubing to fridge |
| Flow improves with filter removed | Filter cartridge | Replace filter and flush thoroughly |
| Weak stream and sputtering air | Air in line or recent installation | Dispense several gallons to clear air |
| Noisy operation, very slow fill | Partially closed valve or kinked line | Fully open valve and straighten tubing |
| Good water, poor ice production | Ice maker feed path | Inspect ice line and inlet valve area |
Filter-Related Causes of Low Flow
Refrigerator filters are designed to trap particles and reduce taste and odor issues from substances such as chlorine. Over time, captured material accumulates and creates resistance to water flow. This is one of the most frequent explanations for weak dispenser performance.
Clogged or Overdue Filter
Most refrigerator filters have a recommended service life measured in months or gallons, whichever comes first. The exact numbers differ by design and water quality, but typical guidance is in the range of several months of regular household use.
Signs that the filter is restricting flow include:
- Gradual decrease in dispenser speed over weeks or months
- Improved flow shortly after installing a new filter, then slow decline
- Filter indicator light or time-based reminder showing the cartridge is due
If you are in a region with higher sediment, rust, or turbidity, the filter can clog sooner than the maximum suggested interval. Sediment pre-filters elsewhere in the home can help, but many refrigerators rely entirely on the onboard cartridge.
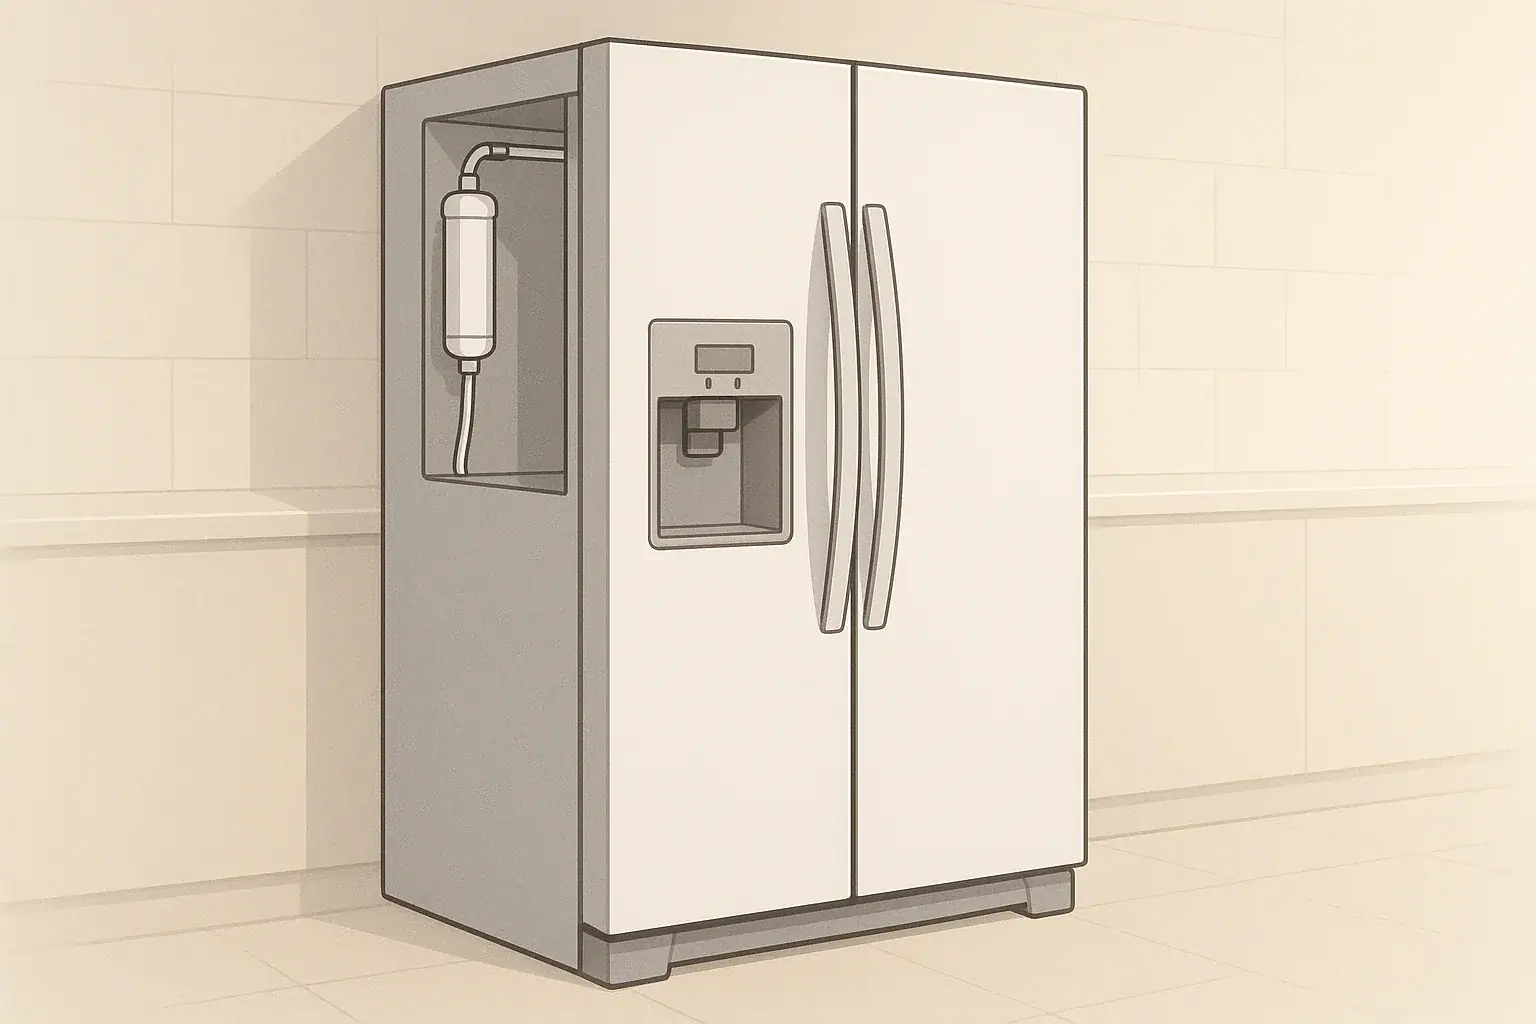
Incorrect or Incompletely Seated Cartridge
Another simple issue is a filter that is not fully clicked or twisted into place. Misalignment can restrict the water path or trigger internal bypass features.
- Turn off or close the fridge water supply valve before removing the filter.
- Remove the filter and inspect the O-rings for damage or deformation.
- Check the filter head for debris, scale, or plastic shavings.
- Reinstall the filter, following the alignment marks and ensuring it is firmly seated.
A partially inserted cartridge may still allow some water through, but with much higher resistance, resulting in a slow or uneven stream.
Importance of Flushing After Filter Changes
New cartridges often contain loose carbon fines or trapped air that can temporarily affect flow. It is common to see spurts of cloudy or grayish water initially. Most manufacturers recommend discarding several liters or more after installation.
- Dispense water in short bursts to avoid straining the pump or valves.
- Follow any printed instructions regarding the minimum flush volume.
- Expect flow to stabilize as air clears and internal media becomes saturated.
Skipping this flush step can leave trapped air pockets that cause sputtering or apparent low flow.
Water Pressure, Lines, and Internal Plumbing
Even with a clean, correctly installed filter, poor water pressure or restricted lines can produce a weak dispenser stream. Because refrigerator systems use small-diameter tubing, they are especially sensitive to pressure losses compared with a standard kitchen faucet.
Incoming Water Pressure Considerations
Typical municipal water pressure at the home entry is often in a moderate range suitable for most appliances. If the pressure is too low, both the dispenser and ice maker can struggle to operate efficiently.
- Pressure can drop due to aging infrastructure, seasonal demand, or a failing pressure regulator.
- Homes on private wells can see wide swings depending on pump settings and tank condition.
- Additional filters or softening equipment upstream may create extra pressure drop.
Measuring pressure at an accessible hose bib or laundry faucet with a simple gauge can confirm whether the supply is within a reasonable range. If pressures are consistently low across the home, addressing that issue normally improves refrigerator performance as well.
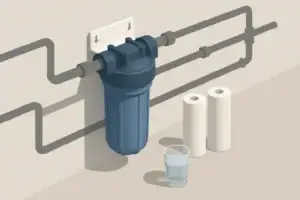
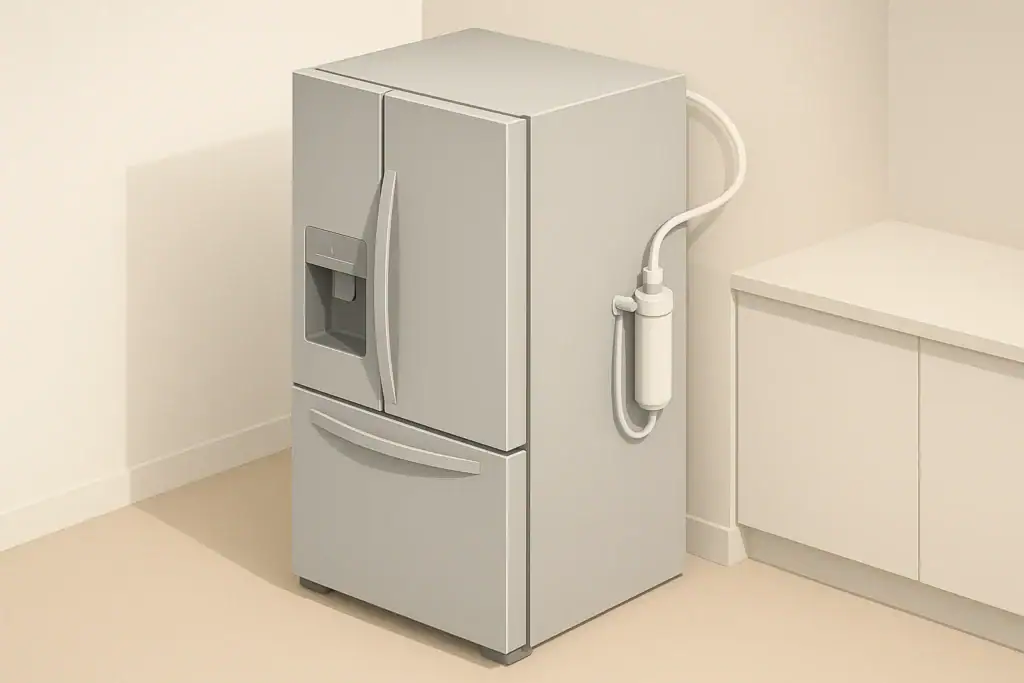
Kinked, Crushed, or Undersized Supply Tubing
Refrigerators often use narrow tubing to reach the back of the unit. If this line is undersized for the run length or is physically damaged, the dispenser may never reach a strong flow rate.
- Look for tight turns where the line exits the wall or cabinet.
- Check that the refrigerator is not pushed so far back that it pinches the tubing.
- Inspect along the run for screws, clamps, or furniture pressing into the line.
If damage is visible, replacing the entire length of line with properly sized tubing and gentle bends is usually more reliable than trying to patch a single kinked section.
Frozen or Partially Frozen Internal Lines
In cold climates or with very low refrigerator settings, water lines routed through the fresh food section can freeze. Partial ice formation narrows the passage and reduces flow long before the line is completely blocked.
- Check the refrigerator temperature setting against the recommended range.
- Look for unusually cold air blowing directly on interior water lines or tanks.
- Confirm that door seals are intact; air leaks can create cold spots.
Allowing the fridge to warm slightly toward the middle of the recommended range often resolves minor freezing. Avoid using external heat sources directly on the plastic components, as this can deform or damage them.
Safe Troubleshooting Steps You Can Do at Home
Several basic checks can be done safely by most homeowners, as long as the water supply is shut off when disconnecting any lines and manufacturer guidance is followed. If you are unsure about any step, it is safer to contact a qualified technician.
Step-by-Step Flow Check
Working in order from the wall to the dispenser can help isolate where the restriction starts.
- Verify the shutoff valve. Confirm it is fully open and not corroded or leaking.
- Inspect exposed tubing. Look behind and under cabinets for kinks or crush points.
- Check the filter. Replace if overdue or if flow improves when bypassed.
- Clear trapped air. Dispense water for several minutes in short bursts after any plumbing work.
- Observe ice production. If water flow is weak and ice cubes are unusually small or hollow, the restriction may be upstream of both the dispenser and ice maker.
When to Consider Internal Valve Issues
Inside the refrigerator, electrically controlled valves open and close to send water to the dispenser or ice maker. If a valve is partially stuck, clogged with debris, or failing electrically, it can reduce flow even when the external plumbing is fine.
Possible signs of valve-related problems include:
- Intermittent operation: normal flow sometimes, very weak at other times
- Audible clicking without much water movement when activating the dispenser
- Normal water to the dispenser but poor ice maker fill, or the reverse
Testing or replacing internal valves generally requires access to panels and components that should remain safely grounded and protected. If simple external checks have eliminated filters, lines, and pressure as causes, professional service is usually recommended.
Maintaining Good Flow Over the Long Term
Once low flow is corrected, routine maintenance can help prevent the problem from returning. Refrigerator dispensers are part of the broader water system in your home, and many of the same practices that protect other filters and fixtures also benefit the fridge.
Filter Replacement Schedules and Water Quality
Water quality influences how quickly refrigerator filters accumulate sediment and other material. Households with high sediment, rust, or hardness may need more frequent replacements than a simple calendar reminder suggests.
- Track approximate household water use to estimate gallons filtered.
- Note when flow begins to decline relative to your last filter change.
- Keep a simple log near the fridge listing installation dates and any observed issues.
Some refrigerators include indicators based mostly on time, not on actual water volume. Treat these as reminders rather than guarantees; if you notice taste, odor, or flow changes before the light activates, replacement may still be appropriate.
When choosing replacement filters, reviewing independent certifications and matching them to your water quality report can help you maintain both good flow and the level of reduction performance you expect from your refrigerator dispenser.
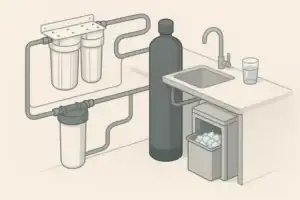
Coordinating with Whole-House or Under-Sink Filtration
If your home already uses whole-house or under-sink filtration, your refrigerator filter is part of a multi-stage system. This can be helpful if upstream filters remove most sediment before it reaches the fridge.
- Ensure upstream filters are replaced on schedule so they do not become a hidden restriction.
- Review the sequence of filters (sediment, carbon, softening, reverse osmosis) to understand where pressure drops may occur.
- If flow is marginal, consider whether multiple filters in series might be lowering pressure too much at the refrigerator connection.
Balancing taste, odor reduction, and flow performance often means coordinating maintenance across all filters in the home rather than adjusting the refrigerator filter alone.
Example values for illustration.
| Item to track | Typical cue or interval | Planning method |
|---|---|---|
| Refrigerator filter change | Every few months or if flow declines | Note date on calendar or appliance label |
| Household sediment filter | Visible discoloration or pressure drop | Inspect element and log readings if available |
| Visual line inspection | At seasonal cleaning or when moving fridge | Check for kinks, bends, or abrasion |
| Water pressure check | Annually or when multiple fixtures slow | Use simple pressure gauge at hose bib |
| Temperature settings | After major food load changes | Verify fridge is within recommended range |
| Ice quality observation | Ongoing, during normal use | Watch for small or hollow cubes |
Understanding Certifications and Performance Claims
Many refrigerator filters mention standards such as NSF/ANSI 42, 53, 401, or 58 in their literature. These standards relate to different performance areas, including aesthetic effects (such as chlorine taste and odor), specific contaminants, and treatment processes like reverse osmosis.
While the refrigerator itself may not contain a full reverse osmosis system, understanding the broader certification landscape helps you interpret filter claims and evaluate whether advertised performance aligns with your household’s priorities.
- NSF/ANSI 42 generally covers aesthetic improvements, like taste and odor.
- NSF/ANSI 53 focuses on reduction of certain substances considered for health-related reasons.
- NSF/ANSI 401 addresses a selection of emerging compounds not always present in every water supply.
- NSF/ANSI 58 is often associated with reverse osmosis systems rather than typical refrigerator filters.
When choosing replacement filters, reviewing independent certifications and matching them to your water quality report can help you maintain both good flow and the level of reduction performance you expect from your refrigerator dispenser.
Frequently asked questions
How can I tell if the refrigerator filter is the cause of low flow?
If your model allows bypassing the filter, briefly test flow with the cartridge removed to see if output improves; many refrigerators either stop dispensing or bypass the filter when it is removed. Also check for a filter indicator or a history of several months’ use—gradual decline in speed over time typically points to a clogged cartridge that should be replaced and flushed.
Could a shutoff valve or the supply tubing be the problem even if home faucets are fine?
Yes. A partially closed or corroded shutoff valve dedicated to the fridge, or a kinked, crushed, or undersized tubing run, can cause low flow to the dispenser while other fixtures remain normal. Visually inspect and fully open the valve and trace the tubing for tight bends or damage, especially where the fridge sits against the wall.
What water pressure is needed for a refrigerator dispenser to work properly?
Most refrigerator water systems operate well with typical residential pressures; a household gauge reading around 40–60 psi is common and generally sufficient. If pressure at the house is consistently low (for example under about 25–30 psi), you may notice weak dispenser flow and should investigate municipal supply issues, pressure regulators, or well equipment.
How should I safely thaw a partially frozen internal water line?
Increase the refrigerator temperature slightly toward the mid-recommended range and allow the unit to warm slowly, which often clears minor ice without damage. Avoid applying direct high heat (open flame or concentrated hot sources) to plastic lines; if thawing does not restore flow or you suspect a deeper freeze, contact a technician.
When is it time to call a professional instead of continuing DIY checks?
Call a technician if external checks (valve, tubing, filter, and household pressure) do not identify the issue, if you hear valve clicking without flow, or if internal components and electrical valves need testing or replacement. Professionals are also recommended when confident access to internal panels, safe grounding, or specialized replacement parts is required.
Recommended next:
- NSF/ANSI standards explained (42/53/401/58)
- Clear trade-offs: pitcher vs faucet vs under-sink vs RO
- Maintenance planning: cost per gallon and replacement cadence