
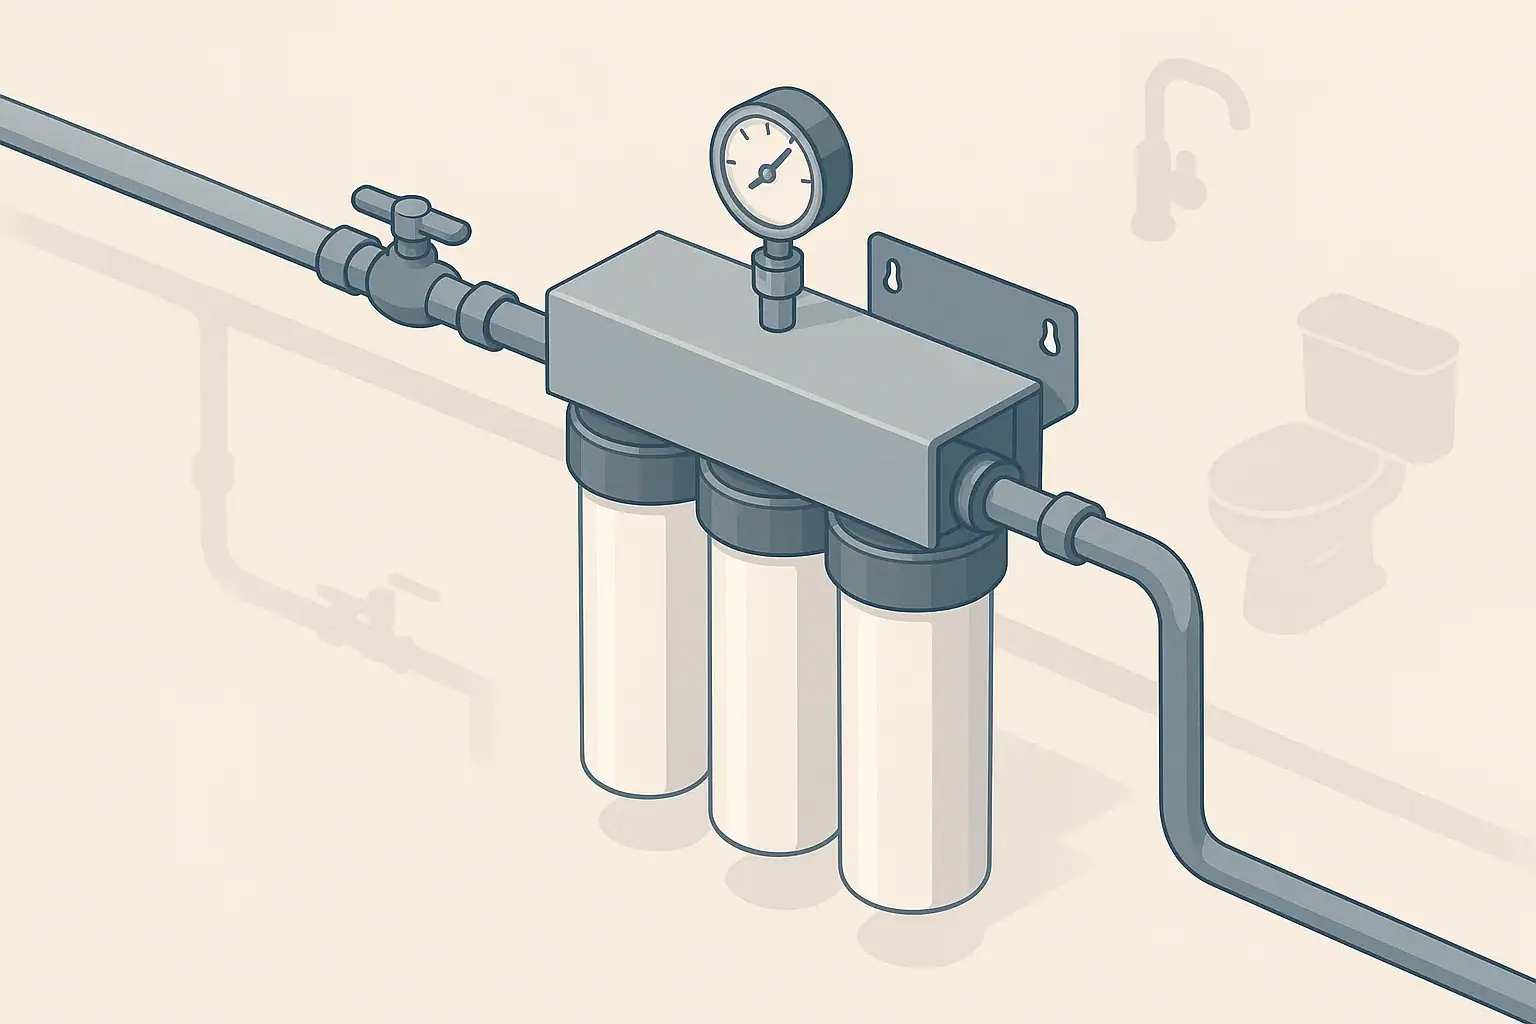
Why Whole House Filter Sizing Matters
A whole house water filter is installed on your main water line, so every shower, faucet, appliance, and hose connection flows through it. If the system is undersized, you can see noticeable pressure and flow loss whenever more than one fixture runs at the same time. If it is greatly oversized, you may pay more up front than necessary and may not use the full capacity of larger cartridges.
This worksheet-style guide walks through the key steps to match whole house filter size to your home’s flow rate needs. It focuses on practical estimates that homeowners can use without specialized tools, while still respecting common plumbing and performance limits.
The goal is not to design plumbing changes, but to help you understand what flow a filter should comfortably handle, and what to look for in product specifications such as flow rating and pressure drop.
Step 1: Estimate Peak Household Flow Rate
The first step in a whole house sizing worksheet is to estimate your peak simultaneous demand—the highest flow you are likely to need at one time. This is usually when multiple fixtures are running during busy times of day.
Use Typical Flow Rates per Fixture
If you do not have a flow meter, use our flow rate calculator or start with typical flow ranges. These are general examples only, assuming modern low-flow fixtures:
- Shower: around 1.5–2.5 gallons per minute (gpm)
- Bathroom faucet: around 0.5–1.5 gpm
- Kitchen faucet: around 1.5–2.5 gpm
- Standard clothes washer (filling): around 2–3 gpm
- Dishwasher (filling): around 1–2 gpm
- Outdoor hose bib: around 3–5 gpm, sometimes higher
Walk through a typical busy time in your home. For example, a morning when someone is showering while another person uses a bathroom sink, and a washing machine is filling. Add up the flows of those fixtures to get a rough peak estimate.
Example Peak Flow Calculation
This is an example only, using typical values:
- Shower: 2.0 gpm
- Bathroom faucet: 1.0 gpm
- Clothes washer: 2.5 gpm
Estimated peak simultaneous demand would be about 5.5 gpm. That means you want a whole house filter that can comfortably supply at least this flow rate without excessive pressure drop.
Consider Outdoor and Seasonal Use
Peak demand can increase when you use outdoor hose bibs or irrigation:
- If you often water the lawn while someone is showering, include an outdoor hose in your peak estimate.
- If irrigation lines are supplied before the filter, they do not count toward filtered peak flow.
- If they are supplied after the filter, the filter must handle that extra flow.
For many single-family homes, a practical planning range is roughly 6–12 gpm, but your actual number depends on the number of bathrooms, occupants, and how often fixtures run together.
Example values for illustration.
| Worksheet item | What to note | Example entry |
|---|---|---|
| Number of full bathrooms | Helps gauge typical shower demand | 2 bathrooms |
| Peak fixtures at once | Showers, faucets, appliances simultaneously | 1 shower + 1 sink + washer |
| Estimated peak flow (gpm) | Sum of typical fixture flow rates | About 6 gpm |
| Service line size | Main pipe diameter entering the home | 3/4 inch copper |
| Incoming pressure (psi) | Measured or stated by utility if available | 60 psi |
| Pressure-sensitive fixtures | Showers, multi-head fixtures, irrigation | Rain-style shower head |
| Water quality issues | Sediment, chlorine, hardness, etc. | Chlorine taste and fine sediment |
Use this list as a worksheet to collect the details you need before comparing whole house systems.
Step 2: Check Pipe Size and Pressure Limits
Your existing plumbing limits the maximum sensible flow through a whole house filter. Two important pieces of information are:
- Main service line size (for example, 3/4 inch or 1 inch).
- Typical incoming water pressure (for example, 40–80 psi).
Pipe Size and Practical Flow Range
Larger pipes can supply higher flow with lower friction loss, which means less pressure drop across a filter. General example ranges often used for planning:
- 1/2 inch service line: usually supports lower flows, often around 4–6 gpm for whole house use.
- 3/4 inch service line: commonly targeted around 7–12 gpm in many homes.
- 1 inch service line: can often support higher flows, depending on length and pressure.
These are examples only; actual performance depends on line length, number of fittings, and pressure. The point is to avoid selecting a filter with a flow rating much higher than what your pipes can realistically deliver, since you may not benefit from that extra rating.
Pressure Drop and Acceptable Loss
Whole house filters create some resistance to flow, usually listed as a pressure drop at a specific flow rate (for example, a certain psi drop at 10 gpm). When sizing a system:
- Check the pressure drop curve or specification table for the cartridge or housing.
- Compare it to your incoming pressure and your acceptable minimum at fixtures.
Many homeowners prefer to keep added pressure drop from a whole house filter to around 5–10 psi at their typical peak flow, when possible. This is a comfort-based guideline, not a fixed rule.
Do Not Bypass or Remove Safety Devices
If you have a pressure reducing valve, backflow preventer, or other safety device, do not remove or bypass it to gain flow. It is better to size the filter appropriately within the existing safe operating range, or consult a licensed professional for any needed plumbing changes.
Step 3: Match Filter Type to Flow and Water Quality
Once you know your estimated peak flow and your plumbing limits, you can consider filter types. Different media behave differently under higher flow rates and may have different recommended service flow ranges per housing size.
Common Whole House Filter Roles
Whole house filters are often used for one or more of these roles:
- Sediment control (sand, rust, silt appearance) to protect plumbing and downstream filters.
- Chlorine and taste/odor reduction using carbon-based media.
- Targeted contaminant reduction with specialty cartridges, where appropriate and certified.
Many homes use a sequence such as a sediment filter followed by a carbon filter. In higher-demand situations, larger cartridges or tanks are often used to maintain good flow with lower pressure drop.
Flow Considerations by Filter Role
- Sediment filters usually handle higher flows if they have sufficient surface area (for example, large-diameter cartridges). At higher flow, fine sediment filters may plug faster and require more frequent replacement.
- Carbon filters need adequate contact time between water and media. Very high flow through a relatively small cartridge can reduce performance for taste and odor reduction.
- Specialty media filters (for example, designed for specific contaminants) may have stricter flow limits listed by the manufacturer.
Aligning Media Size with Household Needs
For many single-family homes, a practical approach is to choose a whole house system whose stated service flow rating is at or slightly above your estimated peak demand, while keeping pressure drop within a comfortable range. This usually involves:
- Larger cartridge diameters for higher-flow households.
- Multiple stages (for example, sediment then carbon) sized so that no single stage is a major bottleneck.
- Considering tank-style carbon systems where very high flows or larger homes are involved.
Step 4: Work Through a Simple Sizing Worksheet
You can organize your sizing decisions step by step, similar to filling out a worksheet. The process below keeps numbers general and emphasizes matching filter specifications to what your plumbing and household habits require.
1. Record Household Demand Info
Gather these details:
- Number of occupants.
- Number of full and half bathrooms.
- Typical busy times (morning, evening).
- Frequent simultaneous uses (for example, shower + washer).
From this, estimate your peak flow demand as described earlier. For many homes this might land in the 6–10 gpm range, but your example may differ.
2. Note Plumbing and Pressure Information
Without altering any plumbing, simply record what you see and what you know:
- Main line size where you plan to install the filter (for example, 3/4 inch or 1 inch).
- Location of shutoff valves, meters, and pressure regulators.
- Any known pressure measurements, if you have a gauge.
If you are unsure about any of these, a photo and a quick consultation with a licensed plumber can help clarify what you have.
3. Translate Demand into a Target Filter Flow Rating
Once you have a peak flow estimate and knowledge of your line size:
- Choose a target filter service flow equal to or slightly above your estimated peak demand.
- Check that this target is reasonable for your service line size (for example, not dramatically higher than what a 3/4 inch line typically supports).
For example, if your estimated peak demand is around 7 gpm, you might target a filter system rated at roughly 8–10 gpm, with an acceptable pressure drop at that flow.
4. Consider Sediment vs Carbon vs Specialty Stages
On city water, many homeowners prioritize:
- A sediment stage to catch rust and fine particles.
- A carbon stage for chlorine, taste, and odor reduction.
On well water, sediment load can be higher, and additional treatment such as disinfection or hardness management may be involved. In those cases, multiple tank-style units or larger housings may be needed to support whole house flow.
5. Evaluate Cartridge Size and Replacement Interval
Larger cartridges generally allow higher service flows with lower pressure drop, and they often last longer between replacements (in gallons). When comparing options, use a filter capacity calculator to compare estimated capacity against your daily use:
- Check the suggested maximum flow for each cartridge size.
- Look for an estimated capacity in gallons and consider your daily use.
- Think about how often you are willing to replace cartridges (for example, every 3, 6, or 12 months, depending on usage and water quality).
A filter that technically meets your peak flow but needs very frequent replacement may not be practical for your household.
Step 5: Account for Special Situations
Certain situations place additional demands on whole house filters. Adjust your worksheet entries to reflect these factors rather than assuming standard residential use.
High-Use Homes and Larger Families
More occupants usually mean:
- More showers and laundry cycles.
- Greater chance of simultaneous fixture use.
- Higher total daily water volume.
In these homes, it can be helpful to:
- Use the higher end of typical flow estimates per fixture.
- Choose cartridges or tanks with higher capacity ratings.
- Plan for more frequent filter checks and possible earlier replacement.
Homes with Multiple High-Flow Fixtures
Some fixtures use more water or rely heavily on pressure, such as:
- Multi-head showers.
- Large soaking tubs.
- High-flow outdoor hoses or small irrigation zones supplied after the filter.
When these are present, update the peak demand section of your worksheet to reflect them, and look for whole house filters designed for higher service flows and larger pipe connections.
City Water vs Well Water Considerations
Your source water can influence how you size and stage filters:
- City water often has consistent pressure and disinfectant such as chlorine or chloramine. Sediment and taste/odor concerns are common, but flow is usually limited more by your plumbing than by supply.
- Well water may rely on a private pump and pressure tank, with pressure cycling between cut-in and cut-out settings. Sediment, hardness, and other issues can be more variable, which may call for more robust whole house treatment with carefully selected flow ranges.
In either case, do not adjust or bypass safety controls such as pressure switches or relief valves. Instead, size your filtration within the normal operating window of your system, or consult qualified professionals when changes are needed.
Step 6: Example Flow and Filter Planning Scenarios
It can help to see how numbers play out in simple, hypothetical examples. The scenarios below are for illustration only and are not design standards.
Scenario A: Small Home, Modest Demand
Imagine a smaller home with:
- 1 full bathroom, 1 half bath.
- 2 occupants.
- 3/4 inch main line, 55–65 psi incoming pressure (example).
Likely peak demand could be one shower plus a bathroom faucet and possibly the washing machine starting a fill. Using example values, that might total around 5–6 gpm. For this home, a whole house system comfortably supporting about 7–8 gpm with moderate pressure drop could be a reasonable planning target.
Scenario B: Larger Family Home
Consider a larger home with:
- 3 full bathrooms.
- 5 occupants.
- 3/4 inch or 1 inch main line, city water at moderate to high pressure.
Morning demands could include two showers, a bathroom sink, and a dishwasher or washer starting. Using example fixture rates, this might add up to 8–10 gpm. A filter system with a service flow rating in the 10–12 gpm range (with acceptable pressure drop) may be more appropriate here, often involving larger housings or tank-style carbon to maintain comfort.
Scenario C: Well Water with Sediment
For a well with visible sediment spikes, you might use a staged approach:
- First, a larger-surface-area sediment filter sized so that expected peak flow stays within the recommended range.
- Second, a carbon stage (if desired) also sized for the same or slightly higher flow.
The worksheet for this home would include not only peak flow estimates, but also observations about how quickly sediment filters load over time, helping refine replacement intervals and possibly cartridge micron rating. Use the replacement planner tool to translate those observations into a change schedule.
Example values for illustration.
| Home type example | Estimated peak flow (gpm) | Target filter rating (gpm) | Approx. cartridge check interval |
|---|---|---|---|
| Small home, 1 bath | 4–6 gpm | 7–8 gpm | Every 6–12 months |
| Medium home, 2 baths | 6–8 gpm | 8–10 gpm | Every 4–9 months |
| Larger home, 3+ baths | 8–12 gpm | 10–12+ gpm | Every 3–6 months |
| Well with higher sediment | 6–10 gpm | 8–12 gpm | Every 1–4 months |
| Home with frequent outdoor hose use | 8–14 gpm | 10–15 gpm | Every 3–6 months |
| Low-occupancy seasonal home | 3–5 gpm | 6–8 gpm | Check at start of each season |
Use a similar table for your own home by replacing the example values with your estimated peak flows and maintenance preferences.
Related guides: Flow Rate Calculator: Estimate GPM for Your Kitchen Faucet • Filter Capacity Calculator: Convert Daily Use into Months • Cost per Gallon Calculator: How to Compare Filters Fairly • Whole House Filter Flow Rate: Sizing by GPM and Household Count
Using Your Worksheet to Compare Whole House Options
Once you have filled in your worksheet—peak flow estimate, line size, pressure information, and desired filter roles—you can compare whole house systems more confidently. Focus on:
- Service flow rating: Does it meet or modestly exceed your estimated peak demand?
- Pressure drop data: Is the listed pressure loss at your target flow acceptable for your comfort?
- Cartridge or media size: Does it match your usage level and maintenance expectations?
- Staging: Are sediment and carbon (or other media) appropriately sized so no single stage becomes a severe bottleneck?
A simple, written worksheet can make these comparisons easier and help you avoid both undersized and unnecessarily oversized whole house filters, while keeping everyday flow and pressure in a comfortable range.
Frequently asked questions
How can I estimate peak household flow without a flow meter?
Use typical fixture flow ranges and add the fixtures likely to run at the same time (for example, showers 1.5–2.5 gpm, faucets 0.5–2 gpm, washers 2–3 gpm). Include outdoor hoses or irrigation only if they draw water through the filter.
What pressure drop is reasonable to expect from a whole house filter?
As a practical guideline many homeowners aim for about 5–10 psi of added pressure drop at peak flow. Check manufacturer pressure-drop data at your target flow and make sure the remaining pressure meets your fixture needs.
How should I size sediment and carbon stages so one stage isn’t a bottleneck?
Choose a sediment cartridge or housing with sufficient surface area for your peak flow to avoid rapid plugging, and select a carbon stage rated at or above that same flow so contact time remains effective. Balance stages so flow capacity is consistent across the system.
How often will cartridges need replacement?
Replacement frequency depends on water quality, household use, and cartridge capacity. Typical intervals range from monthly for heavy sediment situations to several months for lower-load city water; monitor pressure drop and visual indicators to set a schedule.
Recommended next:
- Cost per Gallon Calculator: How to Compare Filters Fairly
- Replacement Planner Tool: Estimate Your Next Filter Change Date
- Flow Rate Calculator: Estimate GPM for Your Kitchen Faucet
- Filter Selector Quiz: Find the Right Filter Type in 2 Minutes
- Cost per Gallon Walkthrough: Pitcher vs Under-Sink Example
- Filter Capacity Calculator: Convert Daily Use into Months
- More in Tools & Calculators →
- NSF/ANSI standards explained (42/53/401/58)
- Clear trade-offs: pitcher vs faucet vs under-sink vs RO
- Maintenance planning: cost per gallon and replacement cadence